Forum Discussion
15 years ago
estyle36 wrote:
Me too lol.
Stw402, could you please just explain me hot to recolor objects please ? I read most of your links but i still don't unerstand :( . I've looked for tutorials in Google but i didn't find one.
So, i just downloaded S3Pe. What do i have to do next if i wanna recolor a bridge from CAW ?
Ok I will try and help you do that:-
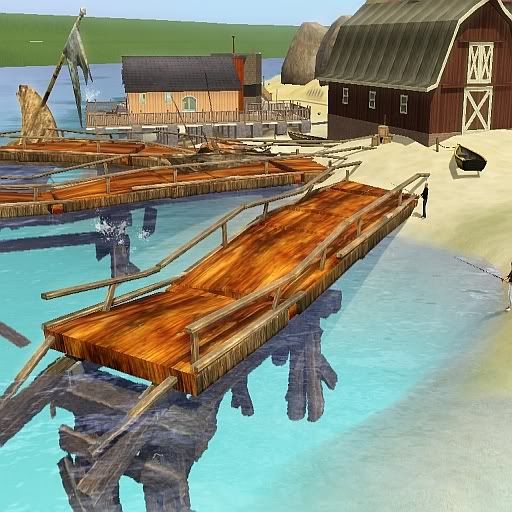
I've recently just recolored a bridge for my new world, so for this guide I will be using that bridge.
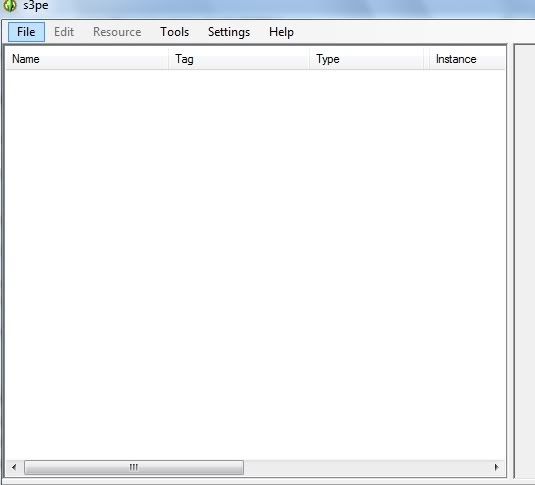
First load in S3Pe
You will see this picture:-
Click on open at the top of the page
Now navigate to this location:-
C:\Program Files (x86)\Electronic Arts\The Sims 3 Ambitions\GameData\Shared\Packages
Open the file called FullBuild_p04
For this guide we are going to extract the broken bridge from Ambitions, if you you wish to use another bridge, you can find more bridge in the other package files that are located in your sims 3 folders, namely
FullBuild2 & FullBuild1
Located here:-
C:\Program Files (x86)\Electronic Arts\The Sims 3\GameData\Shared\Packages
You can also find other bridges in the world adventure files.
Lets not make this any more complex, we will recolor the broken bridge from ambitions
After opening the folder you will be faced with this:-
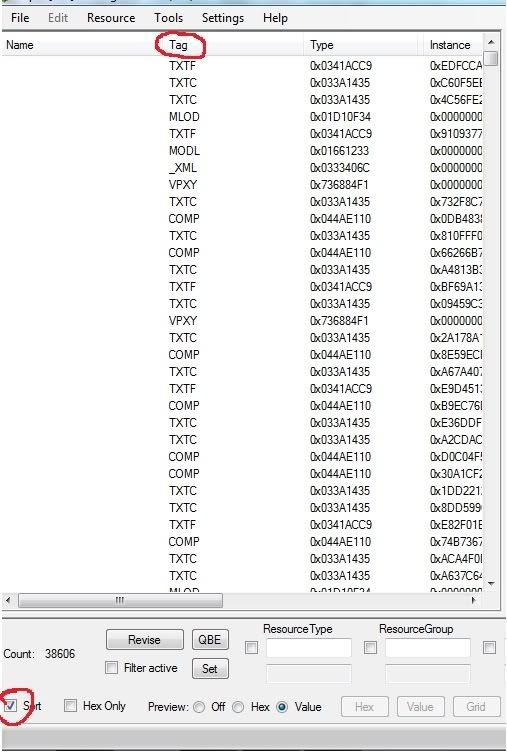
Click on the Tag menu and the sort menu.
Now you can scroll down until you see the IMG files in the Tag menu, you can see that I've highlighted the Bridge Train Broken Image file:-
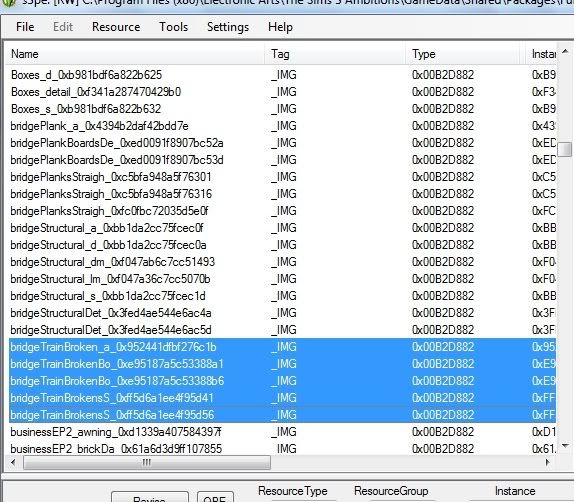
You can hold down control to select more than one image
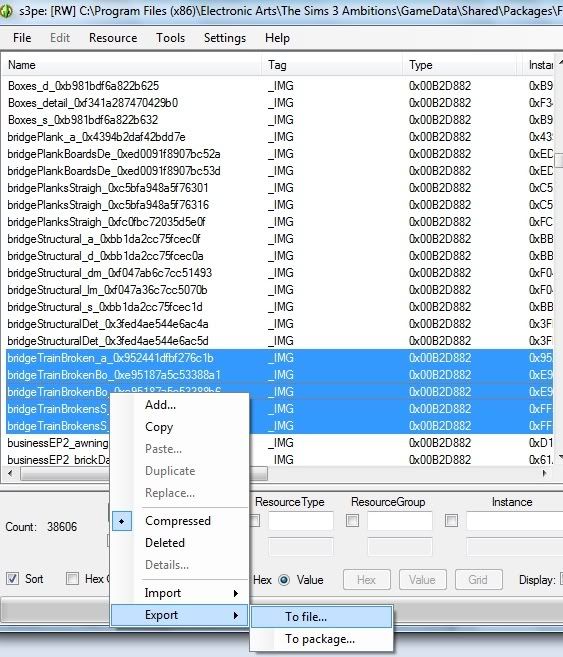
Next right click on the highlighted images, then export them to file, save them to your desktop, or make a folder called Broken Train Bridge.
For the next part I use GIMP with a DDS plugin
Both free to download, but if you already now how to edit DDS graphics with your current paint package, stick with what you now, if not download:-
GIMP
http://www.gimp.org/
DDS Plugin
http://code.google.com/p/gimp-dds/
The file that we are going to edit in this example is called:-
S3_00B2D882_18000000_FF5D6A1EE4F95D41_bridgeTrainBrokensS_0xff5d6a1ee4f95d41%%+_IMG
So when you have installed Gimp with the plugin, open this file in gimp, you should see this:-
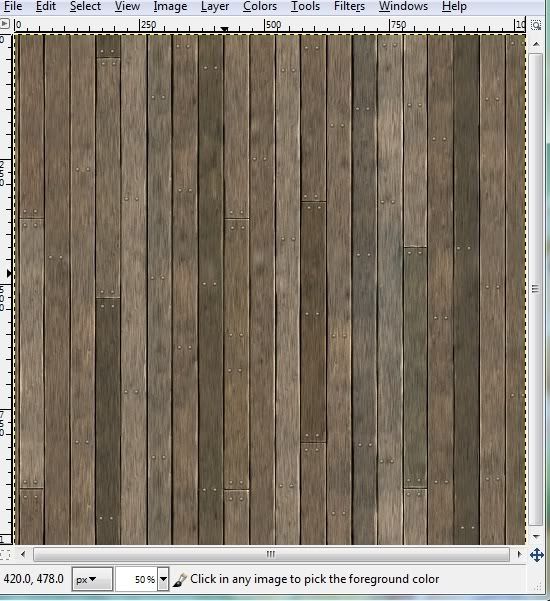
Now you can edit the file, I would not change the size of the picture, but anything else should be ok
When your happy with the result, you should click File, then Save as and the save again, this time you will be faced with this menu:-
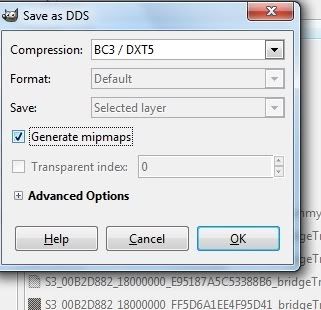
Set the compression to BC3/DXT5
Generate Mipmaps tick this and save.
Something of note, I've found if you Generate Mipmaps then you will increase the size of the file by a large amount, but the quality will be greater when you view the object from afar, but if size is a problem in the world you are designing, you might wish to see what the object looks like without Mipmaps generated.
Right now, we need to get the object into your world, I will show you two ways of doing this, one is for testing your object and the other way is for uploading your world.
TESTING YOUR OBJECT
First install your world into the game, when your world is installed, navigate to my documents and look for a folder called InstalledWorlds, open your world using S3PE and click Resource at the top of the screen then Import and then from file, like so-
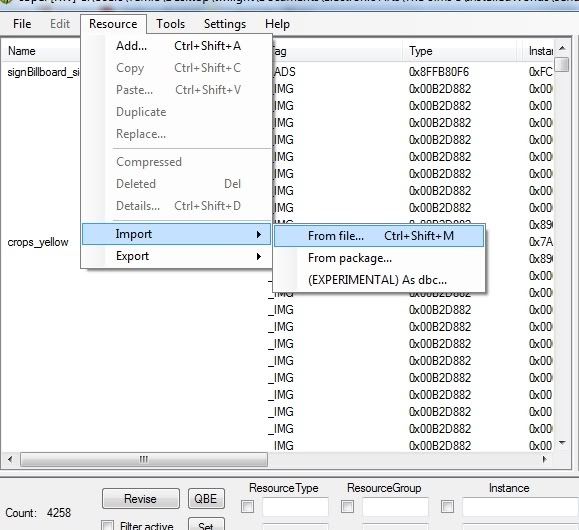
Navigate to your bridge file and import this file, remember to save the world file before you exit S3pe, next you need to load the game and test the result.
UPLOADING WITH EDITED IMAGE OBJECT
More or less like above, in your last saved file found here:-
Documents\Electronic Arts\The Sims 3 Create A World Tool\UserToolData\Worlds
You need to Import this file, prior to extracting the file for export, I would test the world prior to uploading just to make sure everything is ok with the edited graphics.
If you have any problems finding the right image file, tell me what your trying to edit and I will try and narrow down the search for you, I can probable tell you where most files are, I've spent some time looking at all the image files.