Forum Discussion
FLSTRider
9 years agoSeasoned Novice
Part 5 - Back In CAW: The Finishing Touches
Before we begin I just want to say a couple of things here. First please excuse the terrain painting and décor of this project as it is only meant to be used in this tutorial and nothing more. I know that this is not the best work but was just done quickly for demonstration purposes. Also I have been away from CAW for a few months so I am a bit rusty, or just old not sure which (LOL) so I hope you all can forgive me.
We can now go back into CAW and look at our newly formed lakes. Remember from Part 1 that the water planes are rectangular and I do not know of any square lakes around so we still need to finish things up.
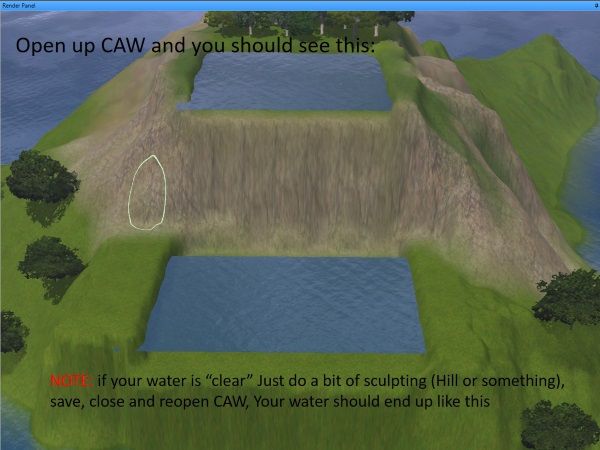
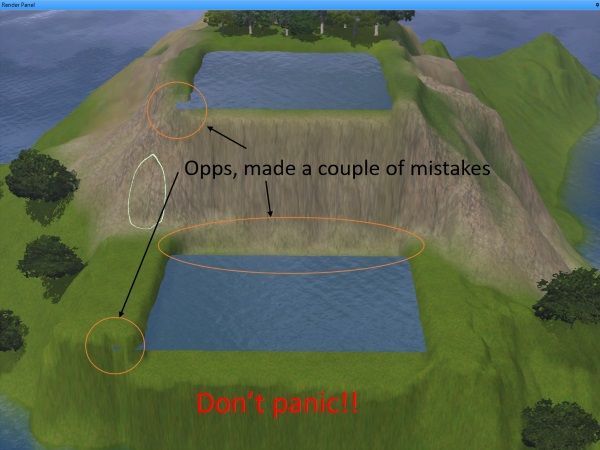
1. OK, so the two points were a bit off and there are a few mistakes in our water planes. No problem CAW gives us the tools to easily correct these miscalculations.
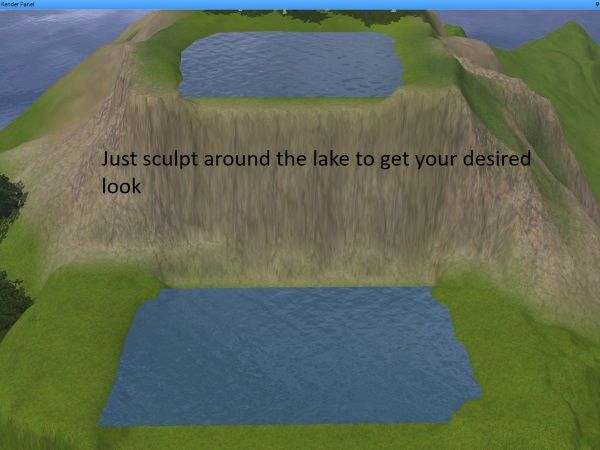
2. First we need to sculpt around the lake raising the terrain to cover up the ends where the water plane is sticking out from the hillside, then form the shape of our lake. One important note about water planes, the center of the plane MUST NOT be under land, if you wish to have an island in the middle of the lake you will need to create two water planes around your island.
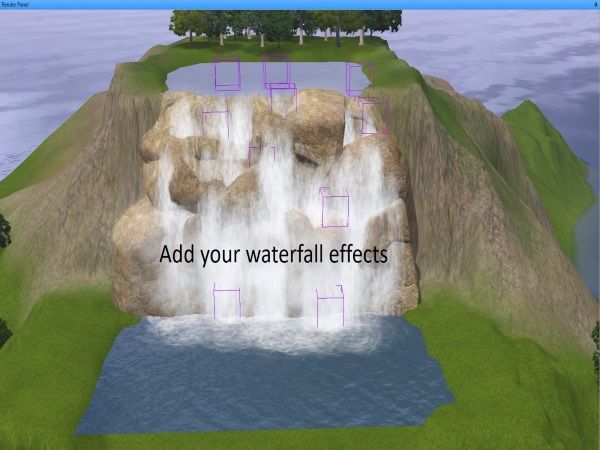
3. We just cannot leave that big open gap between the plane and the lake bottom open so we need to create our waterfall wall. Play with the different rocks, rotate them, slide them around to get a nice look (suggestion here is to try to keep the top of the rock low enough to cover the water plane but yet appear to give the water a place to flow)

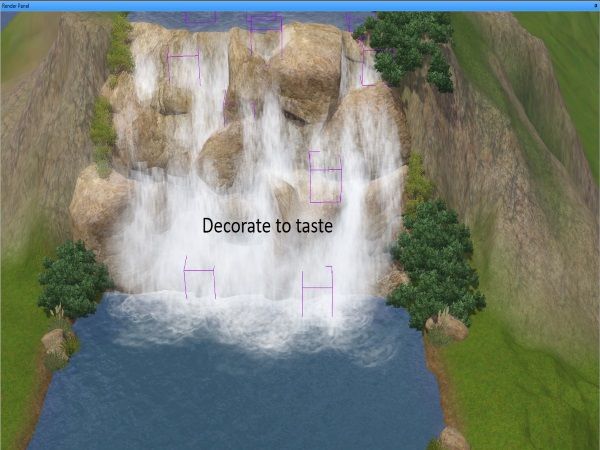
4. After our wall is complete we can then add the waterfall effects. Try to use the rock wall as a guide and imagine how would the water flow down the falls, this image should help you place your effects.
5. Finally you can decorate the area to match your world, and tada!! New lakes and waterfalls for your Sims to enjoy!!! Oh do not forget to complete the other water planes as well!!
I hope this tutorial has helped you understand the complexities of the water plane, and has given you enough information to work them into your worlds. If you have any non-technical questions I can definitely answer those, the technical ones, not too sure about those, but I will try my best!
And as always…….HAPPY SIMMING!!!!!
Before we begin I just want to say a couple of things here. First please excuse the terrain painting and décor of this project as it is only meant to be used in this tutorial and nothing more. I know that this is not the best work but was just done quickly for demonstration purposes. Also I have been away from CAW for a few months so I am a bit rusty, or just old not sure which (LOL) so I hope you all can forgive me.
We can now go back into CAW and look at our newly formed lakes. Remember from Part 1 that the water planes are rectangular and I do not know of any square lakes around so we still need to finish things up.
1. OK, so the two points were a bit off and there are a few mistakes in our water planes. No problem CAW gives us the tools to easily correct these miscalculations.
2. First we need to sculpt around the lake raising the terrain to cover up the ends where the water plane is sticking out from the hillside, then form the shape of our lake. One important note about water planes, the center of the plane MUST NOT be under land, if you wish to have an island in the middle of the lake you will need to create two water planes around your island.
3. We just cannot leave that big open gap between the plane and the lake bottom open so we need to create our waterfall wall. Play with the different rocks, rotate them, slide them around to get a nice look (suggestion here is to try to keep the top of the rock low enough to cover the water plane but yet appear to give the water a place to flow)
4. After our wall is complete we can then add the waterfall effects. Try to use the rock wall as a guide and imagine how would the water flow down the falls, this image should help you place your effects.
5. Finally you can decorate the area to match your world, and tada!! New lakes and waterfalls for your Sims to enjoy!!! Oh do not forget to complete the other water planes as well!!
I hope this tutorial has helped you understand the complexities of the water plane, and has given you enough information to work them into your worlds. If you have any non-technical questions I can definitely answer those, the technical ones, not too sure about those, but I will try my best!
And as always…….HAPPY SIMMING!!!!!
About The Sims 3 Creative Corner
Chat with the Sims 3 community about your stories and legacies and share your creations.528 PostsLatest Activity: 2 hours ago
Recent Discussions
 2 hours ago
 3 hours ago