Forum Discussion
13 years ago
Hello everyone! :D
If you havent had the time yet, please check out lesson 1 and the thread in general. There have been some great questions posed by fellow simmers that might be similar to questions you have. If you have a question that hasnt been covered yet, dont be shy! :-) Ask away! Even if I am not here, I will be popping in frequently and I WILL answer.
So...let's get started with lesson 2 and PORCHES.
To talk about porches we are going to look at a basic farmhouse with wraparound porches. A single porch is pretty easy, but many times it can get frustrating when you try to connect several of them together.
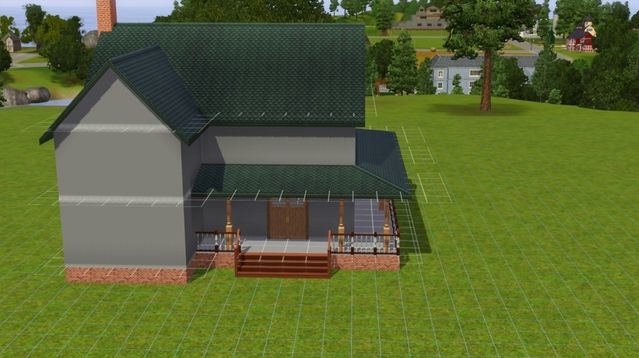
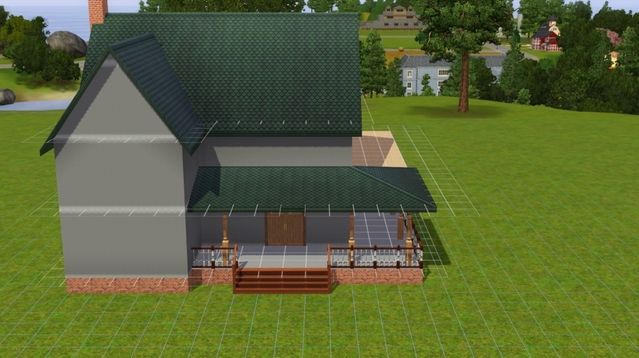
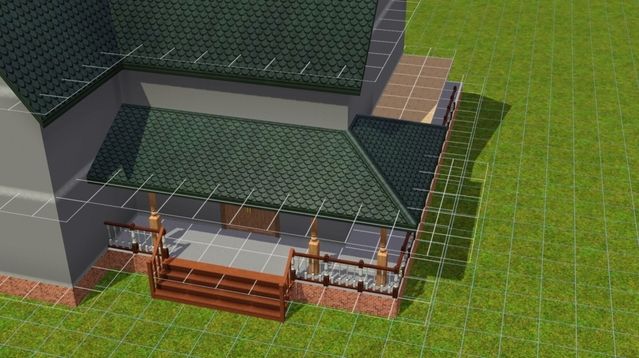
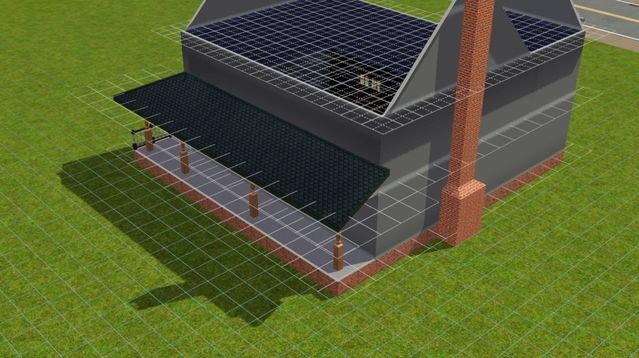
So lets say we want to make something like this:
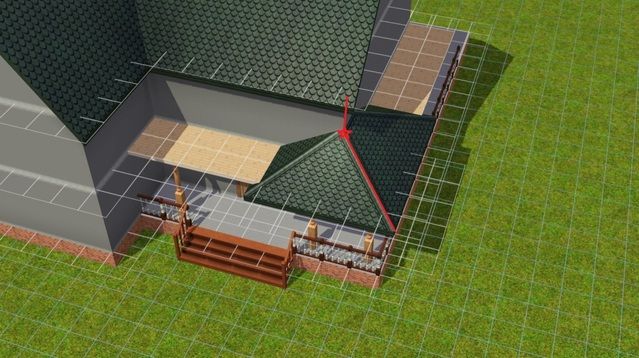
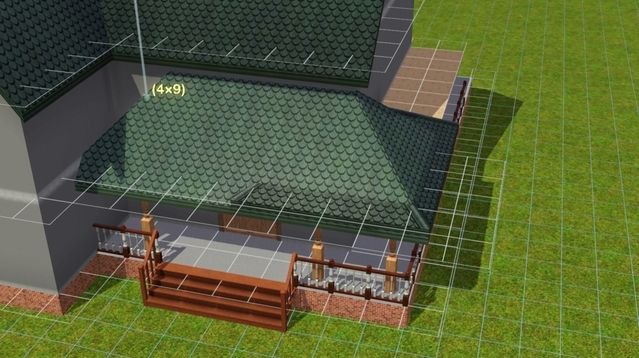
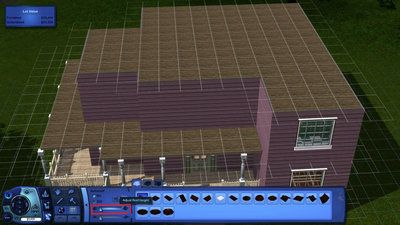
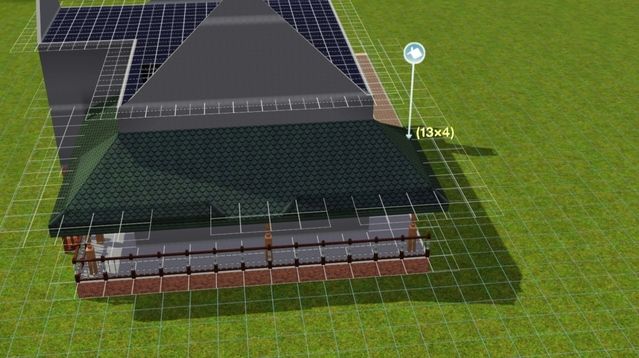
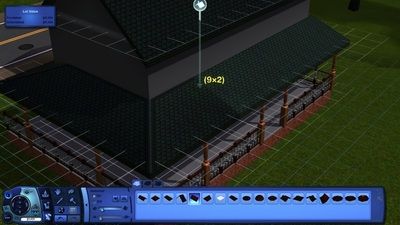
The first thing I am going to suggest is that you try to make covered porches only 2 squares wide. More than that, and the roof needed to cover it becomes too big and out of proportion to the rest of the house. Like so:
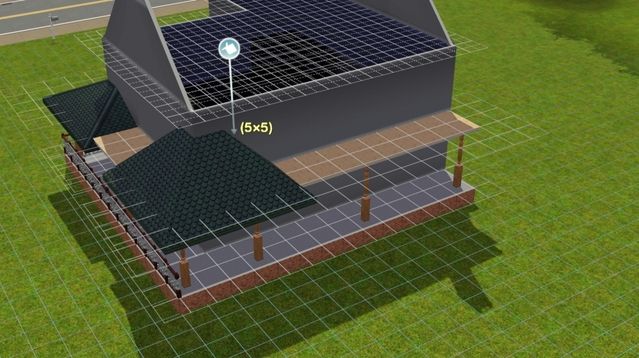
So, if at all possible, make your porches 2 squares wide. Next, place your decking. I really suggest you do this before doing any roofing at all to help you see what you are working with and where you need to place roofing. With wraparound porches, you want to start with a corner section first.
You want to use the hipped roof and draw it so that the seam of the roof matches up to the seam of the house edge:
Make sure you have not put in the windows or any interior furniture on the second fllor before starting this procedure. The roofing tool will not allow you to collide with anything and to do a good porch with smooth seams, we will be drawing though the walls quite a bit. If you are working and you find that the tool will not allow you to draw....look inside and see if you have a door or an object it might be colliding with.
So...we are going to draw just the corner for now like this:

Now we are going to work our way around and cover all of the decking using the hipped roof.
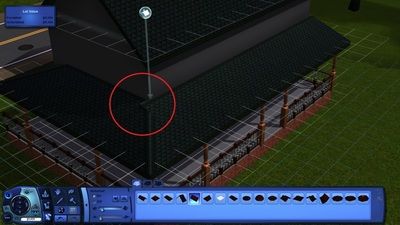
See how the left hand side has a gap? That is because we didnt draw the roof wide enough. We need to draw it far enough into the wall that we have a clean seam like this:

Then use the roof angle tool to make sure that the sections are the same.
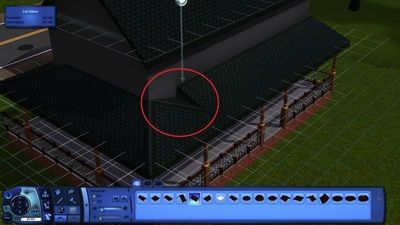
There! A nice clean roof seam that fits perfectly. Since we are going to be joining several sections together, it is a good idea to do the porch first and use the "all roof angles tool" that adjusts all the roofs at the same time. This will ensure that all of the sections fit together.
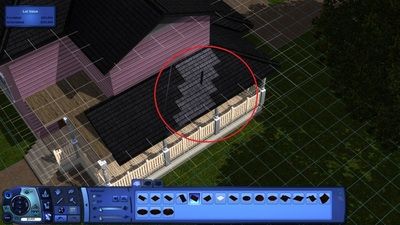
Sometimes when you are joining several roofs together, you might see some jagged breaks or tears in the roofs. If you use the all roof tool and adjust it up a little and then back down to where you want it to be, the movement will "join" those tears together.
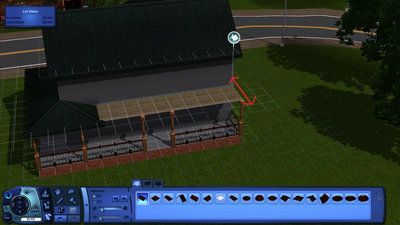
When you are going around corners with a roof, it is easier to do the corners first. So with a wraparound roof, after you do the first section, move to the next **corner** and do that next like so ( making sure that the seam of the roof matches up again to the edge of the wall):
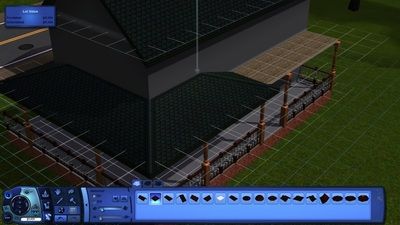
Then you can go back in and join the two sections together:
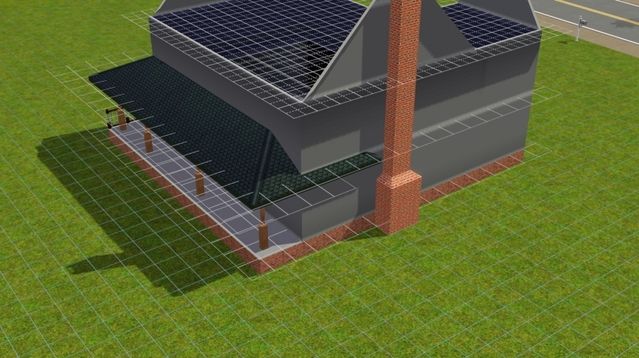
Keep working your way around the house in a similar manner. But wait! What do we have here?
We dont have a corner...we have a straight edge. Well....we must just draw out the roof and finish things up, right?
Ugh! That does not look very nice does it? I admit this is a personal peeve of mine, but I really try to avoid having roofing visibly cutting into walls like this. It just looks messy to me. The solution for this is to go with a different roof that has a clean edge....like that half hip roof:
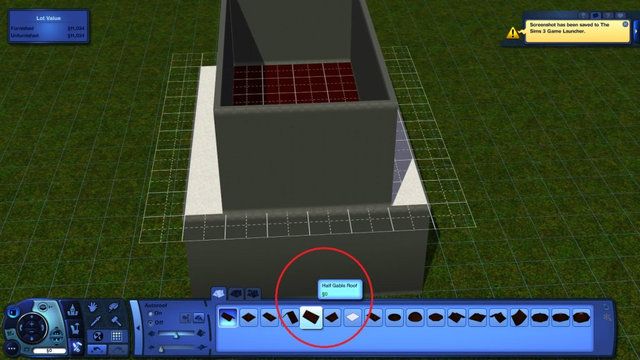
The half hip will allow us to finish off the porch cleanly, like this:
The only thing you have to watch when using two different styles like this together to do a porch is that you dont have clear seams where the two styles join up....like this:
So then...you may think the solution is to start the straight roof a little farther in, right?
That doesnt seem to work either, does it? So what is the solution? We need to bring out the corner section a bit more first. This will allow us to join things up without gaps or overlaps. So bring out the corner a little more with the hipped roof like this:
Then you have more room to add that straight half hip section to finish out your porch:
So...that is the basics of porches. Ready to try one with a little challenge to it? Find the hands on lot here: http://www.thesims3.com/assetDetail.html?assetId=5669309
Find this house:
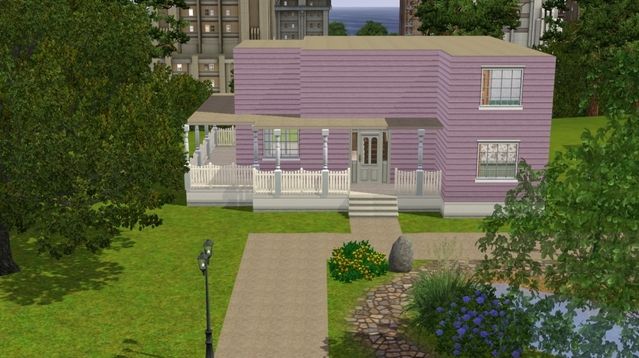
Add the porches. Notice the porch zigzags around the shape of the house a bit...dont get intimidated. You can do this! :-) Place your decking first. Follow the same steps we just discussed and just work your way around.
If you have any questions, let me know. I will be here working on the next section, which is Victorians. There is no "hands on" shell for victorians in the practice lot, because when we are done, you will get your final exam "hands on" lot to work on. :D
If you havent had the time yet, please check out lesson 1 and the thread in general. There have been some great questions posed by fellow simmers that might be similar to questions you have. If you have a question that hasnt been covered yet, dont be shy! :-) Ask away! Even if I am not here, I will be popping in frequently and I WILL answer.
So...let's get started with lesson 2 and PORCHES.
To talk about porches we are going to look at a basic farmhouse with wraparound porches. A single porch is pretty easy, but many times it can get frustrating when you try to connect several of them together.
So lets say we want to make something like this:
The first thing I am going to suggest is that you try to make covered porches only 2 squares wide. More than that, and the roof needed to cover it becomes too big and out of proportion to the rest of the house. Like so:
So, if at all possible, make your porches 2 squares wide. Next, place your decking. I really suggest you do this before doing any roofing at all to help you see what you are working with and where you need to place roofing. With wraparound porches, you want to start with a corner section first.
You want to use the hipped roof and draw it so that the seam of the roof matches up to the seam of the house edge:
Make sure you have not put in the windows or any interior furniture on the second fllor before starting this procedure. The roofing tool will not allow you to collide with anything and to do a good porch with smooth seams, we will be drawing though the walls quite a bit. If you are working and you find that the tool will not allow you to draw....look inside and see if you have a door or an object it might be colliding with.
So...we are going to draw just the corner for now like this:
Now we are going to work our way around and cover all of the decking using the hipped roof.
See how the left hand side has a gap? That is because we didnt draw the roof wide enough. We need to draw it far enough into the wall that we have a clean seam like this:
Then use the roof angle tool to make sure that the sections are the same.
There! A nice clean roof seam that fits perfectly. Since we are going to be joining several sections together, it is a good idea to do the porch first and use the "all roof angles tool" that adjusts all the roofs at the same time. This will ensure that all of the sections fit together.
Sometimes when you are joining several roofs together, you might see some jagged breaks or tears in the roofs. If you use the all roof tool and adjust it up a little and then back down to where you want it to be, the movement will "join" those tears together.
When you are going around corners with a roof, it is easier to do the corners first. So with a wraparound roof, after you do the first section, move to the next **corner** and do that next like so ( making sure that the seam of the roof matches up again to the edge of the wall):
Then you can go back in and join the two sections together:
Keep working your way around the house in a similar manner. But wait! What do we have here?
We dont have a corner...we have a straight edge. Well....we must just draw out the roof and finish things up, right?
Ugh! That does not look very nice does it? I admit this is a personal peeve of mine, but I really try to avoid having roofing visibly cutting into walls like this. It just looks messy to me. The solution for this is to go with a different roof that has a clean edge....like that half hip roof:
The half hip will allow us to finish off the porch cleanly, like this:
The only thing you have to watch when using two different styles like this together to do a porch is that you dont have clear seams where the two styles join up....like this:
So then...you may think the solution is to start the straight roof a little farther in, right?
That doesnt seem to work either, does it? So what is the solution? We need to bring out the corner section a bit more first. This will allow us to join things up without gaps or overlaps. So bring out the corner a little more with the hipped roof like this:
Then you have more room to add that straight half hip section to finish out your porch:
So...that is the basics of porches. Ready to try one with a little challenge to it? Find the hands on lot here: http://www.thesims3.com/assetDetail.html?assetId=5669309
Find this house:
Add the porches. Notice the porch zigzags around the shape of the house a bit...dont get intimidated. You can do this! :-) Place your decking first. Follow the same steps we just discussed and just work your way around.
If you have any questions, let me know. I will be here working on the next section, which is Victorians. There is no "hands on" shell for victorians in the practice lot, because when we are done, you will get your final exam "hands on" lot to work on. :D