Forum Discussion
13 years ago
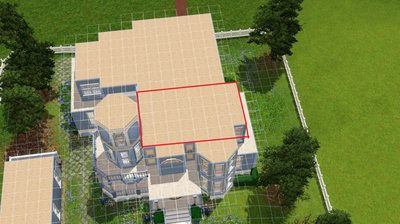
Let's start working on the Victorian using the steps we already covered. :D First thing we are going to do is look for what is going to be the main section of the roof
This section looks like it should be perfect, right?
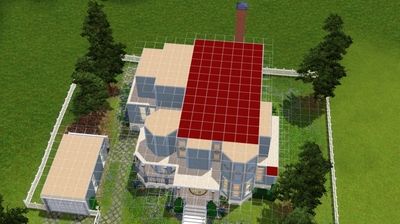
It covers a large part of the roof...doesnt leave weird margins or anything....great! Nope. :( That shape will mean the roof we draw will look like this:
You might be saying to yourself "so? what is the problem? That looks fine to me." Well yes...and no. It looks ok as it is...but once we start adding the other roofs there will be a problem with the shape of the house. You will need to start working out the roofs to discover the problem.....so lets add a few more and see what it is:

We are going to have too many peaks! We can try to make those other roofs something else...and here are some examples:
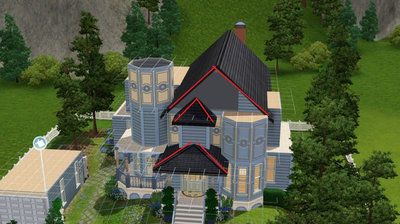
This has different roofing but the seams still echo the peak shape, dont they? Not enough variety.
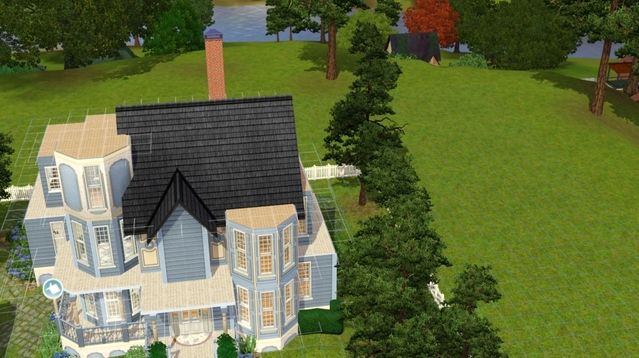
Here is a straight roof type in the mix....also doesnt work. Look at that sloppy edge!
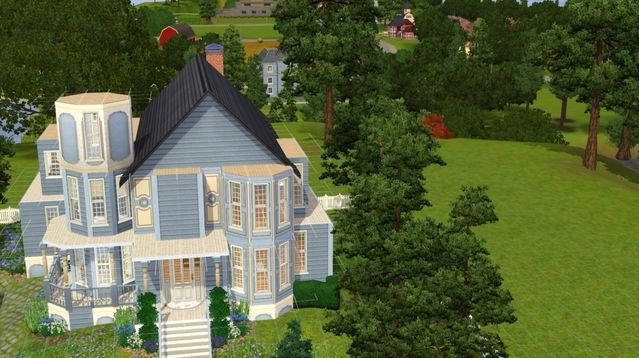
So that means our main section is not as perfect as we thought! We need to find another one. I think this will work here:
This shape means we can have the roof go horizontally so we dont have too many peaks at the front.
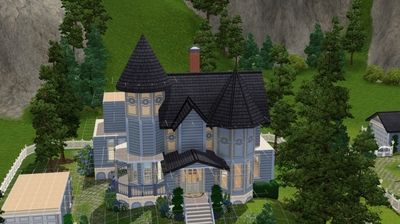
Lets start by finishing the front section first:

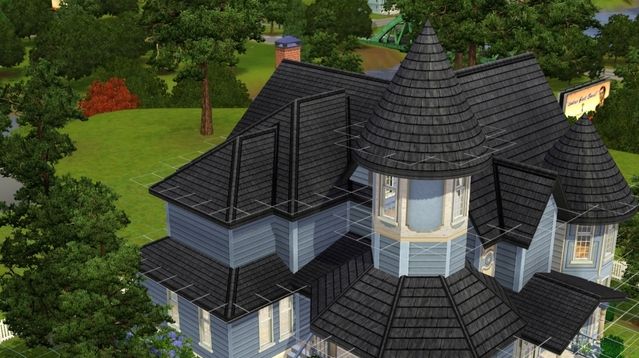
And we know the turrets are going to be conical roofs. They can be smooth or ribbed cones. How about one of each for now...for variety sake? :D
Now what about the section to the left?
When I made this house, I elected to make that a balcony like this:
But let's say we want to go ahead and roof that? How would we do it? Since it is a turret shape, lets draw on the decking so we can see where the conical roof might go....like this:
That allows us to find the points we need to draw the roof in and have it centered properly....like so:

And then we have to finish off the rest of that little section. The half hip would be best as it will join with the wall neatly and allow us to form a good seam with the conical roof.....like so:

We want a smooth joining of the parts as much as possible.
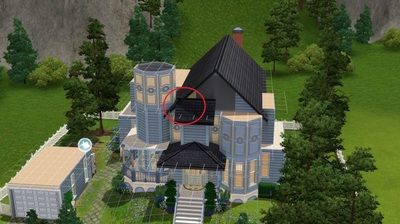
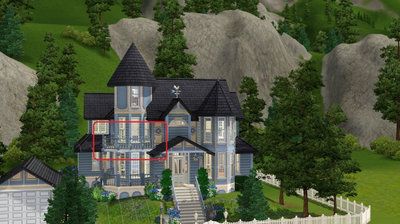
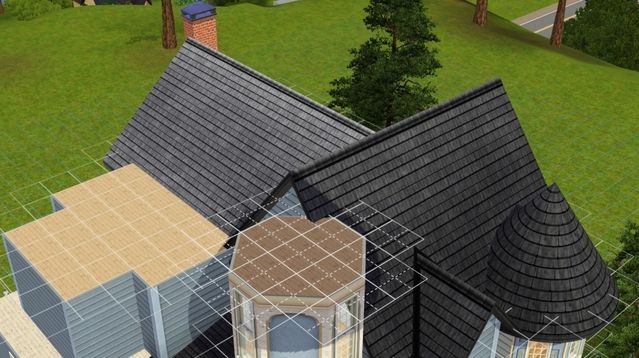
So now that we have this section done lets move around to the rest of this side. We need to find the biggest chunk to cover on top. Think this might be it?
If we use that as a chunk, the rectangle will make us have to draw the roof in like so:
And you know why that doesnt work, dont you? There is that odd little margin on the left...not a deal breaker, but not great. The deal breaker for this roof is that deep seam in the middle where it joins with the main section. That looks broken up and it does not flow at all, does it?
That means we have to find another main chunk. How about this one?
Yes! That looks like a good possibility. Lets cover it up and see:
Now we have some additional sections to deal with. For a good looking roof, we need to hande each of these sections individually, as in the red boxes......but for a good shape and flow...we want to make sure they blend into each other...going the same direction ( the green arrows) This will mean that even though we have a lot going on, the roof wont get too busy looking.
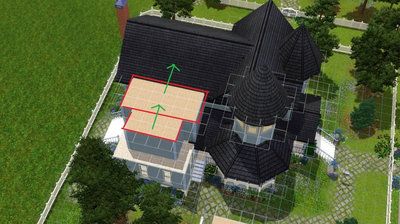
See what I mean?
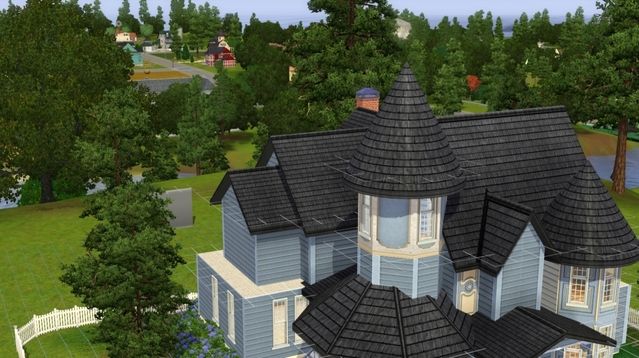
Even still...if we want it to be smoother, we could use the hipped roof that has softer edges like this:
Same concept...we handled each part as its own section..but they both go the same direction together...and join nicely. Make sense?
I think you have the tools you need to tackle something really tricky now. We will call this the "final exam" and I made it pretty hard because I want you to really put everything we have talked about to use.
If you get stuck...that is fine. Post a picture and we will talk about about. Chances are someone else might be having the same issue. Once you work out a hard problem, you always remember how to deal with it....so if you can roof this house, you should be up for just about anything!! :D
The final exam is here:
http://www.thesims3.com/assetDetail.html?assetId=5707804
This section looks like it should be perfect, right?
It covers a large part of the roof...doesnt leave weird margins or anything....great! Nope. :( That shape will mean the roof we draw will look like this:
You might be saying to yourself "so? what is the problem? That looks fine to me." Well yes...and no. It looks ok as it is...but once we start adding the other roofs there will be a problem with the shape of the house. You will need to start working out the roofs to discover the problem.....so lets add a few more and see what it is:
We are going to have too many peaks! We can try to make those other roofs something else...and here are some examples:
This has different roofing but the seams still echo the peak shape, dont they? Not enough variety.
Here is a straight roof type in the mix....also doesnt work. Look at that sloppy edge!
So that means our main section is not as perfect as we thought! We need to find another one. I think this will work here:
This shape means we can have the roof go horizontally so we dont have too many peaks at the front.
Lets start by finishing the front section first:
And we know the turrets are going to be conical roofs. They can be smooth or ribbed cones. How about one of each for now...for variety sake? :D
Now what about the section to the left?
When I made this house, I elected to make that a balcony like this:
But let's say we want to go ahead and roof that? How would we do it? Since it is a turret shape, lets draw on the decking so we can see where the conical roof might go....like this:
That allows us to find the points we need to draw the roof in and have it centered properly....like so:
And then we have to finish off the rest of that little section. The half hip would be best as it will join with the wall neatly and allow us to form a good seam with the conical roof.....like so:
We want a smooth joining of the parts as much as possible.
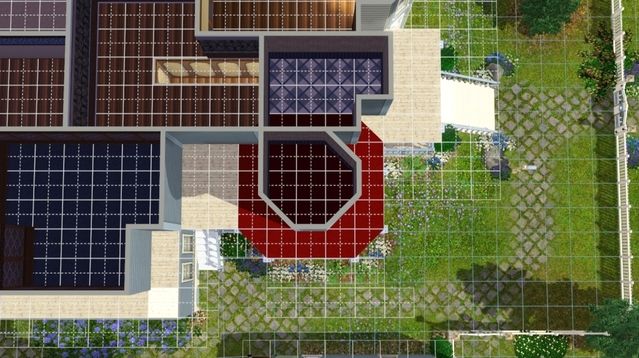
So now that we have this section done lets move around to the rest of this side. We need to find the biggest chunk to cover on top. Think this might be it?
If we use that as a chunk, the rectangle will make us have to draw the roof in like so:
And you know why that doesnt work, dont you? There is that odd little margin on the left...not a deal breaker, but not great. The deal breaker for this roof is that deep seam in the middle where it joins with the main section. That looks broken up and it does not flow at all, does it?
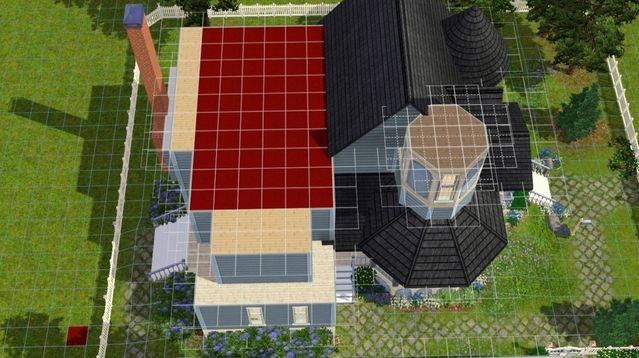
That means we have to find another main chunk. How about this one?
Yes! That looks like a good possibility. Lets cover it up and see:
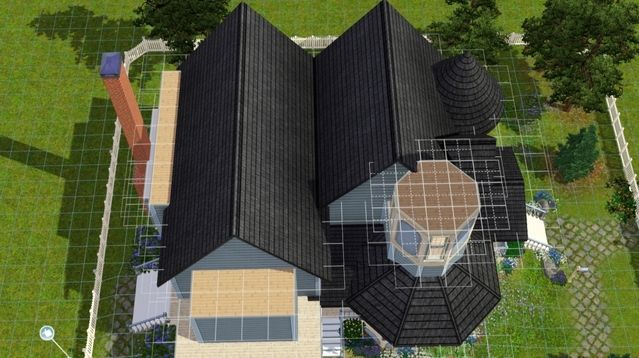
Now we have some additional sections to deal with. For a good looking roof, we need to hande each of these sections individually, as in the red boxes......but for a good shape and flow...we want to make sure they blend into each other...going the same direction ( the green arrows) This will mean that even though we have a lot going on, the roof wont get too busy looking.
See what I mean?
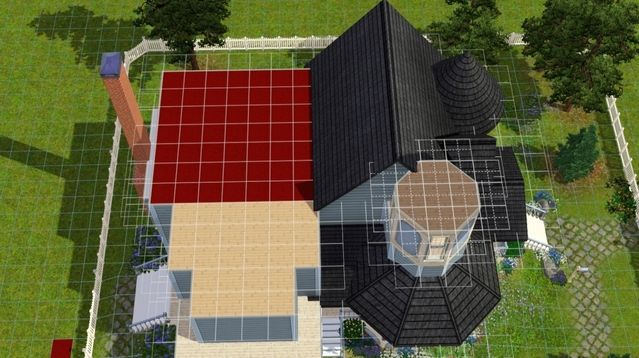
Even still...if we want it to be smoother, we could use the hipped roof that has softer edges like this:
Same concept...we handled each part as its own section..but they both go the same direction together...and join nicely. Make sense?
I think you have the tools you need to tackle something really tricky now. We will call this the "final exam" and I made it pretty hard because I want you to really put everything we have talked about to use.
If you get stuck...that is fine. Post a picture and we will talk about about. Chances are someone else might be having the same issue. Once you work out a hard problem, you always remember how to deal with it....so if you can roof this house, you should be up for just about anything!! :D
The final exam is here:
http://www.thesims3.com/assetDetail.html?assetId=5707804