As I have been asked many times...
HOW I MAKE CAP PATTERNS
To start with I have folders on my desktop for any pictures I find online that I right click on and choose 'Save as' into a suitable folder such as 'Kids' etc.
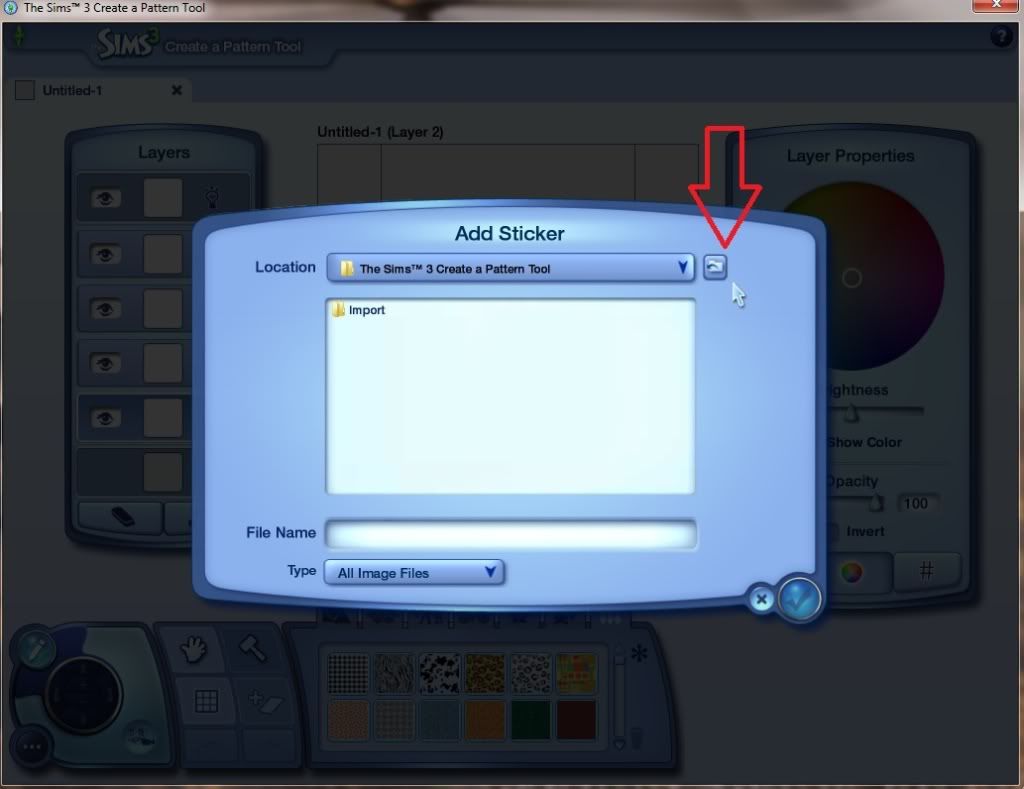
1. Open up the Tool on desktop then I click on 'Add a New Sticker' this opens a Screen to import from my folders on desktop. This I click 3 times until I see 'Desktop'.
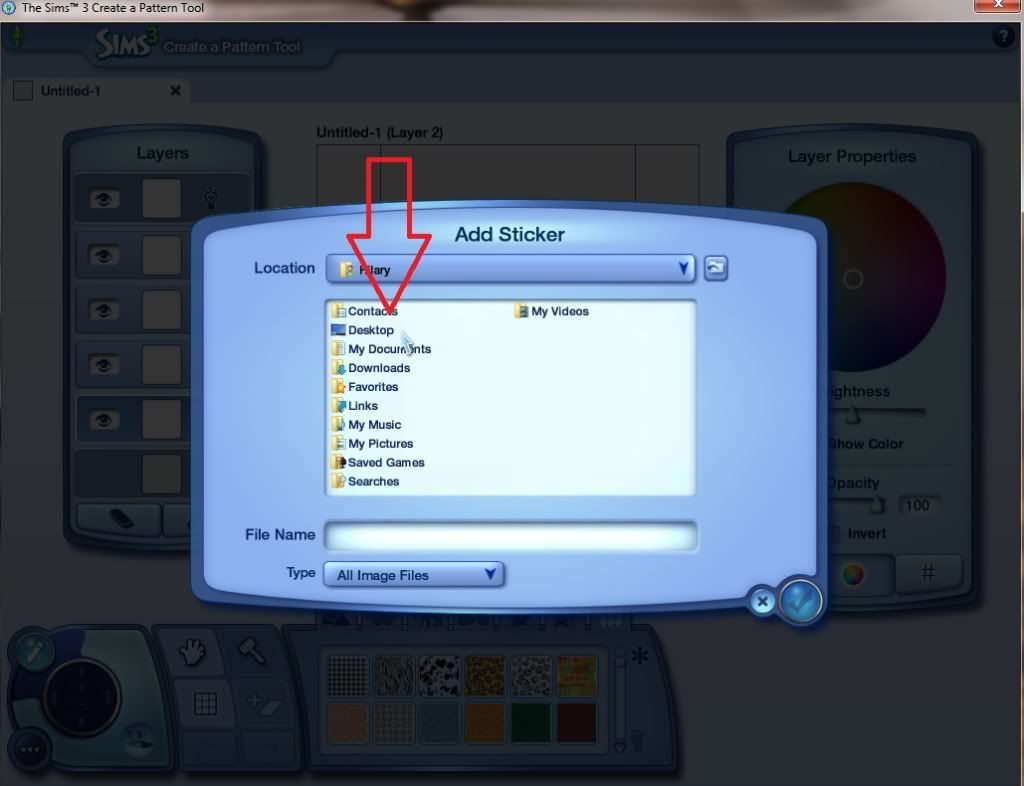
2. Double click on the word 'Desktop' and you will see all your desktop folders. Double click on the 1 you have your pictures in for patterns.
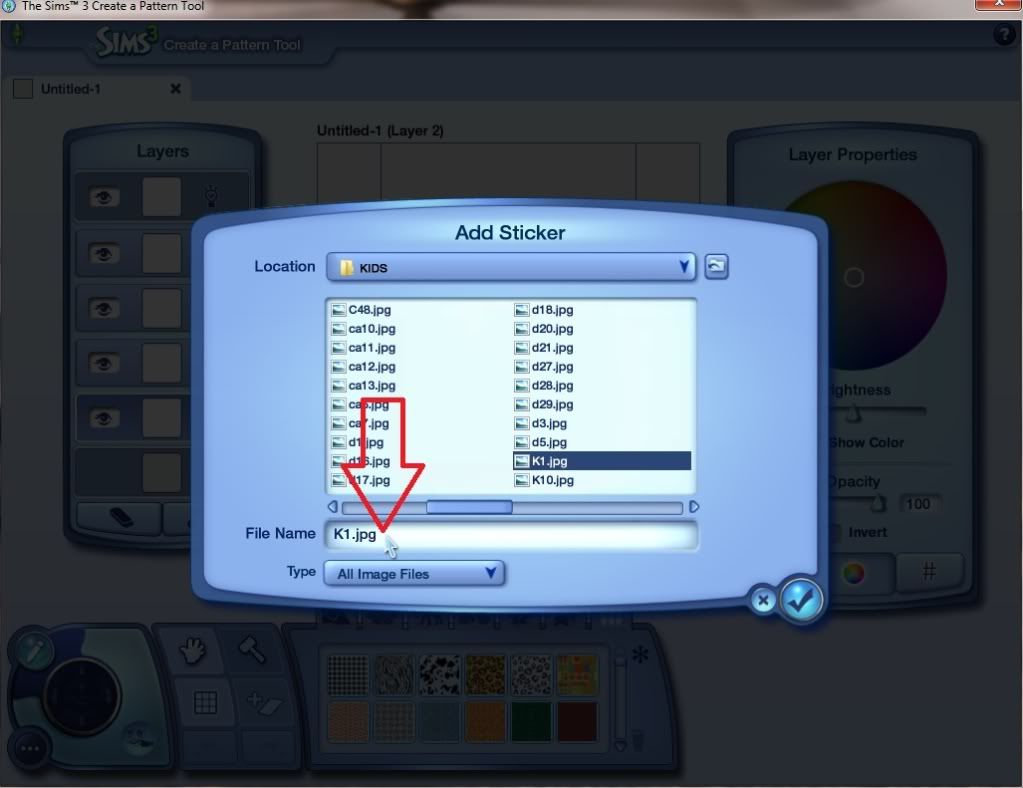
3. Choose 1 and click and you will see it in 'File Name' them click the Tick accept, this will now be in the 'Stickers'.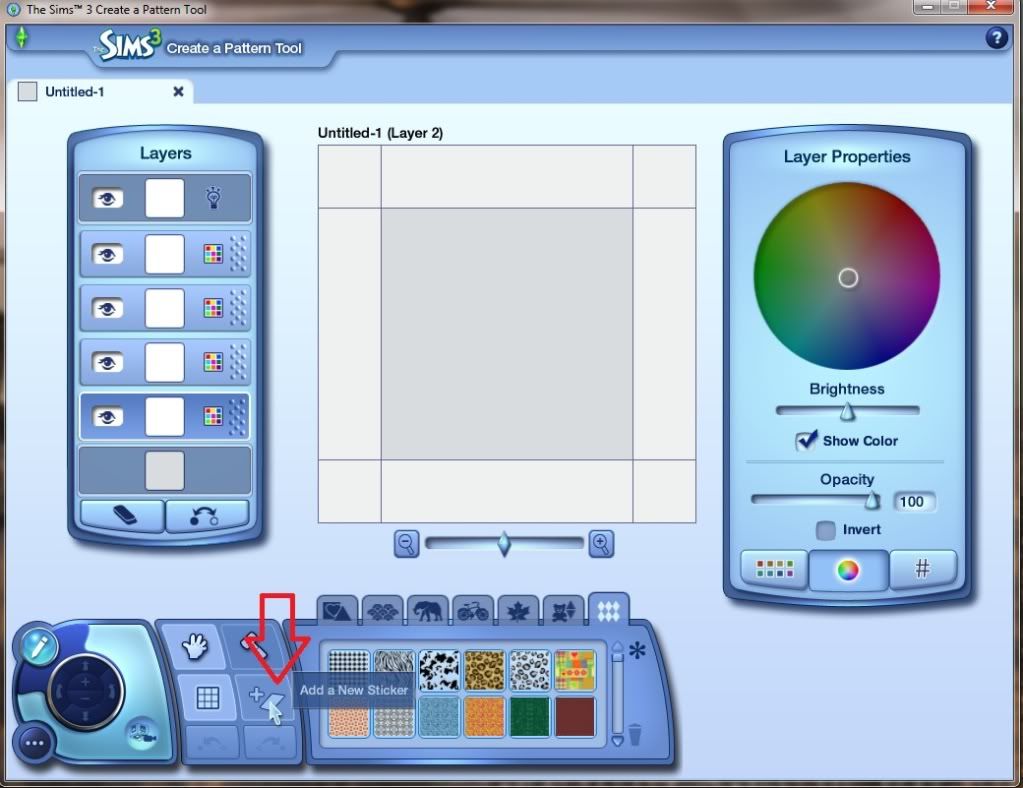
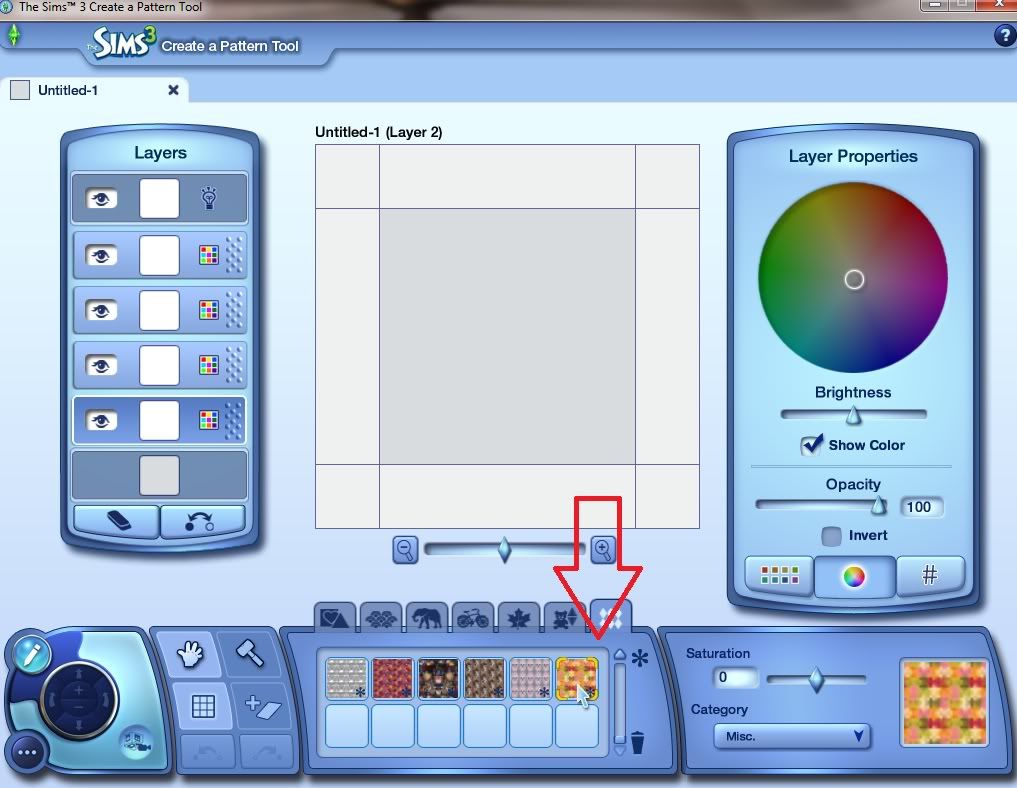
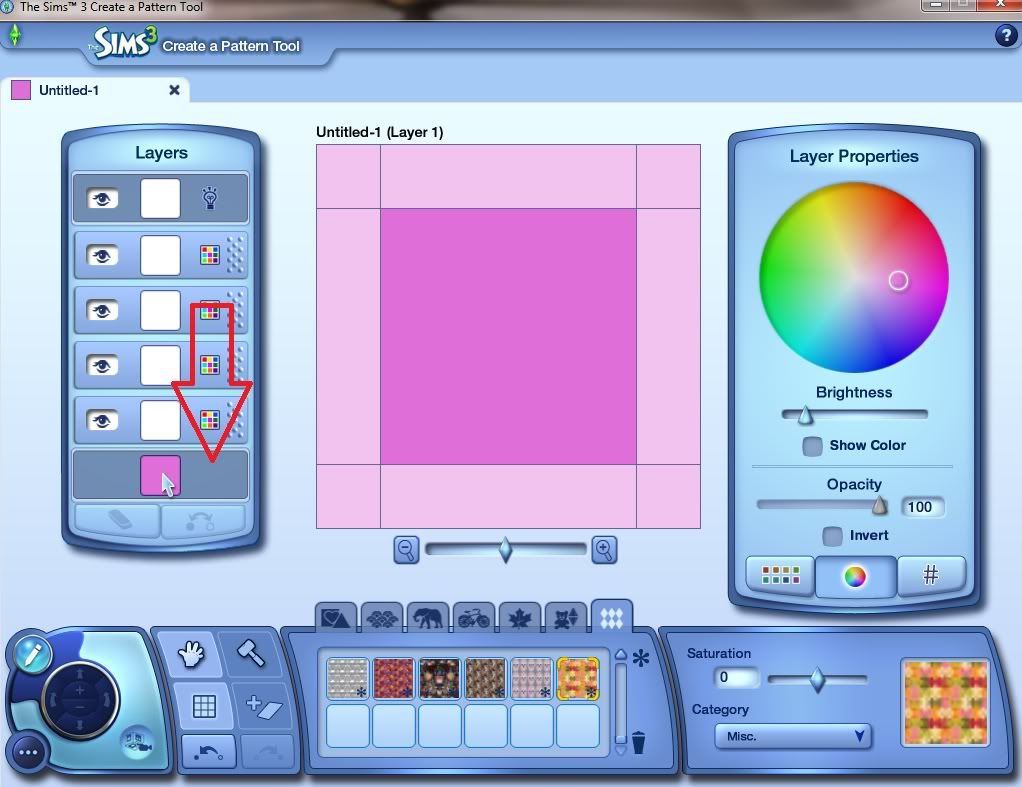
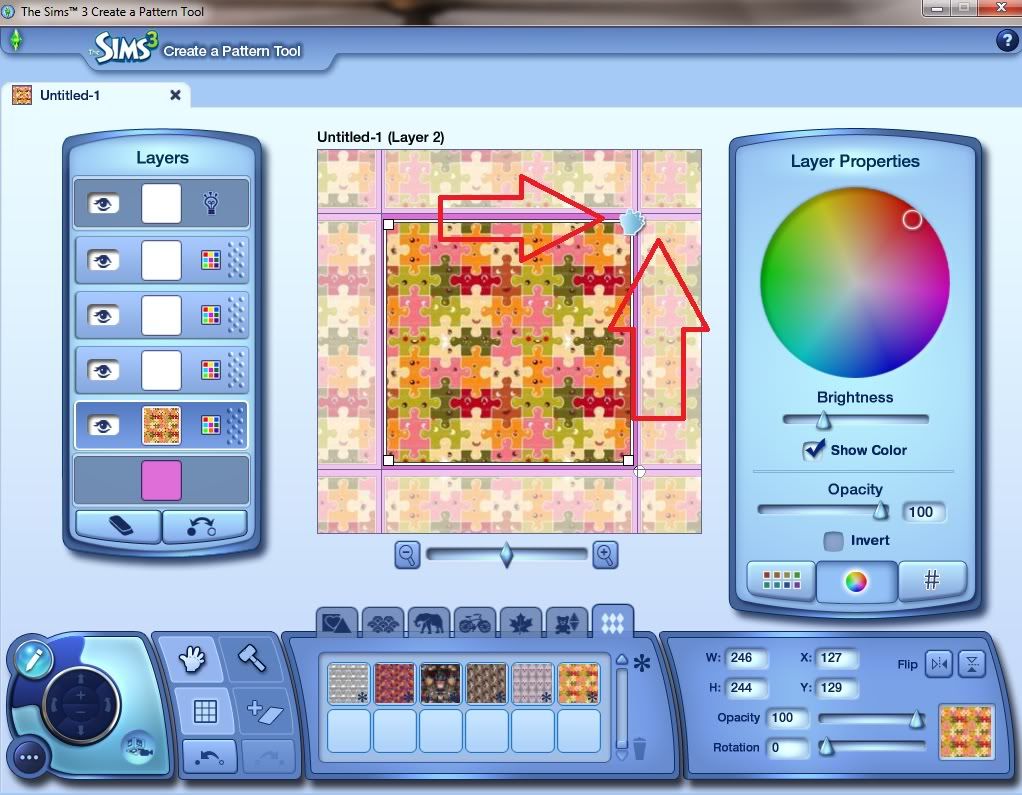
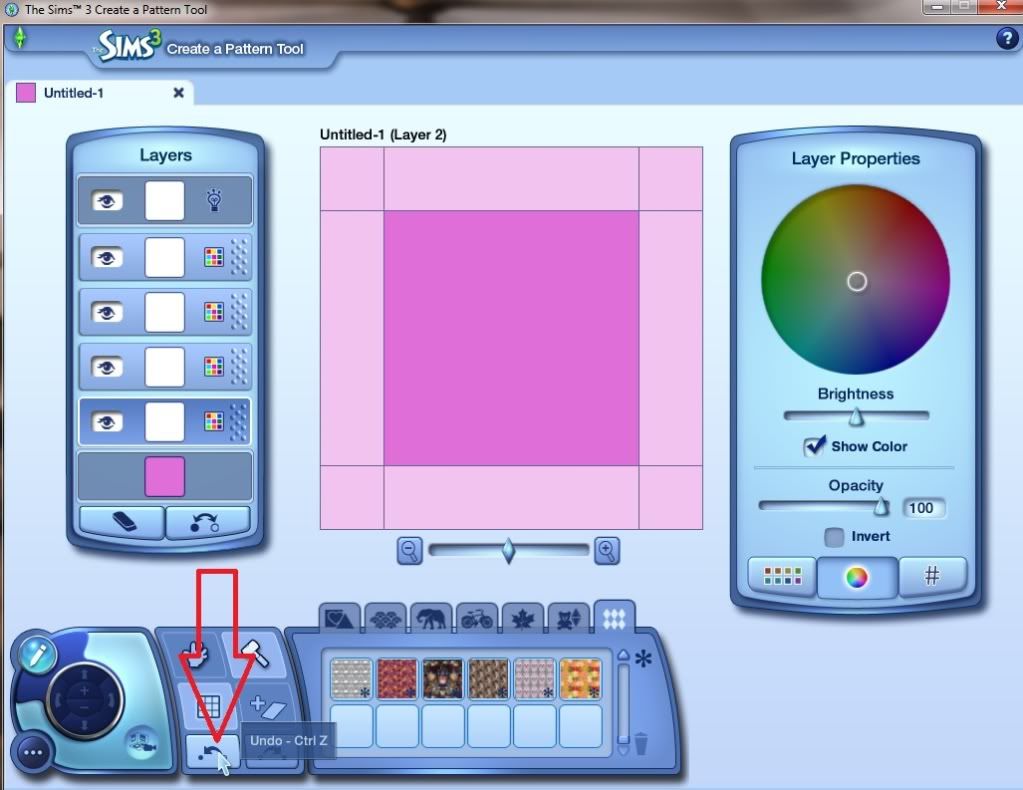
4. Now what I always do in the bottom layer called 'Background Colour', I click on it and use the colour wheel to put any colour in it, I will explain the reason soon.
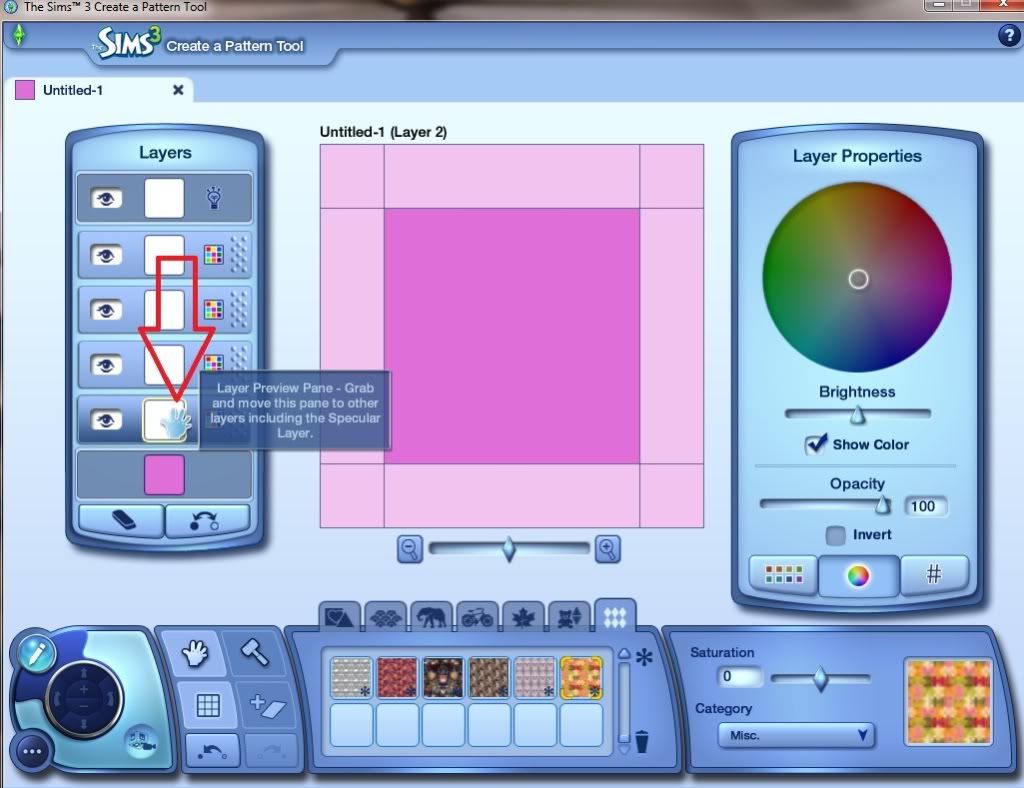
5. Then I click on the next layer up and then drag the 'Sticker' into the central section.
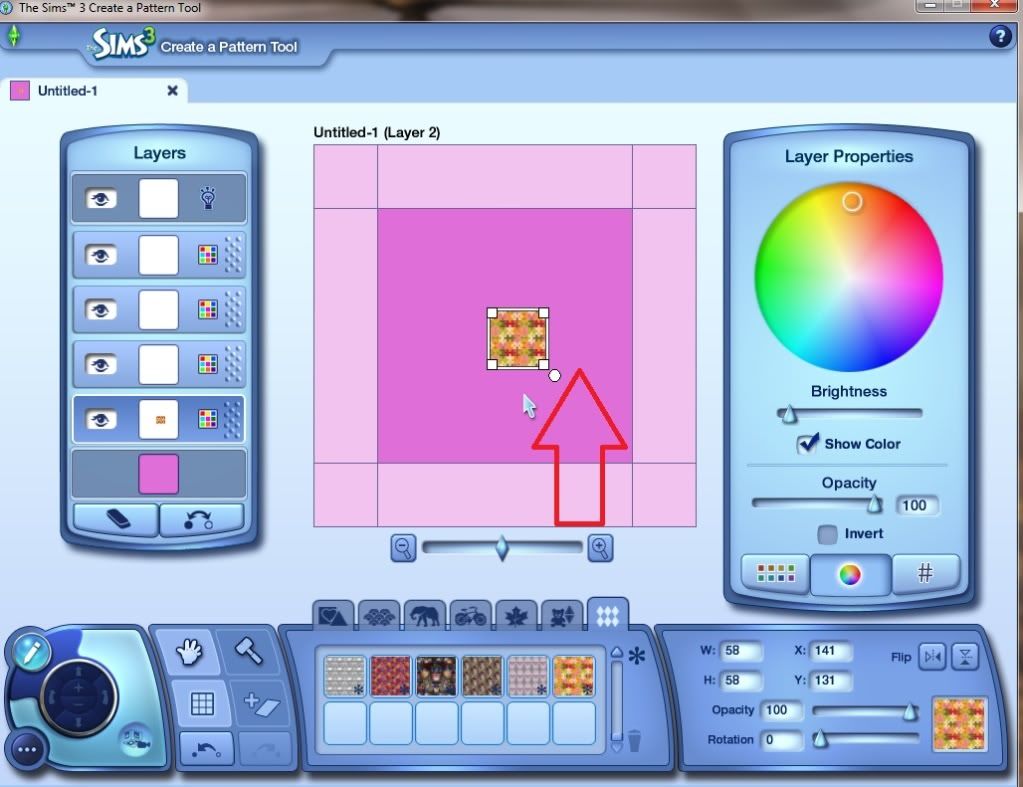
6. The 'Sticker' can now be pulled to fit the central square.
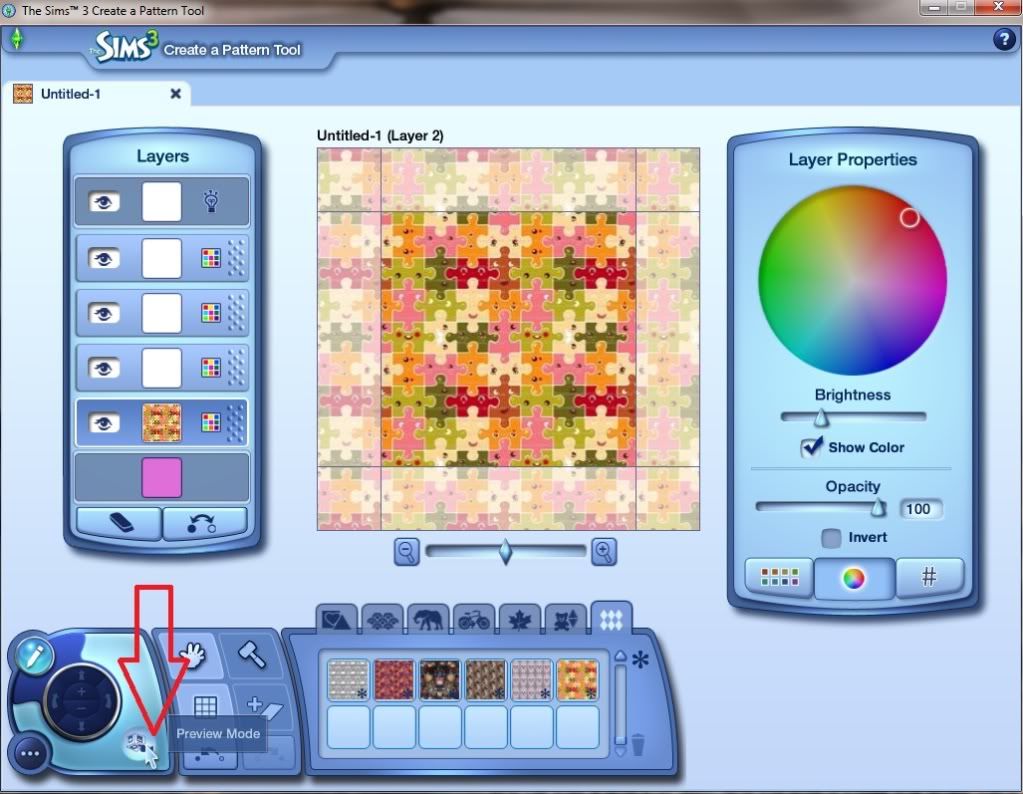
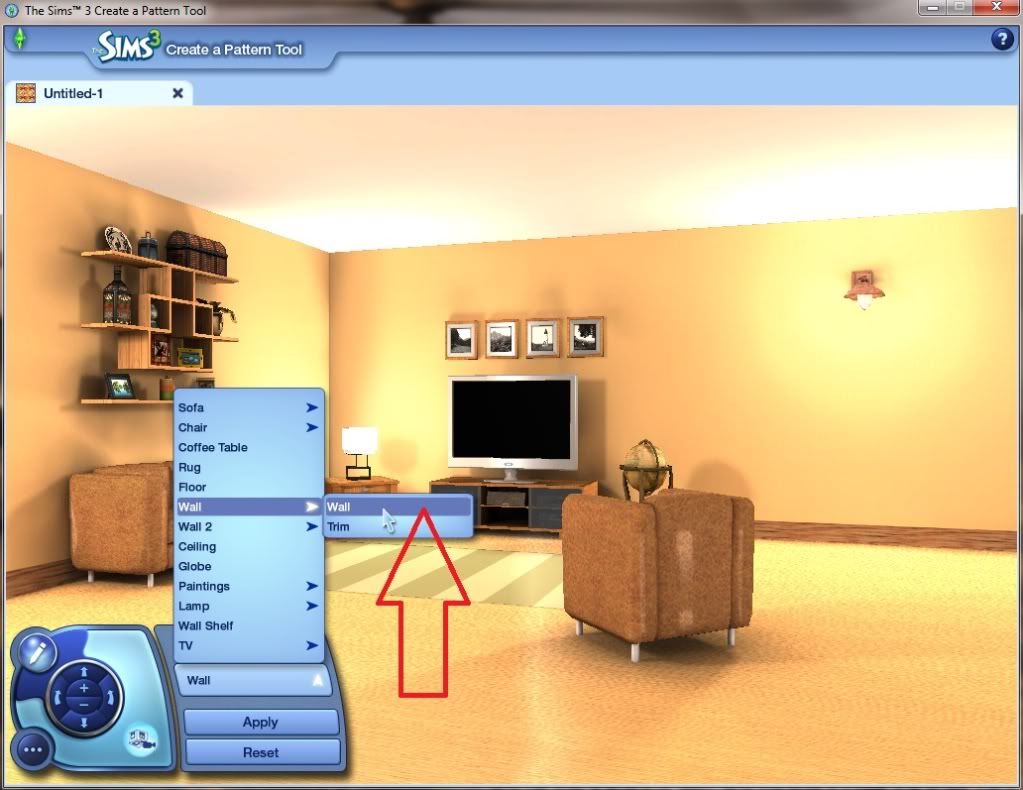
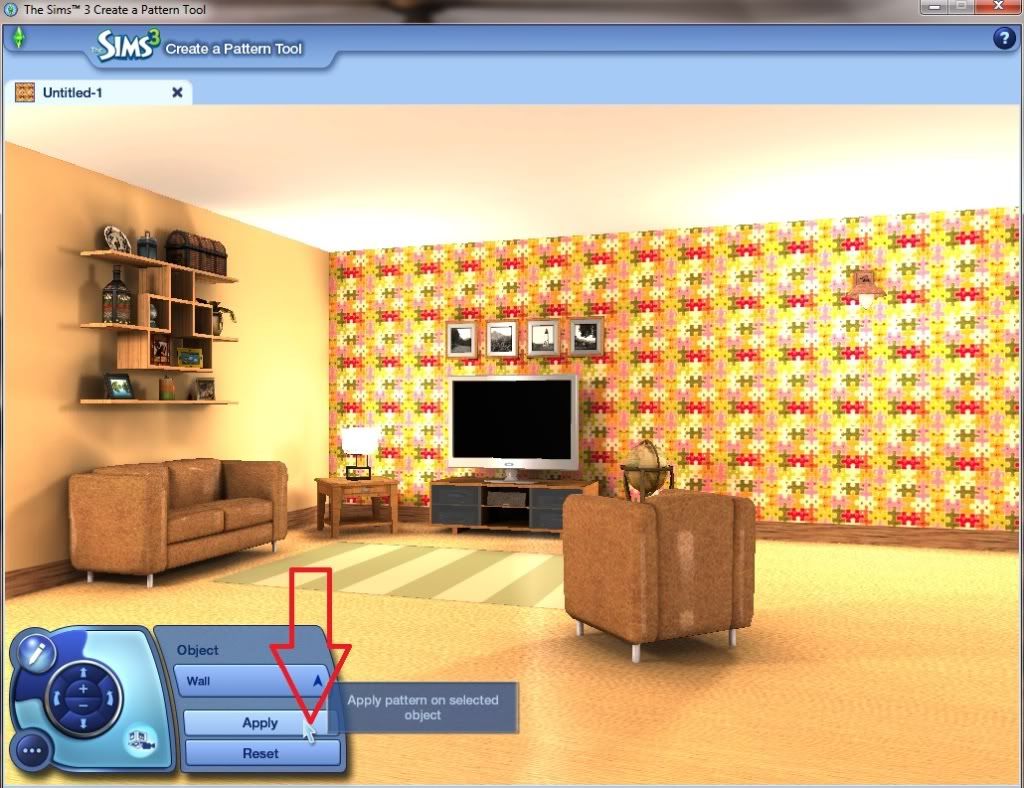
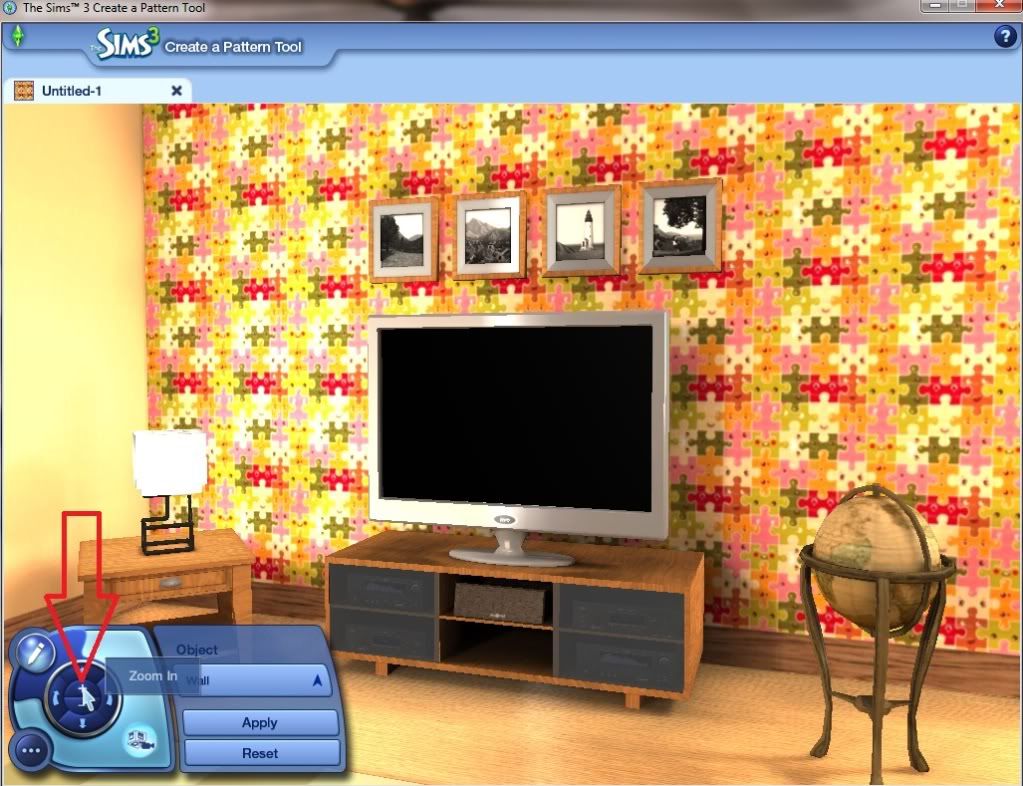
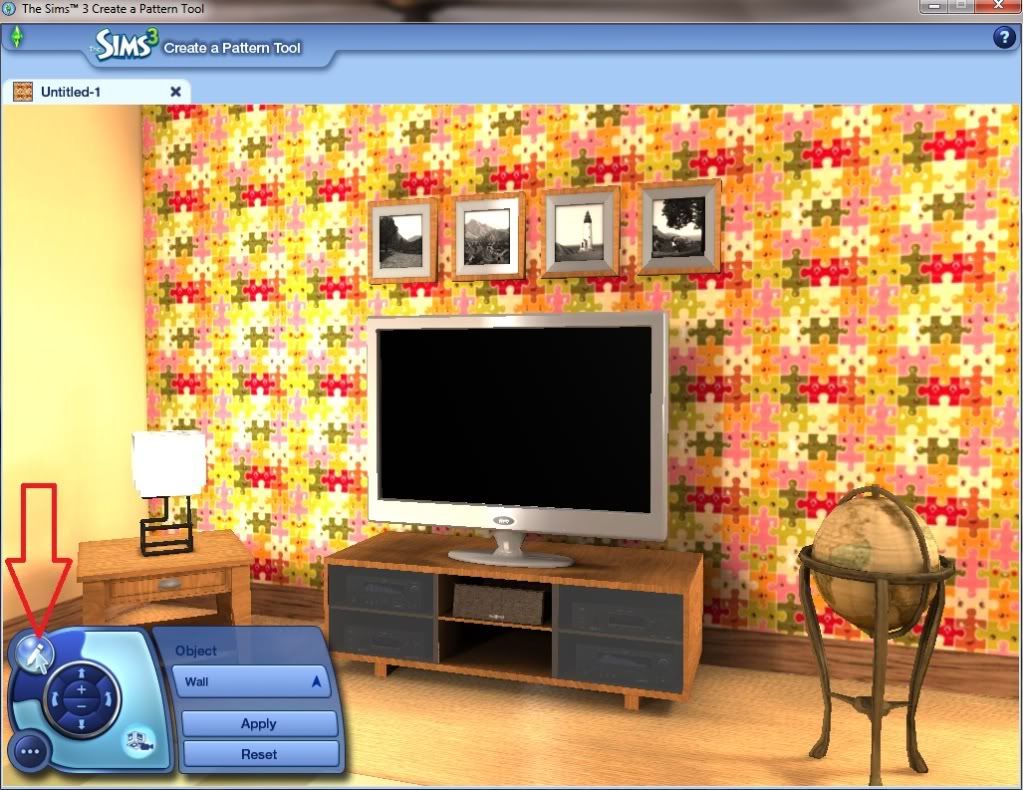
7. When I think the edges of the 'Sticker' meet up, I go into 'Preview Mode' and I always use the 'Wall' then click apply.
8. So now you will see the pattern on the rear 'Wall' and you will be able to 'Zoom' in on the wall and see if any of the 'Background colour' ls showing.
9. To go back click on the 'Exit Mode', it looks like a pen.
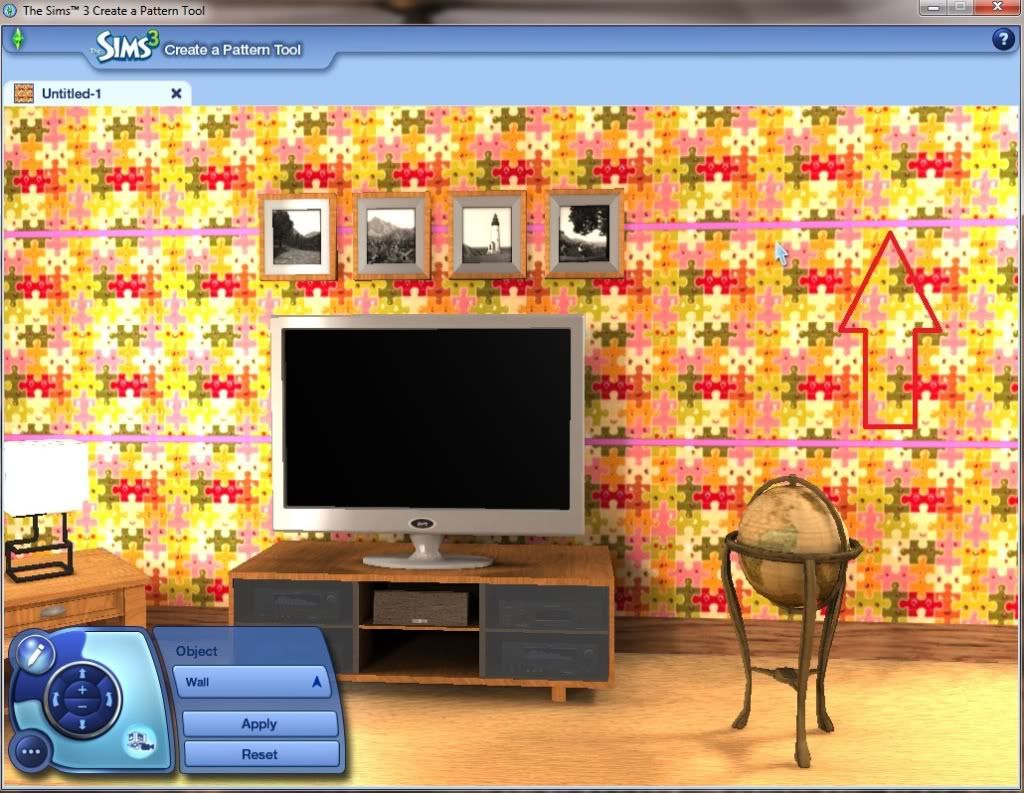
Note.
I will show a picture that you can see the 'Background colour' as this is what you do Not want to be showing.
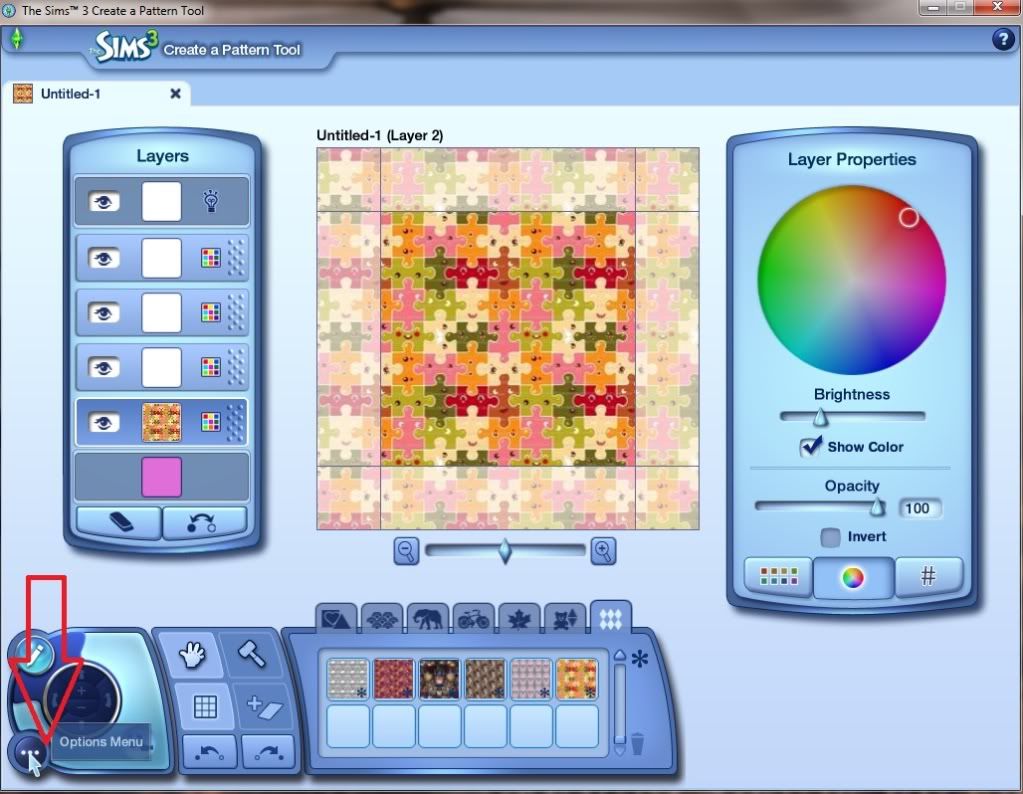
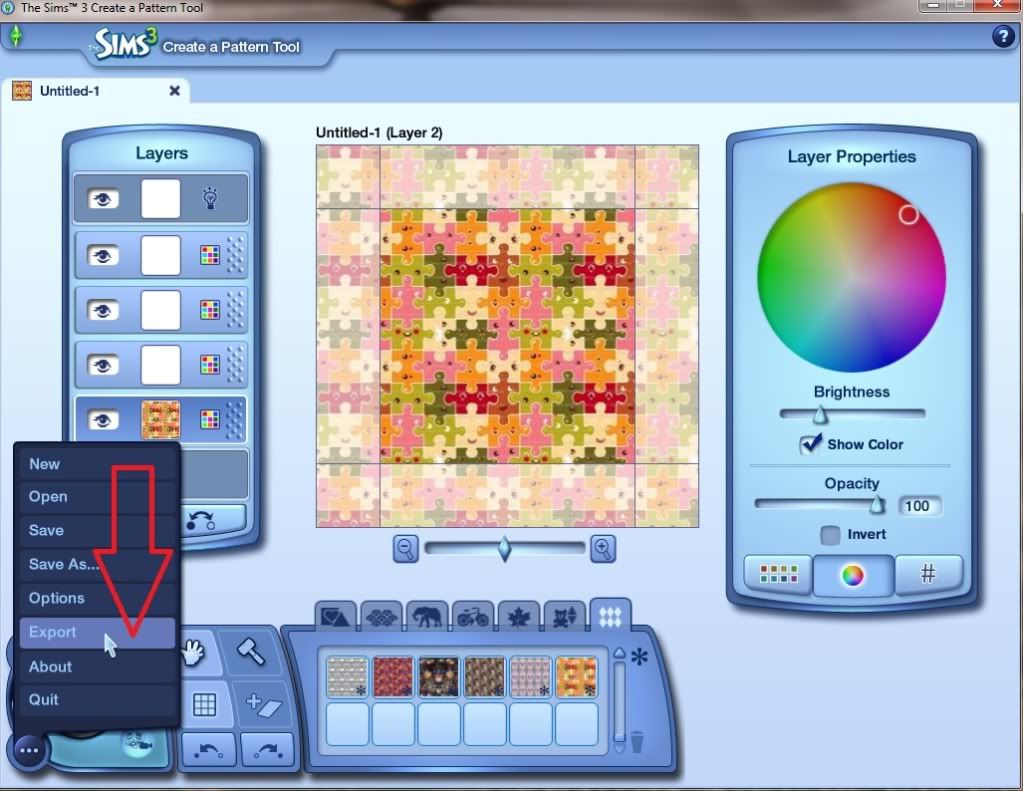
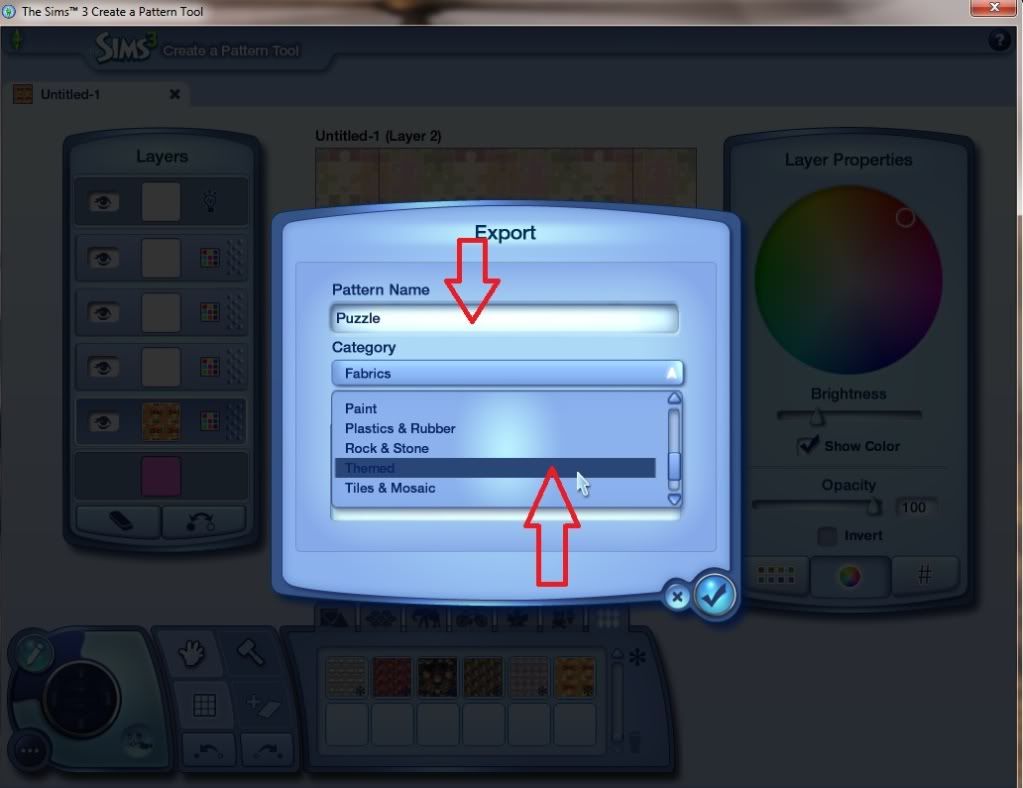
10. When you are satisfied that all 4 sides are close together or slightly overlapping, you click on the 'Options Menue' and on 'Export pattern' you click to get a screen appear where you Type in the pattern name then the drop down menue where you pick what type of pattern it is. If you want you can write a short description, I use this to say if my pattern appears seamless.
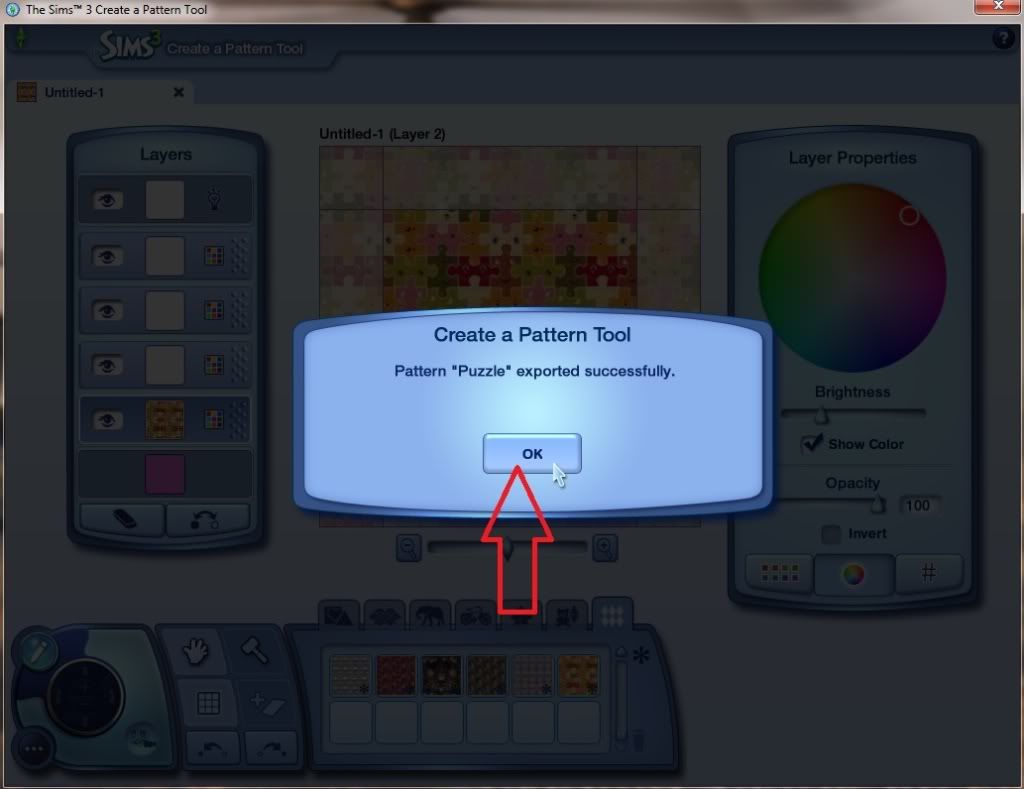
11. Then click the 'Tick' and it will put up another screen for you to click OK.
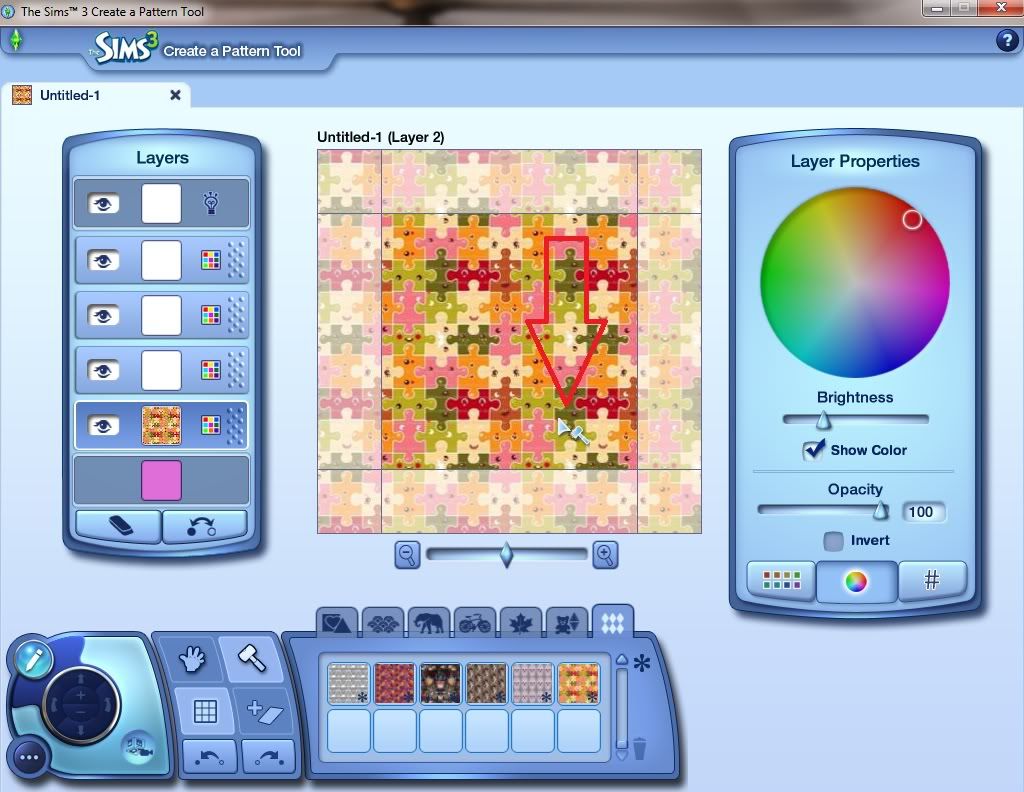
12. That 1 is all done so then you can use the 'Hammer' eraser tool to remove that sticker or press Undo until its gone, then start with the next sticker.
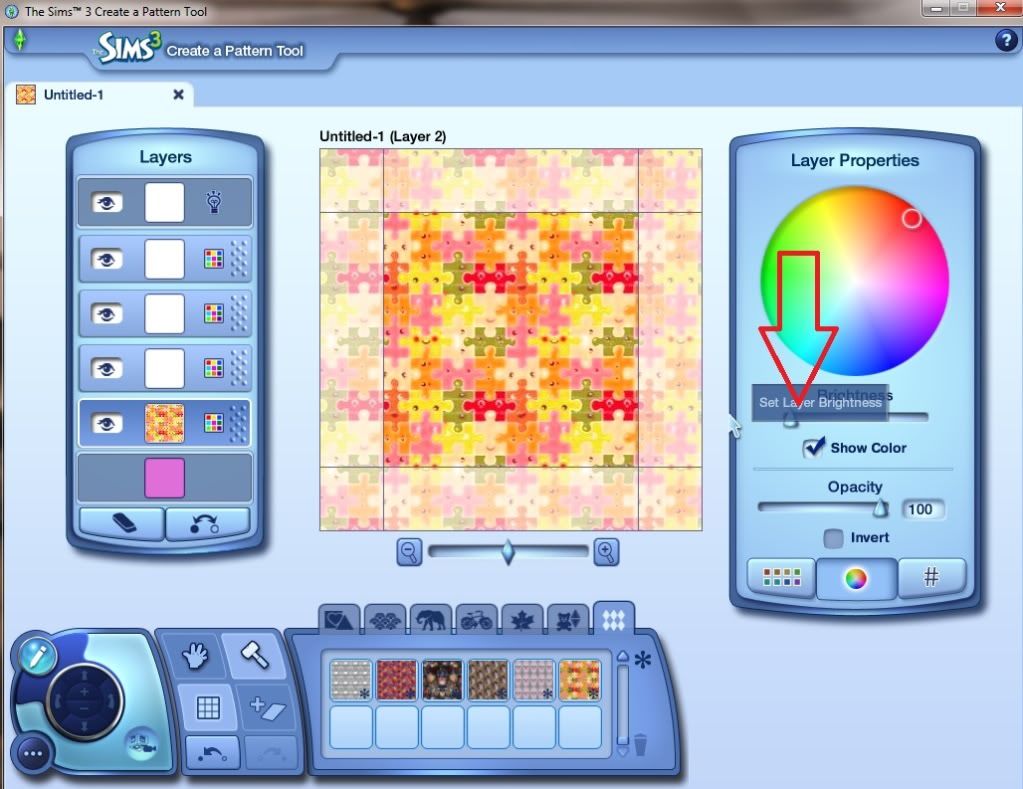
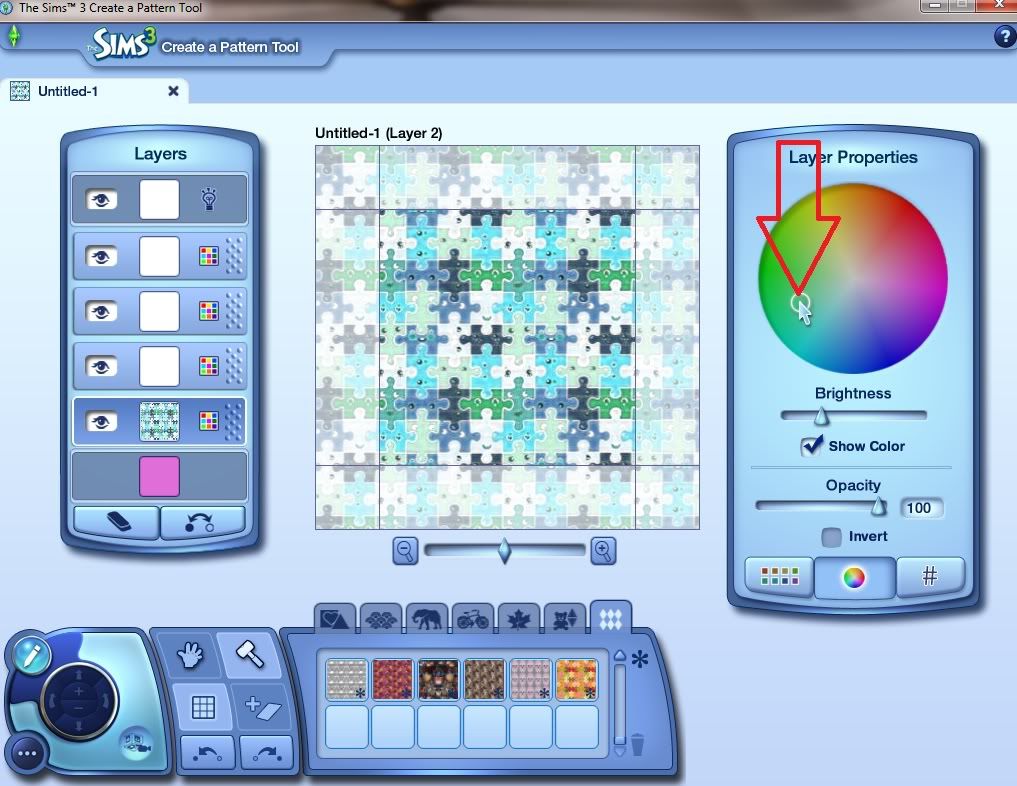
13. When you have mastered how to make the pattern then you can start using the other sections of the create a pattern tool, such as making the pattern 'Lighter' or 'Darker' or even use the 'Colour Wheel' to change the colours.
BTW all the written instructions are on page 13 in case you want to copy/paste for a notepad.
Special Hint/Tip
The bottom layer that I made pink in the picture, I have often seen people using it when its white to put 'Stickers' on that have white backgrounds. Well as the layer is not pure white it shows up behind the 'Stickers', so if you want a white background always pull the slider to the brightest white it will go before adding white backed stickers.

