FLSTRider
9 years agoSeasoned Novice
Water Plane Tutorial - Hopefully! (LOL) - Pictures are working again!
Water Plane Tutorial by FLSTRider
Part 1: The Initial Steps
Before we begin you will need the following external programs:
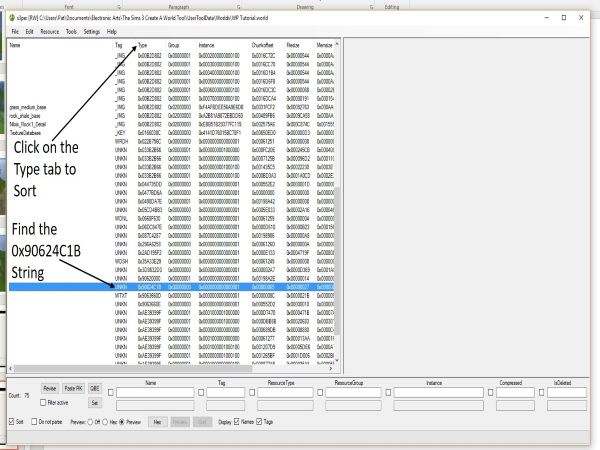
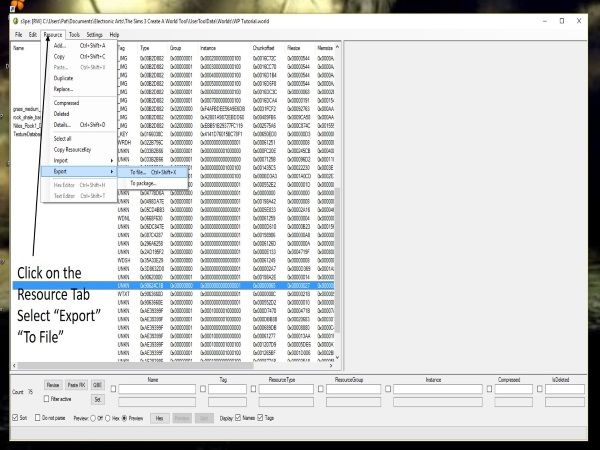
S3pe - Available at Simlogical.com
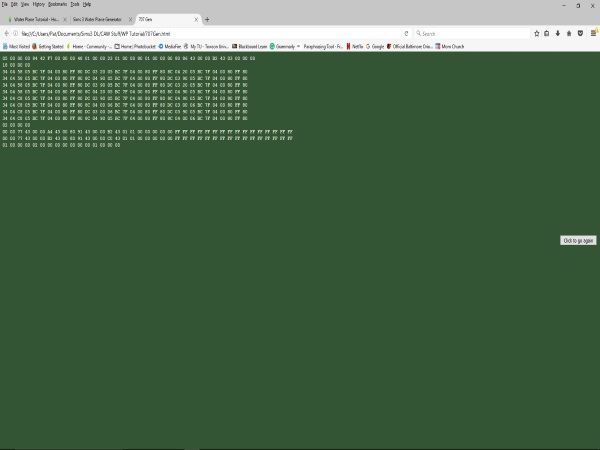
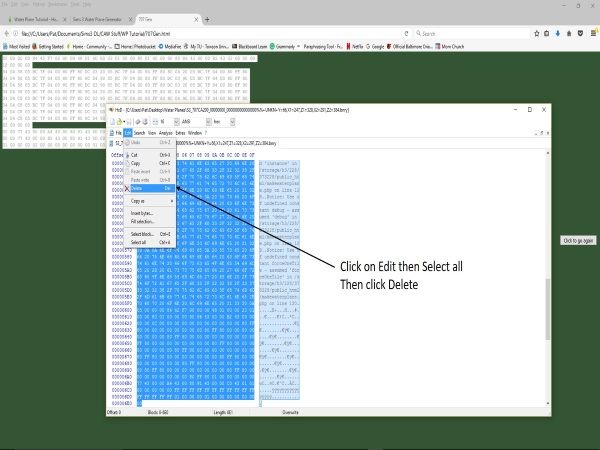
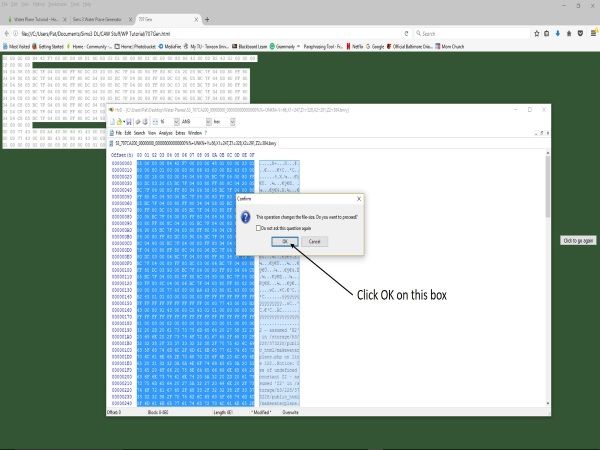
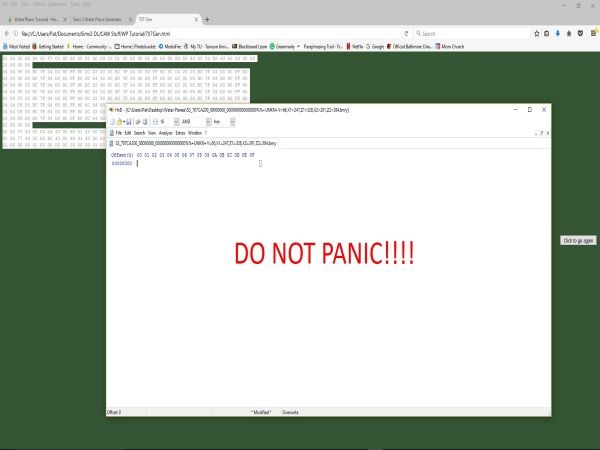
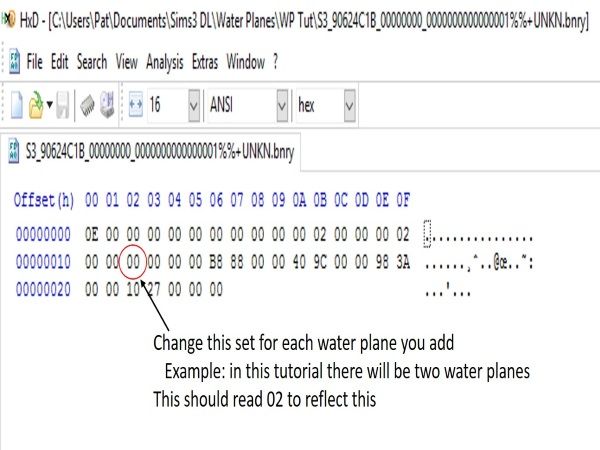
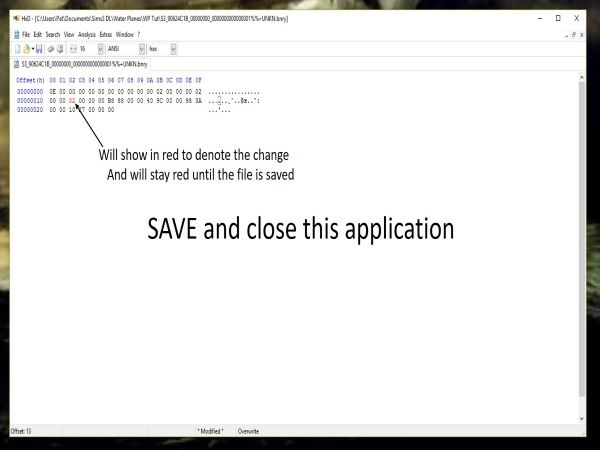
A Hex Editor - (I like HxD, it is a free program that works very well for this) You can find it here HxD – Freeware Hex Editor
SandrineD’s Hex generator - available at Mod The Sims
Some Patience!!!
So you want to add water up in your mountains to add a waterfall for your Sims to enjoy? This tutorial is designed to help you add lakes, rivers, or other water features at altitudes above your worlds sea level. This tutorial may be a bit confusing as we work in the more technical aspects of adding water planes to your world in CAW but it is my hope to break it down as easily as possible.
Water planes can create a whole new look to your world, and does not limit you to create lakes only at your current sea level. EA has been using these (i.e. Moonlight Falls, Twinbrook, Bridgeport) so why should we not be able to use them as well. Lets get started………..
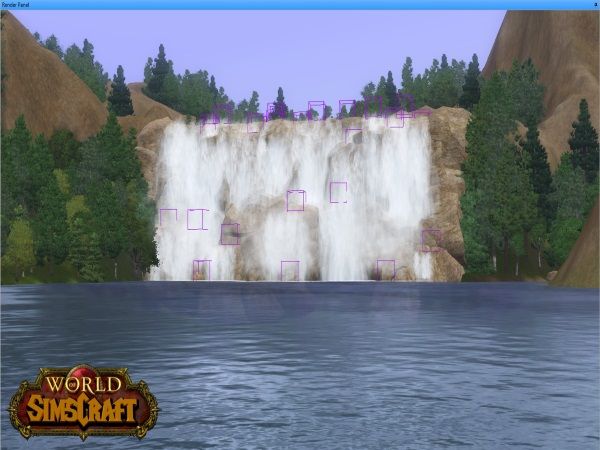
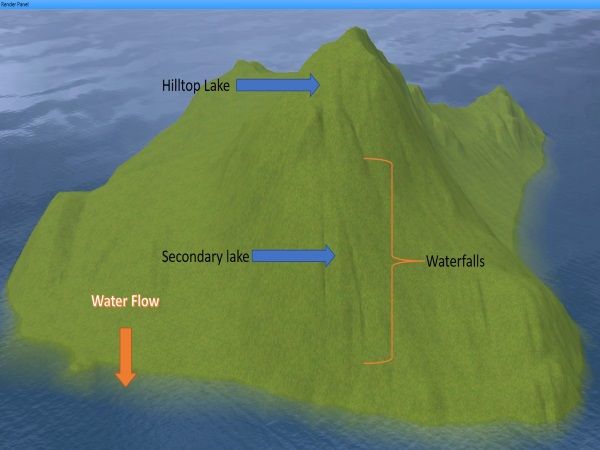
1. The first thing is to decide where you want your lake, stream, river, or whatever water feature you want to add. You may also want to pay attention to the flow of the water already in your world. By looking at the water flow it will help give your lake, and waterfalls a bit more natural flow.
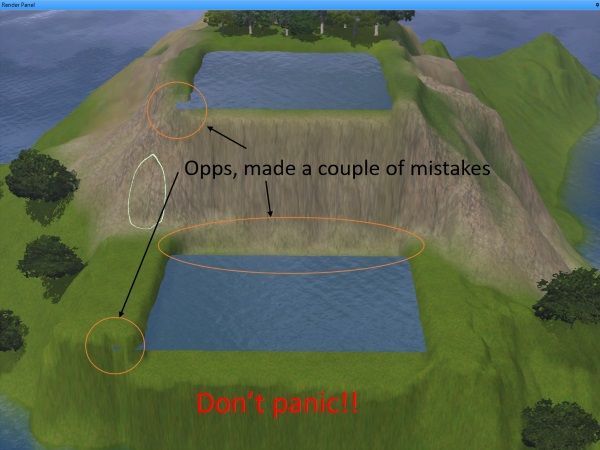
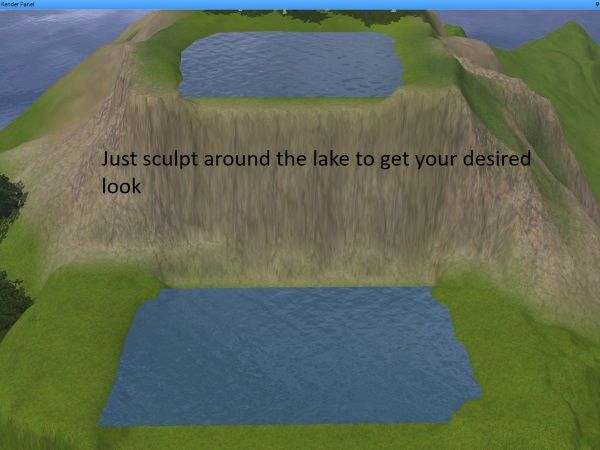
2. Flatten your lake area and make sure to flatten an area larger than the lake you wish to add. You may want to begin any additional terrain sculpting around your lake, but know that once the water plane has been added, you will be doing additional sculpting as well.
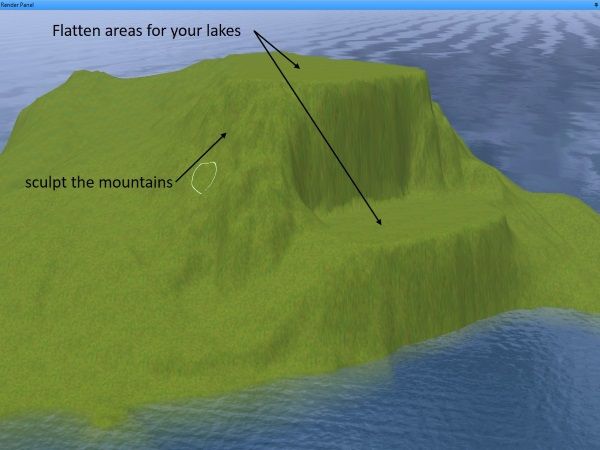
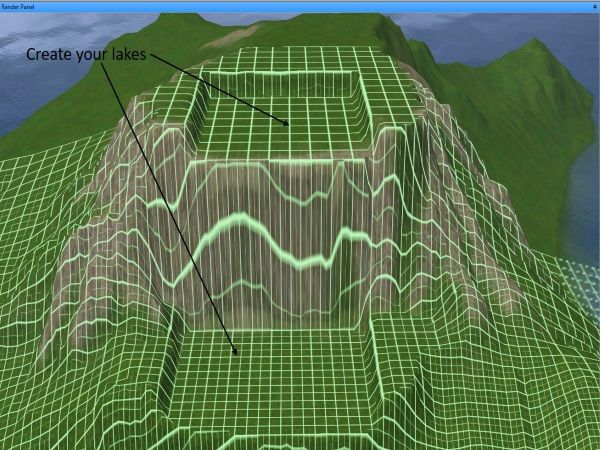
3. Next. You will begin to sculpt your lakes. As you see in the picture these lakes are square, you want to do the same for now, as you will learn, water planes are rectangular and you will need to do some sculpting to create the look you want.
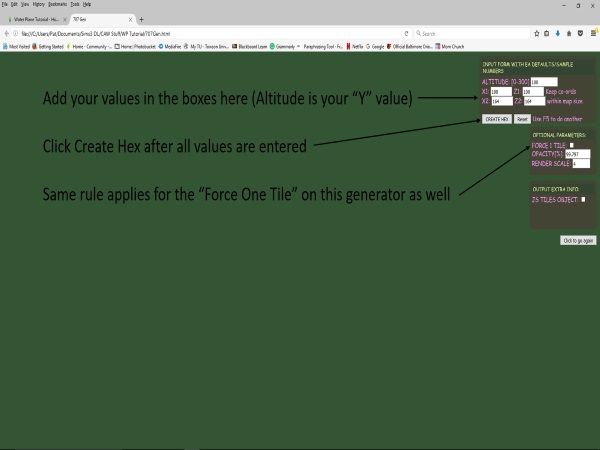
4. Now we start the confusion….LOL! In order to create your square (or rectangular) water plane you need to find three things, two points (for the program to draw the square) and its height relative to sea level. I use the Birch Tree because of its thin point, in order to find these points. A few things to know about this.
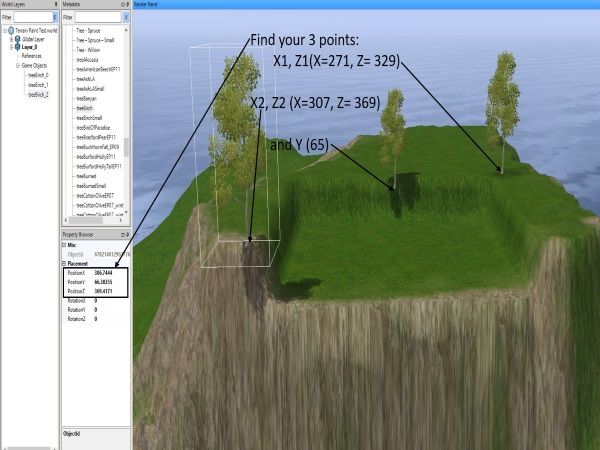
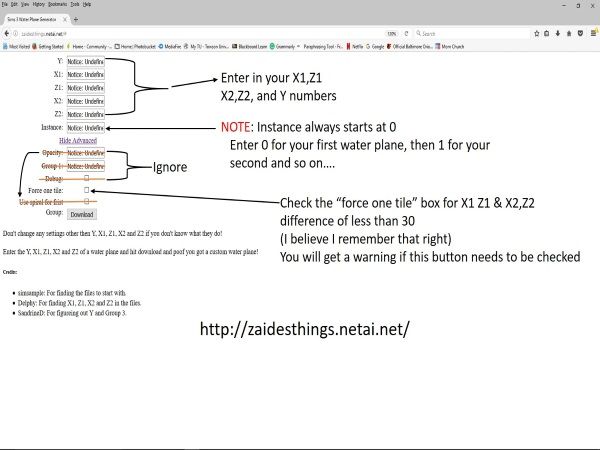
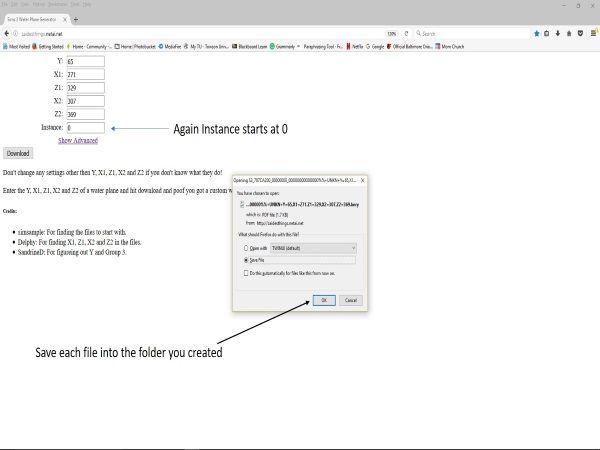
5. First at the left of your world render panel you will see the property browser, this is where you will find the X,Y, and Z, for your water plane. You only need one Y value and I will talk about this a bit later.
6. As I said you need two points to create your plane, by using two birch trees you can find these points easily. But there is a catch, your first points (X1,Z1) must be less than your second point (X2,Z2) as you see in the example pictured.
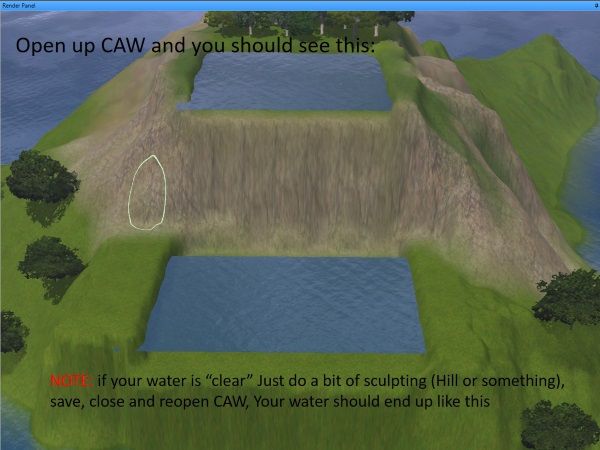
7. I use a third birch tree to help find the Y value, this value is the height (or altitude) above sea level your water plane will be set at. Use this birch tree to set your water plane's depth in the sculpted lake. I generally will set the point a bit lower than what would look good for a natural lake shore to allow for the additional sculpting that we will be doing later. Something to note here, just as the water lightens and darkens when you adjust sea level as it gets closer or farther away from from the ocean bottom, your water plane will do the same, so keep this in mind. The deeper your lake, the darker your water plane and vice versa.
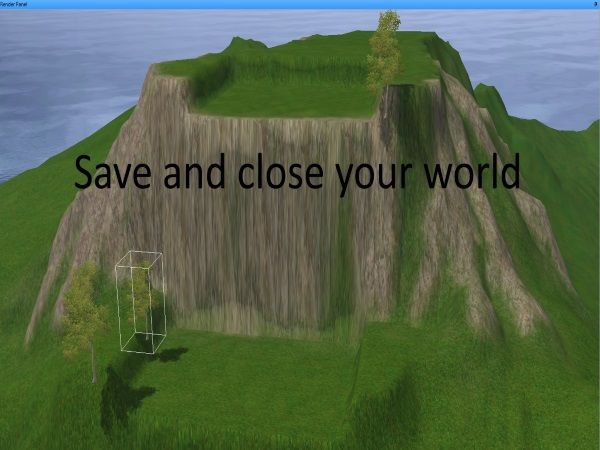
8. Once you have all of your initial sculpting done, your values written down, save and close CAW.
Next Part Two: The Technical Headaches!!!
Part 1: The Initial Steps
Before we begin you will need the following external programs:
So you want to add water up in your mountains to add a waterfall for your Sims to enjoy? This tutorial is designed to help you add lakes, rivers, or other water features at altitudes above your worlds sea level. This tutorial may be a bit confusing as we work in the more technical aspects of adding water planes to your world in CAW but it is my hope to break it down as easily as possible.
Water planes can create a whole new look to your world, and does not limit you to create lakes only at your current sea level. EA has been using these (i.e. Moonlight Falls, Twinbrook, Bridgeport) so why should we not be able to use them as well. Lets get started………..
1. The first thing is to decide where you want your lake, stream, river, or whatever water feature you want to add. You may also want to pay attention to the flow of the water already in your world. By looking at the water flow it will help give your lake, and waterfalls a bit more natural flow.
2. Flatten your lake area and make sure to flatten an area larger than the lake you wish to add. You may want to begin any additional terrain sculpting around your lake, but know that once the water plane has been added, you will be doing additional sculpting as well.
3. Next. You will begin to sculpt your lakes. As you see in the picture these lakes are square, you want to do the same for now, as you will learn, water planes are rectangular and you will need to do some sculpting to create the look you want.
4. Now we start the confusion….LOL! In order to create your square (or rectangular) water plane you need to find three things, two points (for the program to draw the square) and its height relative to sea level. I use the Birch Tree because of its thin point, in order to find these points. A few things to know about this.
5. First at the left of your world render panel you will see the property browser, this is where you will find the X,Y, and Z, for your water plane. You only need one Y value and I will talk about this a bit later.
6. As I said you need two points to create your plane, by using two birch trees you can find these points easily. But there is a catch, your first points (X1,Z1) must be less than your second point (X2,Z2) as you see in the example pictured.
7. I use a third birch tree to help find the Y value, this value is the height (or altitude) above sea level your water plane will be set at. Use this birch tree to set your water plane's depth in the sculpted lake. I generally will set the point a bit lower than what would look good for a natural lake shore to allow for the additional sculpting that we will be doing later. Something to note here, just as the water lightens and darkens when you adjust sea level as it gets closer or farther away from from the ocean bottom, your water plane will do the same, so keep this in mind. The deeper your lake, the darker your water plane and vice versa.
8. Once you have all of your initial sculpting done, your values written down, save and close CAW.
Next Part Two: The Technical Headaches!!!