Forum Discussion
13 years ago
Welcome to Roofing 101: roofing for beginners!
*** If I am not around and you have a question, just add a comment to my status page and I will get back to you....or drop me a line on facebook***
As I work through some of the basics, you can follow along with this lot:
http://www.thesims3.com/assetDetail.html?assetId=5669309
It is a model home village that has several homes in need of roofing and we will discuss all of them in Class 1. If yhou cant load the lot for whatever reason, no worries. There will be plenty of pix in the thread for you to see and you can build a quick shell yourself to give some of these techniques a try.
So...let's get started! The first thing you need to know is that AUTO ROOF is NOT your FRIEND. Bleh! Turn that thing off and leave it off. You can always do way better than auto roof.
Secondly, realize that roofs are not just a way to cover up what is underneath them. Roofs add a lot of interest to your house and can really change the look of a basic house.
Take the basic box house we all start out building:
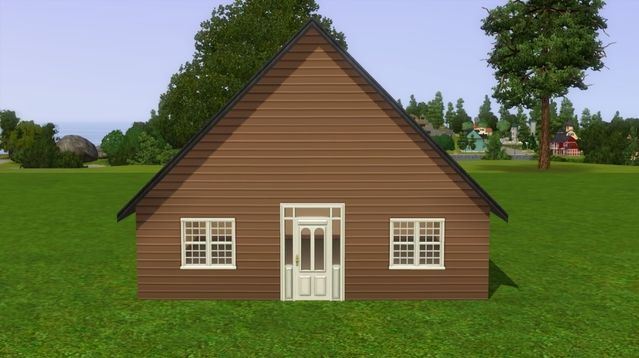
If we left it like that, it kind of looks like a kid's drawing, right? And having the roof go the other way is not much better...it still looks kind of boring and the roof overwhelms the little box it is sitting on, doesnt it?
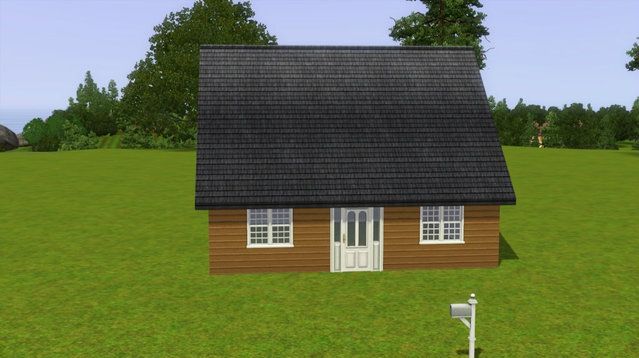
So, dormers and interesting angles are a way we can break up that big hunk of roof and make things interesting. Let's give that a shot. If you downloaded the practice lot, you can use this house to practice adding things to the roof with this house:
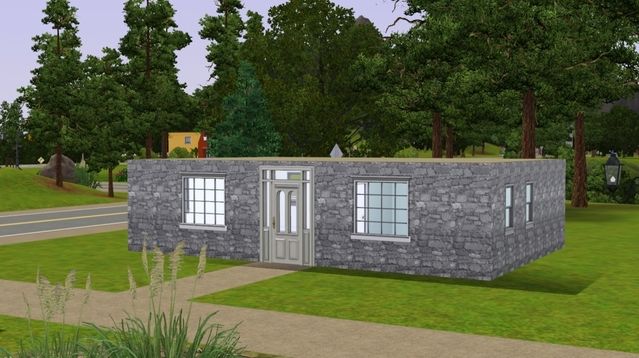
We are going to go ahead and add the basic roof like we had in this picture:

Then, go down a level and add some walls as shown in here:
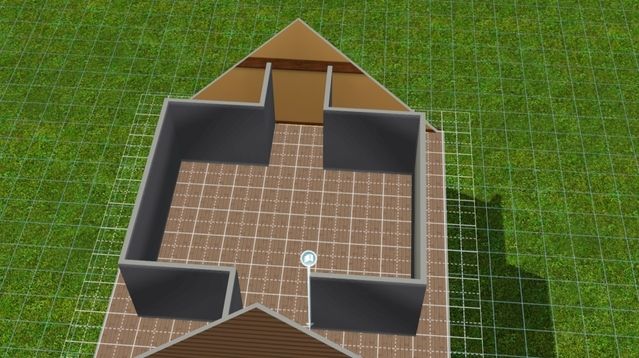
If you are wondering why the walls go in so much at each end, you can go in, make the wall go straight all the way across and you will see why :) We are adding a dormer but we dont want it to overwhelm the roof...so we bring in the walls we want to hide and leave out the parts that will be the dormer. We need balance. A larger dormer would look wrong. Try making it too big and you will see what I mean.
Now we are going to start on one corner and cover the deck with flooring so that we have ceilings if we decide to use that space. It also helps us see where we need roofing.
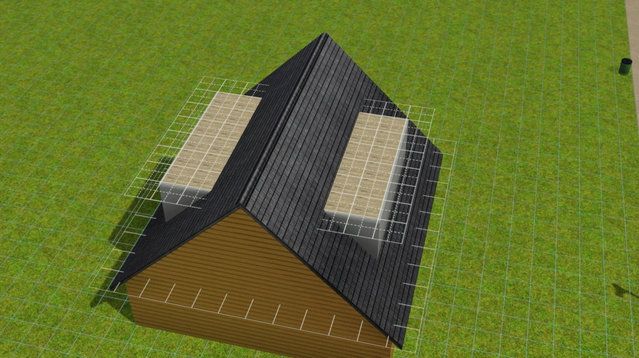
We are going to use the half gable roof...which is a fance way of saying the straight angle roof seen here:
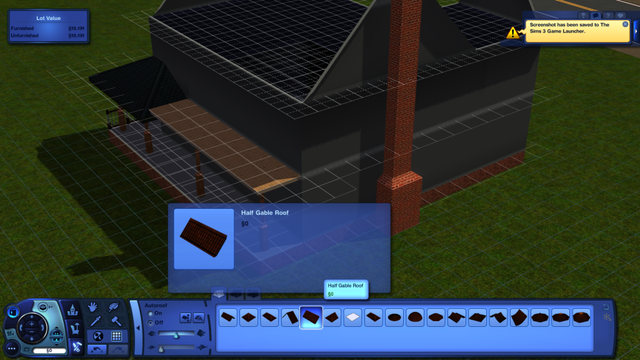
You will need to draw the roof one extra square beyond what you can see in the decking. For instance, if the decking shows 2 squares deep...make sure you draw the roof on 3 squares deep. This is important to get a proper seam.
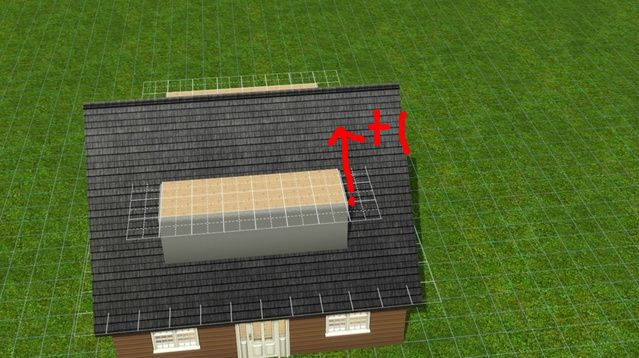
Do it on each side and you should have something that looks like this:
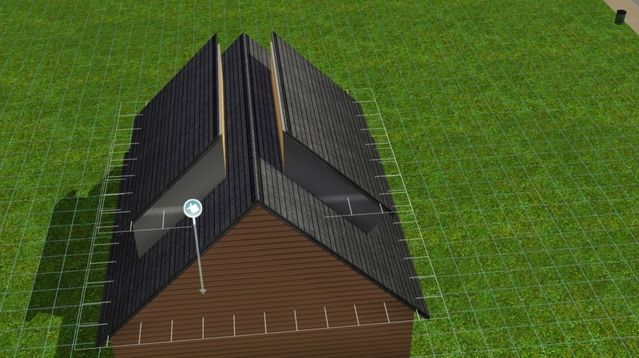
Now use the lower roof tool....the individual roof tool...not the one that lowers all of the roofing at the same time. (I almost always use the individual roof angle tool exclusively because it gives more control and you can mess up things accidentally using the other)

Lower each side until to seams meet nicely.
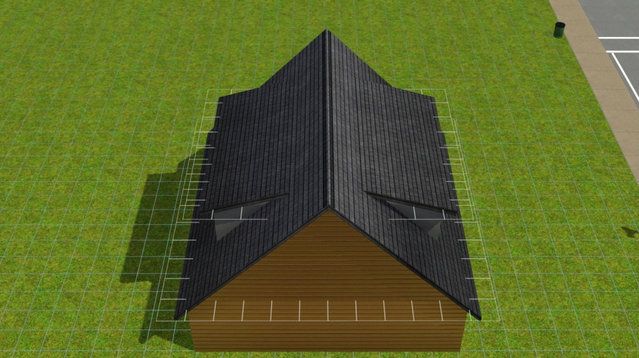
The you can go in and add the siding and find a window that will fit. You should have something like this:
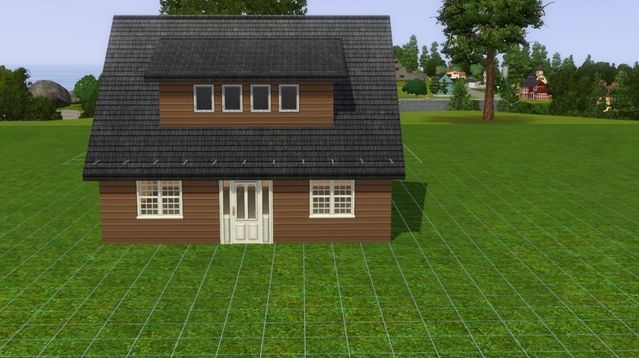
Much better already, yes? We have an interesting shape on our box without having touched the box itself. But we can do a little more if we want. How about a small porch?
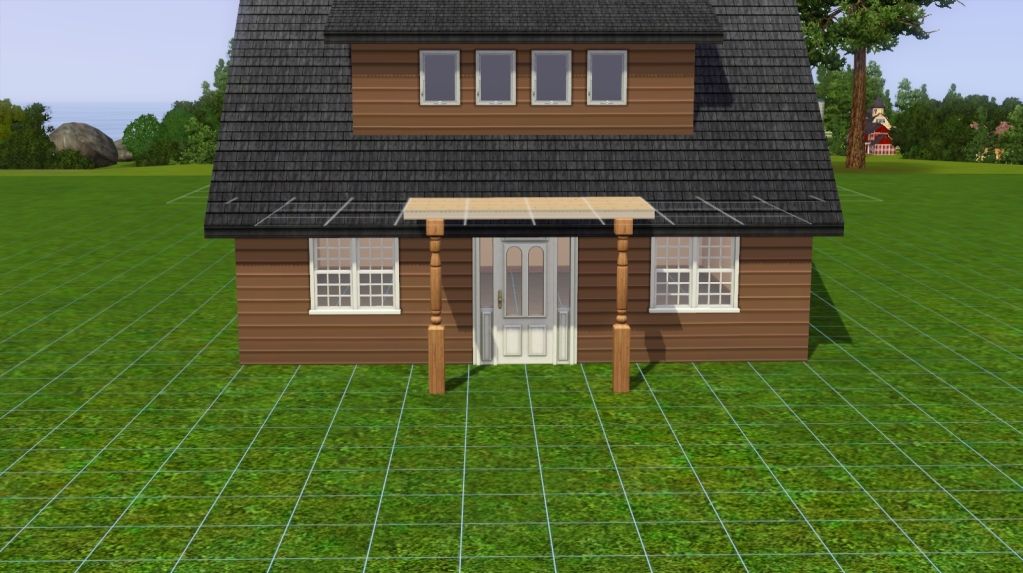
I suggest always adding the decking for a roof before you draw it. It really helps you to see where the roof needs to go and keeps you from over drawing or underdrawing the roofline.
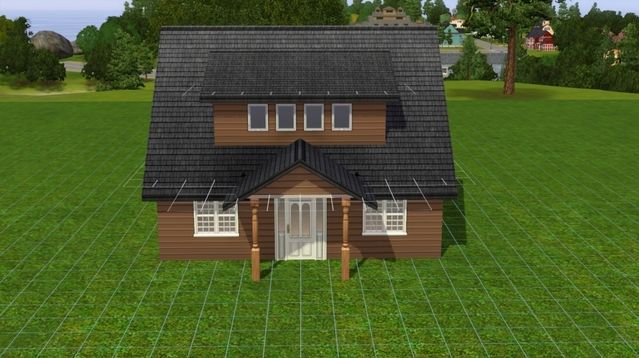
And there we go. We did not change the floorplan of this house one bit...but we added some roofing that gave us some angles and interest to make the plain house more charming. See how roofing can enhance your build? :-)
Going back to our original box...it is important to know that the pitch of a roof is based on the width of what it is covering. What this means is that if a roof is covering a large space, the roof will always lean more as it covers that space.

This means sometimes your roof **leans back** farther than you would like. Sometimes you want the roof to be more upright but cant do that because of the whole width/angle thing.
The solution to that is to break up the roof into smaller sections so you can get a more upright angle on the part you want.
If we put the same roof on the box but in a smaller section, we cn get a more upright angle on the roof like so:
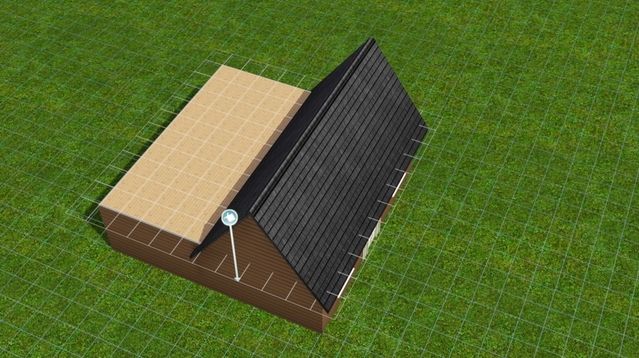
Then we have to cover the rest....we can do it like so:
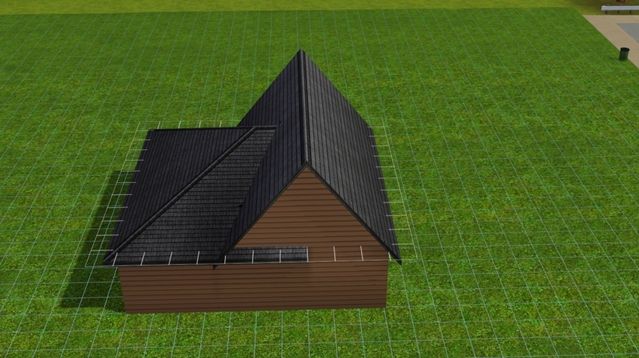
But wait! IF we do that...there is that messy little section on the side where the roof cuts into the wall. I hate that. It looks bad. :evil: We need to do something to fix that, dont we?
This is where roofing can sometimes mean changing your floorplan just a little. Nothing to be concerned about and I do it all the time. In this case, to avoid a harsh cut off of the roofline and to make it look more polished, we are going to want to take in the back section of the walls one square.
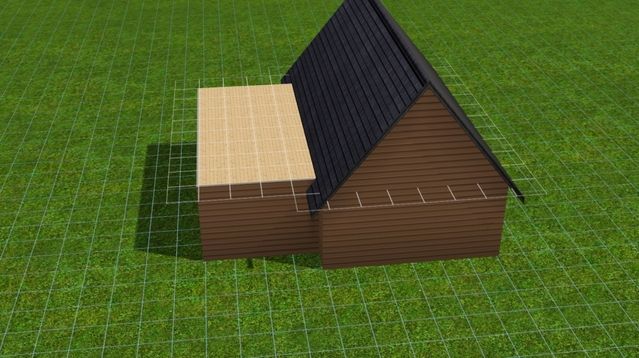
This gives that back roof a nice place to finish that doesnt show:
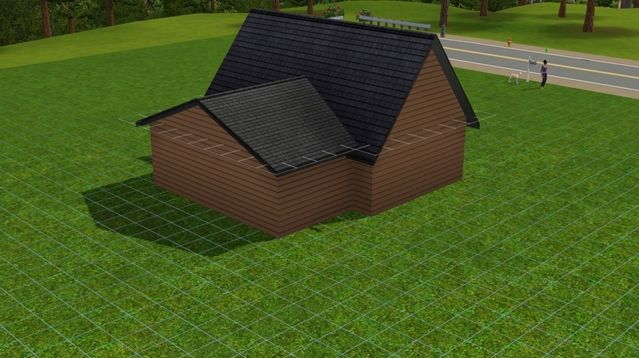
So...there you go! The basics on dealing with your simple box shape. It doesnt have to look simple at all. It can look charming and interesting if you play around with the roofing a bit. Try messing around with the box example in the practice lot ( or build a quick box in your game) and let me know if you have any questions. :D
*** If I am not around and you have a question, just add a comment to my status page and I will get back to you....or drop me a line on facebook***
As I work through some of the basics, you can follow along with this lot:
http://www.thesims3.com/assetDetail.html?assetId=5669309
It is a model home village that has several homes in need of roofing and we will discuss all of them in Class 1. If yhou cant load the lot for whatever reason, no worries. There will be plenty of pix in the thread for you to see and you can build a quick shell yourself to give some of these techniques a try.
So...let's get started! The first thing you need to know is that AUTO ROOF is NOT your FRIEND. Bleh! Turn that thing off and leave it off. You can always do way better than auto roof.
Secondly, realize that roofs are not just a way to cover up what is underneath them. Roofs add a lot of interest to your house and can really change the look of a basic house.
Take the basic box house we all start out building:

If we left it like that, it kind of looks like a kid's drawing, right? And having the roof go the other way is not much better...it still looks kind of boring and the roof overwhelms the little box it is sitting on, doesnt it?

So, dormers and interesting angles are a way we can break up that big hunk of roof and make things interesting. Let's give that a shot. If you downloaded the practice lot, you can use this house to practice adding things to the roof with this house:

We are going to go ahead and add the basic roof like we had in this picture:

Then, go down a level and add some walls as shown in here:

If you are wondering why the walls go in so much at each end, you can go in, make the wall go straight all the way across and you will see why :) We are adding a dormer but we dont want it to overwhelm the roof...so we bring in the walls we want to hide and leave out the parts that will be the dormer. We need balance. A larger dormer would look wrong. Try making it too big and you will see what I mean.
Now we are going to start on one corner and cover the deck with flooring so that we have ceilings if we decide to use that space. It also helps us see where we need roofing.

We are going to use the half gable roof...which is a fance way of saying the straight angle roof seen here:

You will need to draw the roof one extra square beyond what you can see in the decking. For instance, if the decking shows 2 squares deep...make sure you draw the roof on 3 squares deep. This is important to get a proper seam.

Do it on each side and you should have something that looks like this:

Now use the lower roof tool....the individual roof tool...not the one that lowers all of the roofing at the same time. (I almost always use the individual roof angle tool exclusively because it gives more control and you can mess up things accidentally using the other)

Lower each side until to seams meet nicely.

The you can go in and add the siding and find a window that will fit. You should have something like this:

Much better already, yes? We have an interesting shape on our box without having touched the box itself. But we can do a little more if we want. How about a small porch?

I suggest always adding the decking for a roof before you draw it. It really helps you to see where the roof needs to go and keeps you from over drawing or underdrawing the roofline.

And there we go. We did not change the floorplan of this house one bit...but we added some roofing that gave us some angles and interest to make the plain house more charming. See how roofing can enhance your build? :-)
Going back to our original box...it is important to know that the pitch of a roof is based on the width of what it is covering. What this means is that if a roof is covering a large space, the roof will always lean more as it covers that space.

This means sometimes your roof **leans back** farther than you would like. Sometimes you want the roof to be more upright but cant do that because of the whole width/angle thing.
The solution to that is to break up the roof into smaller sections so you can get a more upright angle on the part you want.
If we put the same roof on the box but in a smaller section, we cn get a more upright angle on the roof like so:

Then we have to cover the rest....we can do it like so:

But wait! IF we do that...there is that messy little section on the side where the roof cuts into the wall. I hate that. It looks bad. :evil: We need to do something to fix that, dont we?
This is where roofing can sometimes mean changing your floorplan just a little. Nothing to be concerned about and I do it all the time. In this case, to avoid a harsh cut off of the roofline and to make it look more polished, we are going to want to take in the back section of the walls one square.

This gives that back roof a nice place to finish that doesnt show:

So...there you go! The basics on dealing with your simple box shape. It doesnt have to look simple at all. It can look charming and interesting if you play around with the roofing a bit. Try messing around with the box example in the practice lot ( or build a quick box in your game) and let me know if you have any questions. :D
About The Sims 3 General Discussion
Connect with fellow Simmers and share your experiences in The Sims 3 official community.6,490 PostsLatest Activity: 4 hours ago
Related Posts
Recent Discussions
Sim Store Question
Solved4 hours ago- 4 hours ago