Forum Discussion
13 years ago
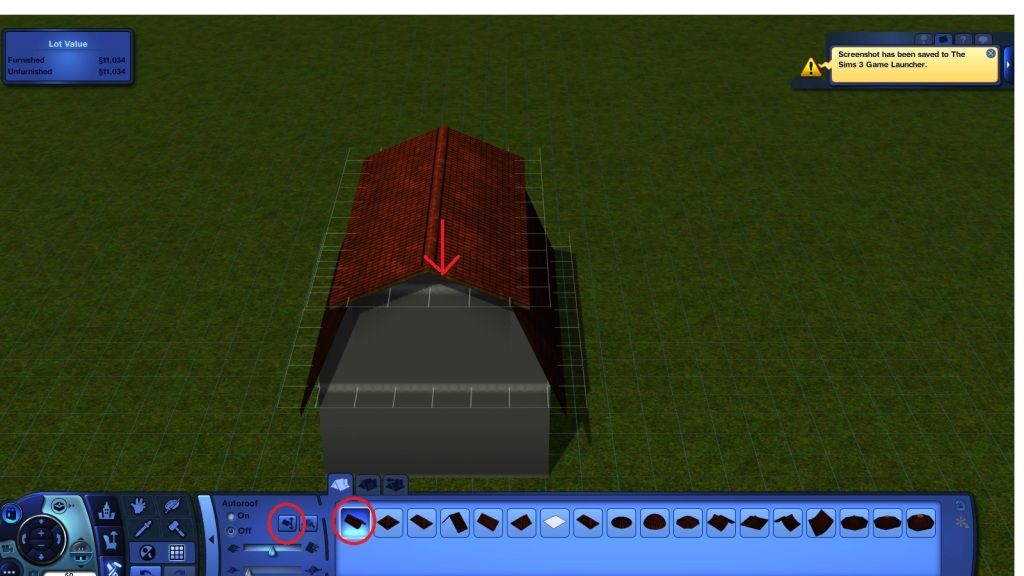
The next style we are going to tackle is the barn style. This is a great style for adding softness to your build and it does not have to be used for rural or barn buildings at all. Barn roofing looks like this:
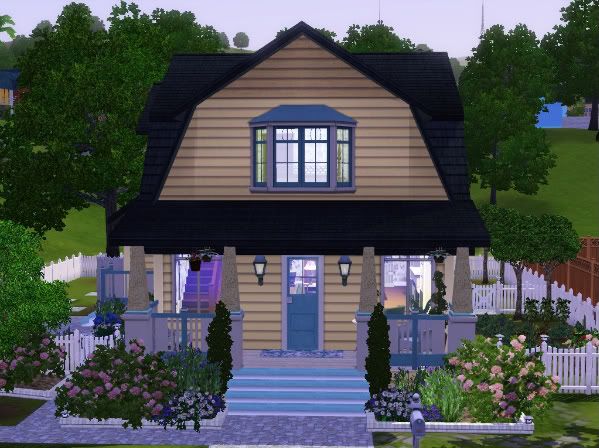
And here is how it looks when you use it on a house:
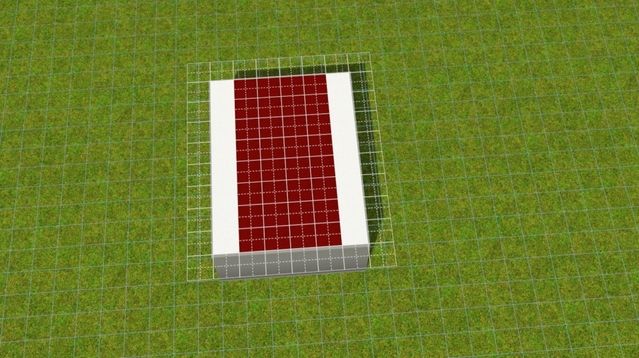
This is very easy to accomplish. We will be using guide walls to construct this roof. First, cover the surface you want to roof with your decking so you can see what you are working with. For the barn style, we will draw guide walls one sqare in on each "long side" where you want the slanted roof:
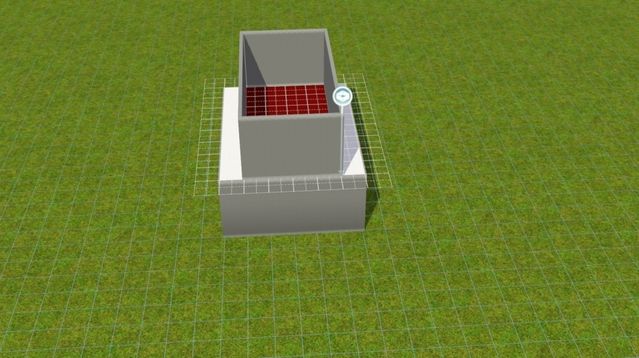
Draw in your gude walls like so:
Now, using the half gable ( straight wall )
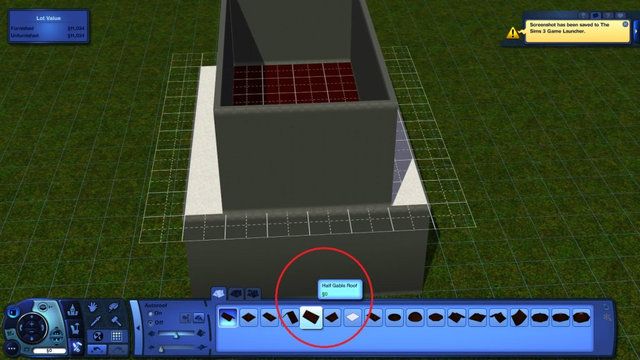
...we are going to add a roof like so:
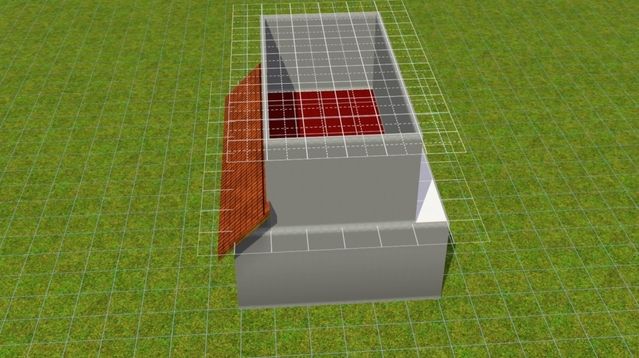
We are going to use the individual roof angle tool to raise that roof to just **under** the edge of the wall. You should see a little bit of the wall sticking out over the top.
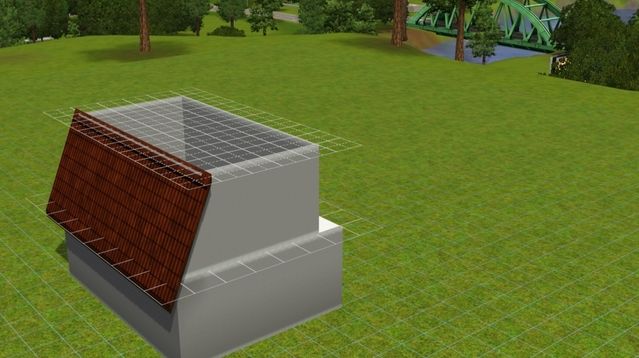
The reason for this is that when we had the top section, that little wall bit will be covered..but if you raise the roof to completely cover the wall, when you add the top roof you might see the side roof sticking out over the top and that doesnt look good:
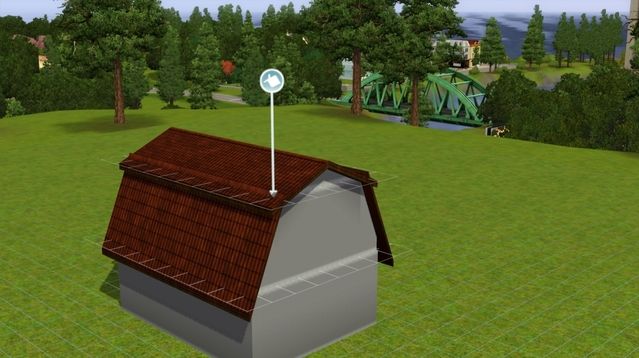
So bring the roof just almost to the top of the wall and then do the same on the other side
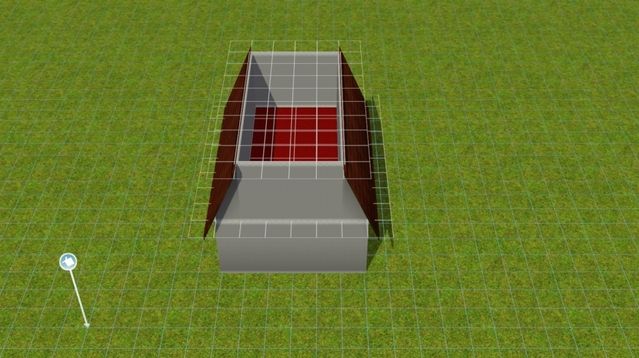
Now using the gable roof add the top. Use the individual roof angle tool to flatten out the top until you get an angle that you like:
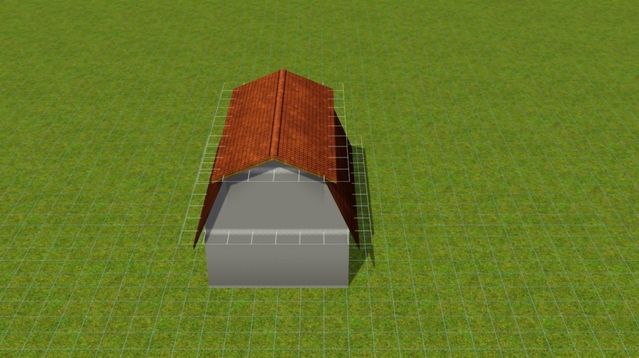
So...that is the basic barn roof. You can incorporate this roof into a build without making the whole thing barn style. Just follow the same basic steps. On this example, we have one section that is not barn...so we add the decking for the part we want to "barn out" like so:
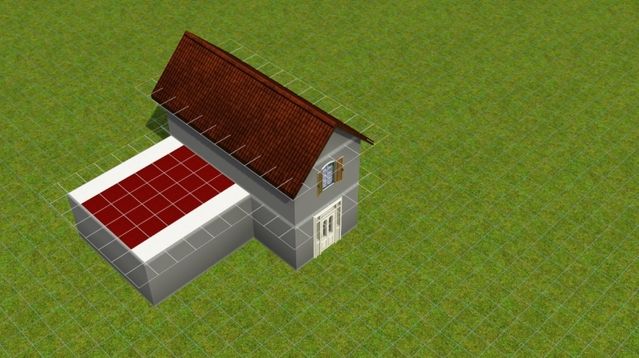
And then we draw our guide walls the same way:
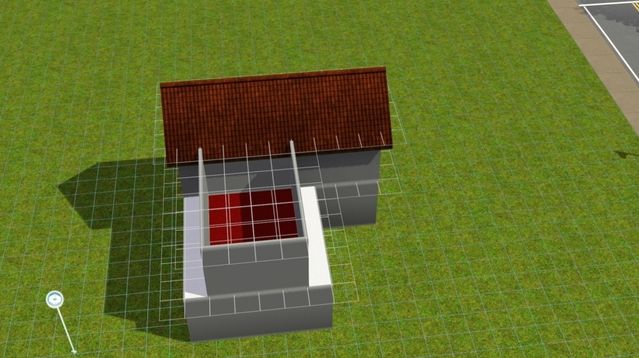
And complete it the same way:
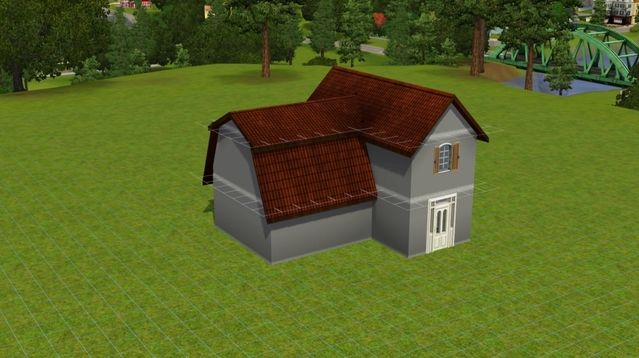
We can then go in and add some dormers if we want to dress it up even more:
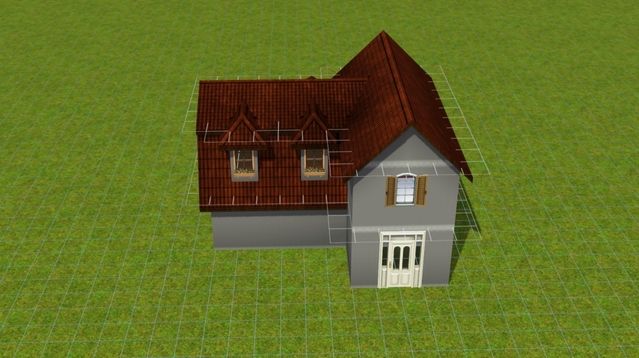
Not bad? We need to check out our roof from all of the angles and make sure we dont have any messy spots. And here we see that we do :evil: so we have to fix that!
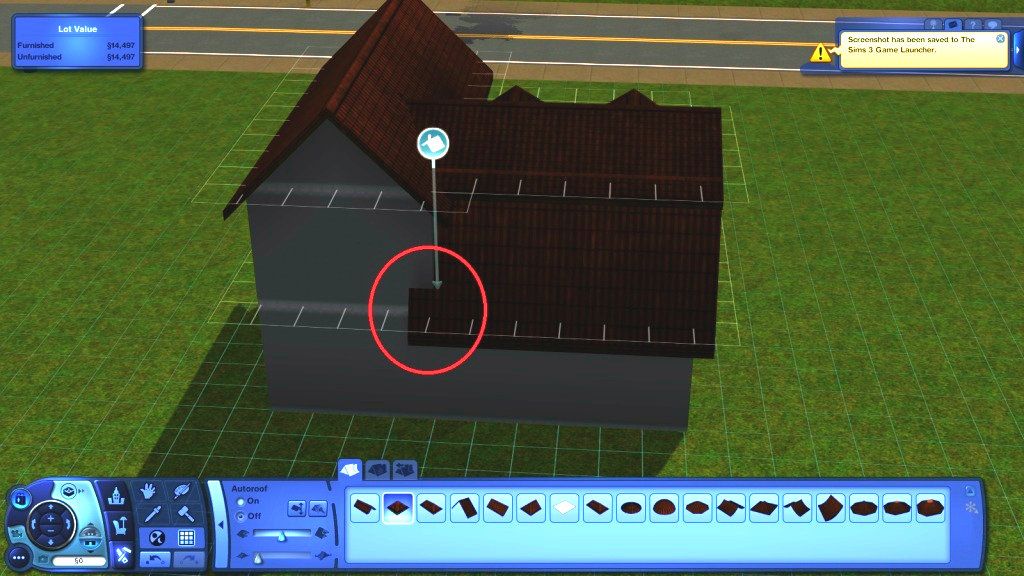
This is easily solved by bringing out the wall a sqaure or two. That gives the barn roof a place to end that doesnt show on the outside.
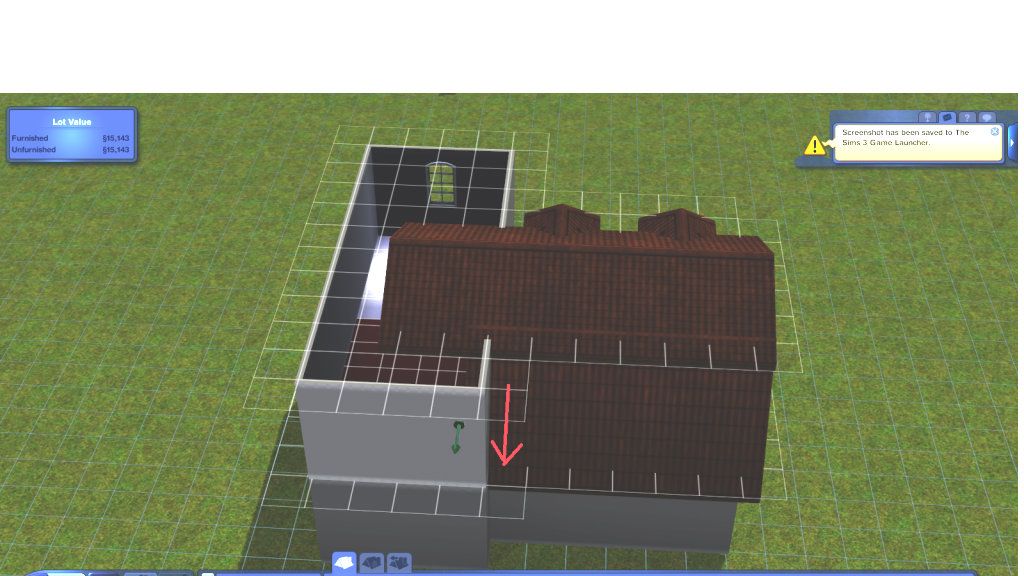
Ready to give this a try yourself? Find this house in the hands on lot and try adding barn style roofing to it. Dont be afraid to change it up and add dormers, or to make only part of it a barn. The idea is to try it and play with it. As you go along, if you have any questions, let me know. :D
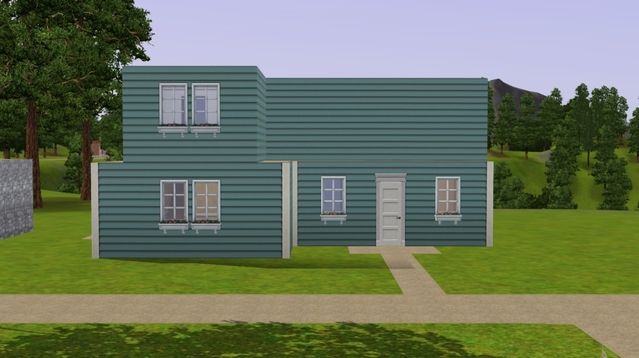
Another style that can add to your build and is made in a similar manner is the mansard. If you are thinking" What the heck is a mansard??" no worries! Here is an example:

Yes...there is a mansard style in the roof tools...but if you play with it, you will see it doesnt give you the more "upright" angle that a true mansard has and the flat part is replatively small...which makes adding the decorative fencing at the top problematic. Since it is pretty easy to make your own mansard, forget about the tool and do this instead:
Just like with the barn style, we are going to make wall guides. Place decking on the surface you want to cover and then we are going to go one square in **all the way around** and draw in the guide walls. Like this:
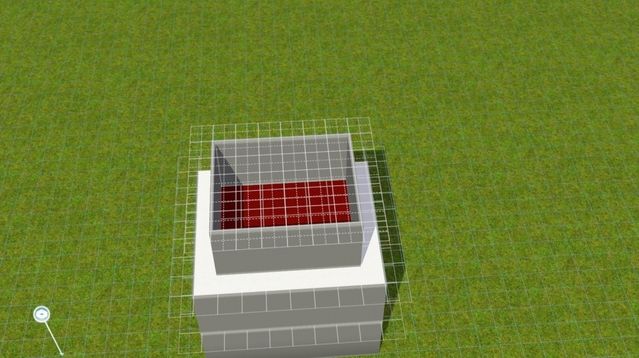
Now we are going to use the hipped roof:
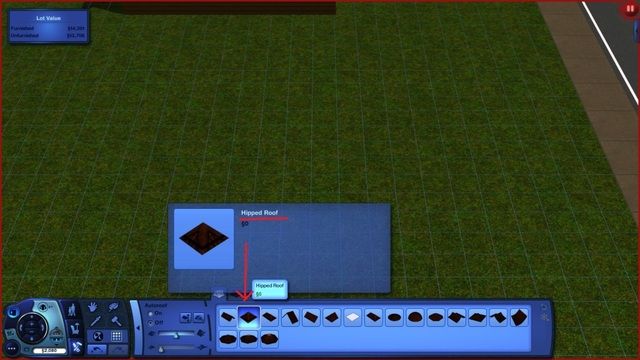
Draw the hipped roof 2 squares wide so that it is exactly **centered** on the guide wall. The peak of the roof should be lining up with the wall:
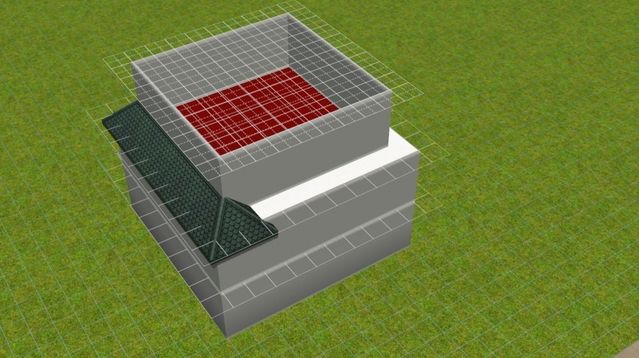
Then, use the raise all roofing tool. This is one of those times where using the "all roof" tool makes things easier. Just remember that you will have to be careful if you add other types of roof after the mansard to the same build. Once the mansard is in place, only use the individual tool so that you dont ruin your work.
Using the raise all roof tool, raise the roof until it comes to the top of the wall. Unlike the barn, make sure the wall is completely covered...no wall sticking out this time.
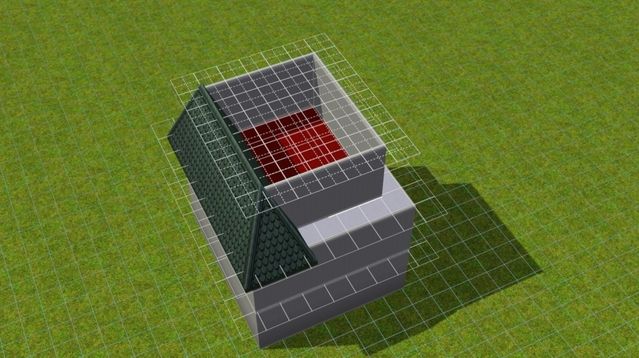
Work your way around and add the rest of the roof sections. Make sure you start drawing at the exact corner. If you dont start at the full corner, you will see gaps like this:
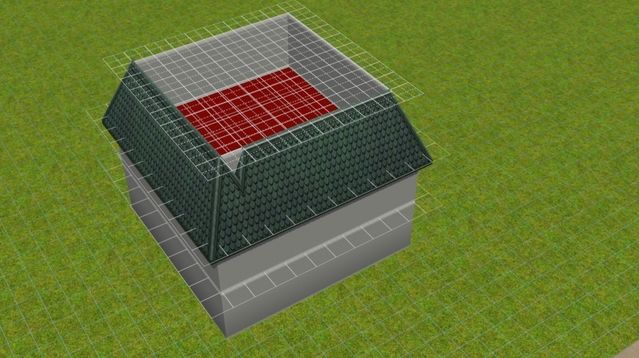
If that happens, demolish that section and redraw it starting a little farther out. If you do it right it will all match up nicely like so:
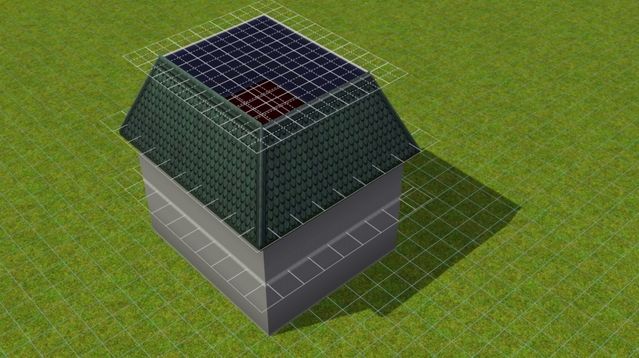
Work your way around and add all of the roof sections. Then select a floor tile and cover the top....I tend to use the basic white carpet because it colors well and doesnt have an obvious texture. For a polished look, color the floor as closely to the roof you selected as possible.
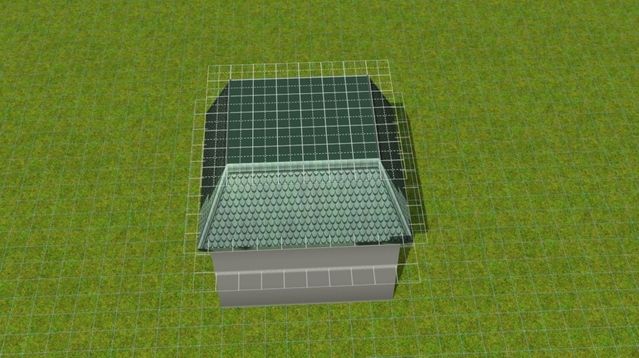
Now you can add your decorative fencing along the top. Keep in mind the scale of your house and the look you want. Some fencing is small and doesnt show much....which you might prefer:
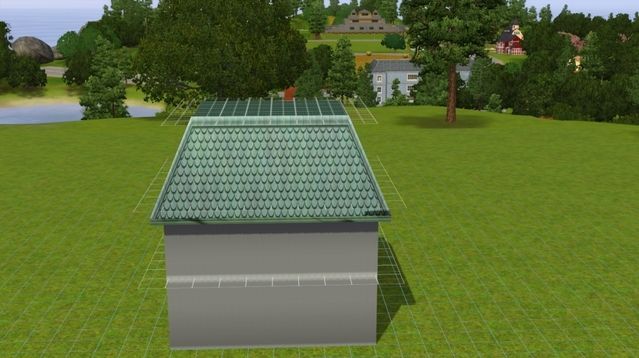
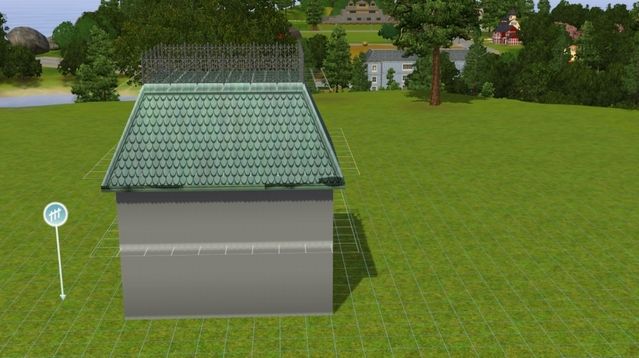
And other fencing is taller and makes a more dramatic statement. It is up to you completely:
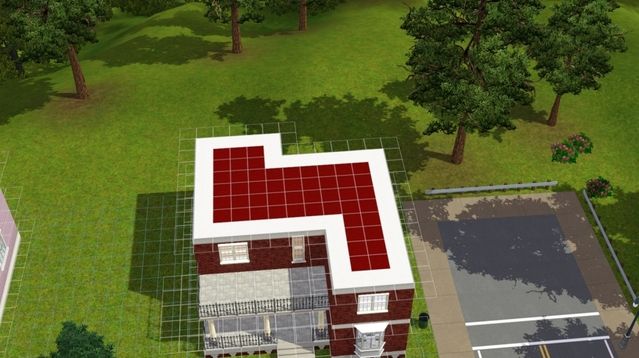
The house does not have to be a square to use this roof. You can do it on any straight sided shape...just follow the same basic steps. Put your decking down and add the guide walls one square in all the way around and follow the smae steps:
As with the barn roof, this style also lends itself well to dormers. Just draw in the walls like so:
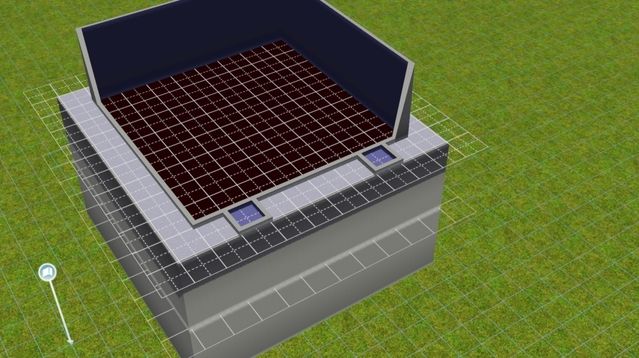
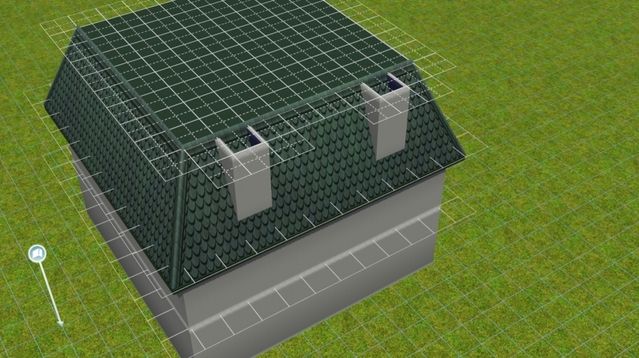
You may notice when you add the roofing to the dormers that the roof sticks out a bit on the flat surface of the rest of the roof. Lowering the angle of the dormer roof softens that a bit...and the fencing will hide it a little too...but that will happen and there is nothing we can do to make it go away altogether.
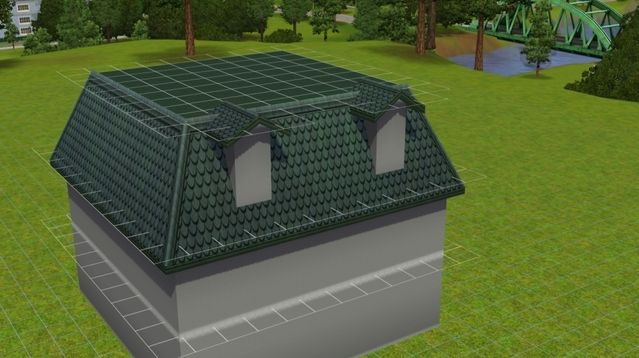
Think you are ready to handle a mansard roof? Find this house in the hands on lot and see what you can do. I did add the guide walls for you, but I didnt make it completely easy....it is a complicated shape, but just stick to the steps. If you feel like a real challenge, demolish those guide walls and do it all on your own! :D Let me know if you have any questions!

And here is how it looks when you use it on a house:

This is very easy to accomplish. We will be using guide walls to construct this roof. First, cover the surface you want to roof with your decking so you can see what you are working with. For the barn style, we will draw guide walls one sqare in on each "long side" where you want the slanted roof:

Draw in your gude walls like so:

Now, using the half gable ( straight wall )

...we are going to add a roof like so:

We are going to use the individual roof angle tool to raise that roof to just **under** the edge of the wall. You should see a little bit of the wall sticking out over the top.

The reason for this is that when we had the top section, that little wall bit will be covered..but if you raise the roof to completely cover the wall, when you add the top roof you might see the side roof sticking out over the top and that doesnt look good:

So bring the roof just almost to the top of the wall and then do the same on the other side

Now using the gable roof add the top. Use the individual roof angle tool to flatten out the top until you get an angle that you like:

So...that is the basic barn roof. You can incorporate this roof into a build without making the whole thing barn style. Just follow the same basic steps. On this example, we have one section that is not barn...so we add the decking for the part we want to "barn out" like so:

And then we draw our guide walls the same way:

And complete it the same way:

We can then go in and add some dormers if we want to dress it up even more:

Not bad? We need to check out our roof from all of the angles and make sure we dont have any messy spots. And here we see that we do :evil: so we have to fix that!

This is easily solved by bringing out the wall a sqaure or two. That gives the barn roof a place to end that doesnt show on the outside.

Ready to give this a try yourself? Find this house in the hands on lot and try adding barn style roofing to it. Dont be afraid to change it up and add dormers, or to make only part of it a barn. The idea is to try it and play with it. As you go along, if you have any questions, let me know. :D

Another style that can add to your build and is made in a similar manner is the mansard. If you are thinking" What the heck is a mansard??" no worries! Here is an example:

Yes...there is a mansard style in the roof tools...but if you play with it, you will see it doesnt give you the more "upright" angle that a true mansard has and the flat part is replatively small...which makes adding the decorative fencing at the top problematic. Since it is pretty easy to make your own mansard, forget about the tool and do this instead:
Just like with the barn style, we are going to make wall guides. Place decking on the surface you want to cover and then we are going to go one square in **all the way around** and draw in the guide walls. Like this:

Now we are going to use the hipped roof:

Draw the hipped roof 2 squares wide so that it is exactly **centered** on the guide wall. The peak of the roof should be lining up with the wall:

Then, use the raise all roofing tool. This is one of those times where using the "all roof" tool makes things easier. Just remember that you will have to be careful if you add other types of roof after the mansard to the same build. Once the mansard is in place, only use the individual tool so that you dont ruin your work.
Using the raise all roof tool, raise the roof until it comes to the top of the wall. Unlike the barn, make sure the wall is completely covered...no wall sticking out this time.

Work your way around and add the rest of the roof sections. Make sure you start drawing at the exact corner. If you dont start at the full corner, you will see gaps like this:

If that happens, demolish that section and redraw it starting a little farther out. If you do it right it will all match up nicely like so:

Work your way around and add all of the roof sections. Then select a floor tile and cover the top....I tend to use the basic white carpet because it colors well and doesnt have an obvious texture. For a polished look, color the floor as closely to the roof you selected as possible.

Now you can add your decorative fencing along the top. Keep in mind the scale of your house and the look you want. Some fencing is small and doesnt show much....which you might prefer:

And other fencing is taller and makes a more dramatic statement. It is up to you completely:

The house does not have to be a square to use this roof. You can do it on any straight sided shape...just follow the same basic steps. Put your decking down and add the guide walls one square in all the way around and follow the smae steps:

As with the barn roof, this style also lends itself well to dormers. Just draw in the walls like so:


You may notice when you add the roofing to the dormers that the roof sticks out a bit on the flat surface of the rest of the roof. Lowering the angle of the dormer roof softens that a bit...and the fencing will hide it a little too...but that will happen and there is nothing we can do to make it go away altogether.

Think you are ready to handle a mansard roof? Find this house in the hands on lot and see what you can do. I did add the guide walls for you, but I didnt make it completely easy....it is a complicated shape, but just stick to the steps. If you feel like a real challenge, demolish those guide walls and do it all on your own! :D Let me know if you have any questions!
About The Sims 3 General Discussion
Connect with fellow Simmers and share your experiences in The Sims 3 official community.6,490 PostsLatest Activity: 5 hours ago
Related Posts
Recent Discussions
Sim Store Question
Solved4 hours ago- 5 hours ago