Forum Discussion
13 years ago
Ok! Now that we are all warmed up...let's try something a little more complicated.
Most of the houses we build are not just simple boxes, are they? In fact, we dont WANT them to be boxes because the more angles and variety on the shape, the more interesting the house looks. But that can present a problem all of its own. What do you do when you make a great floorplan and then you have to roof a very irregular shape?
How about something like this? Intimidating?
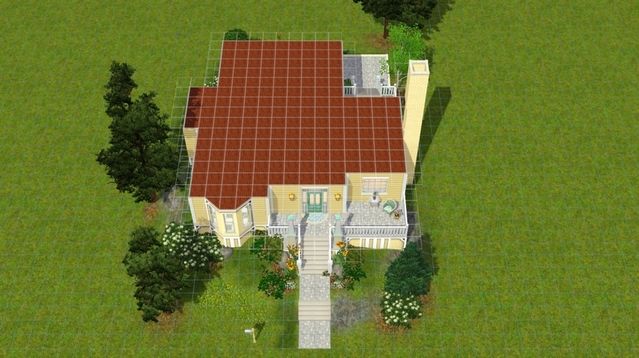
The very first thing to do is to put on the decking ( as I have done) so you can see what you are working with. Then find the biggest square/rectangle of roofing that touches all four sides if possible. It is not always possible. In the example...we can see a big hunk here:
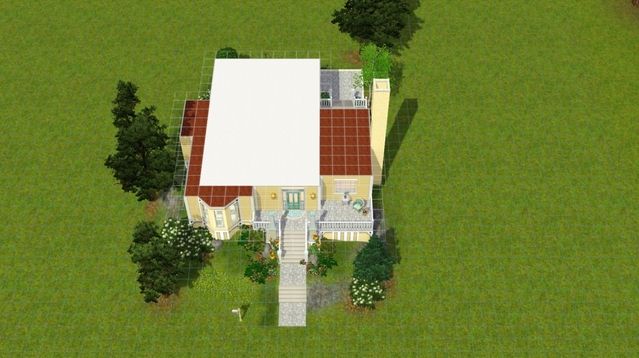
but look at the left side there....we have a one square wide little strip that is not covered. That is not going to work well. Lets try another big hunk instead:
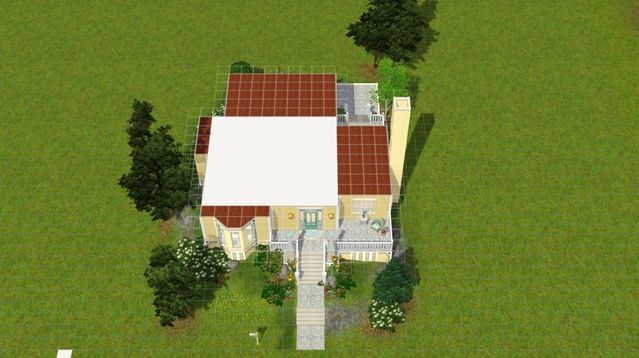
This works because even though there are bits on the sides, they are large enough to cover well and we have the main body of the house covered in one section.
So lets go ahead and cover that section.
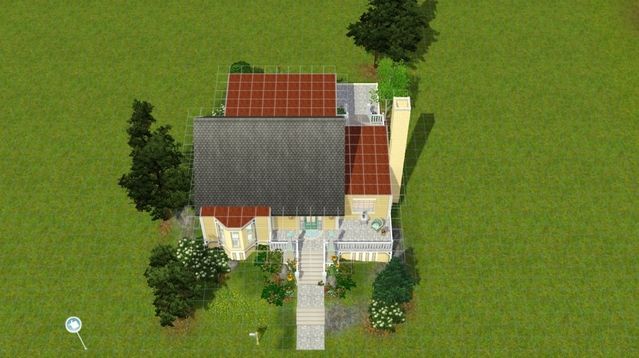
Now we are going to slowly work our way around the house and deal with each section as it comes up. Remember that the leftover parts DONT have to be covered in a single section at all. We might have to use multiple parts. Lets start at the front. We have two different shapes here so we will need two different bits to cover it.

Lets do the straight part first like so:
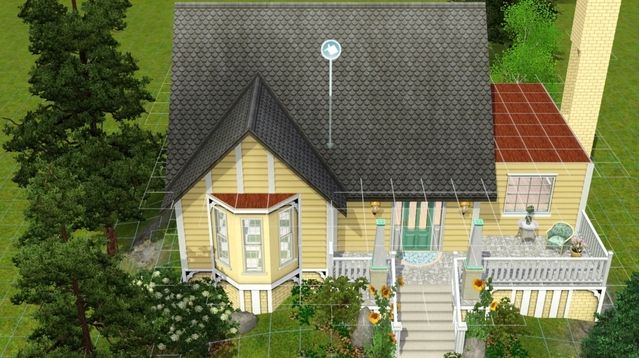
And since the bit that is leftover is curvy...how about a curvy roof to match?
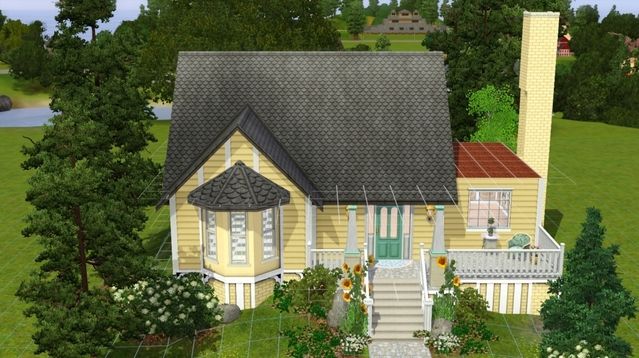
If you are asking yourself, does it have to be curvy? I show you this picture by way of saying..yes, it does! :D
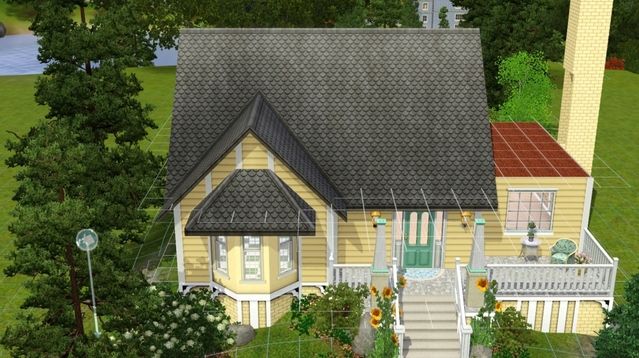
Now...back to the curvy roof. We want to look at the proportions and make sure it looks nice. Right now, the curved part is a bit cramped looking in the gable, isnt it?

If we raise the angle of the roof behind it we can give it more room and it will look nicer:
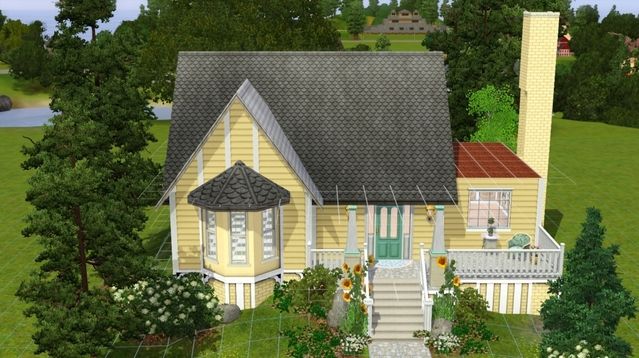
Do you see the difference?
Now that we have that part taken care of, let's move around to the next part. Wait a minute! Whats this?
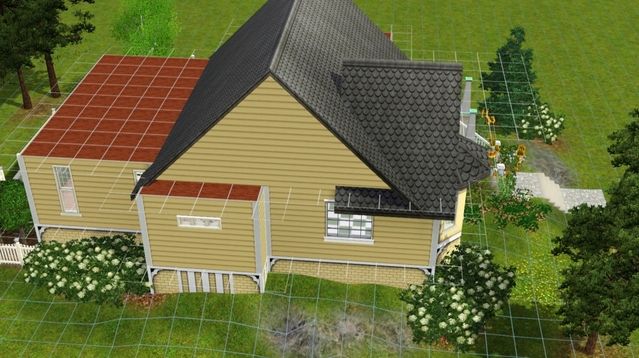
We have an unfinished line along the side, dont we? When we made that section we didnt bring it far enough back. This is why it is good to look at things from every angle. Let's fix that!
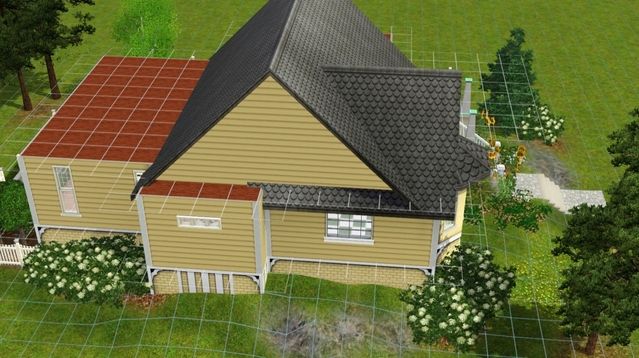
Much better! And then we can cover that little bit sticking out as well:

We can cover this back bit fairly easily in one big hunk as well:
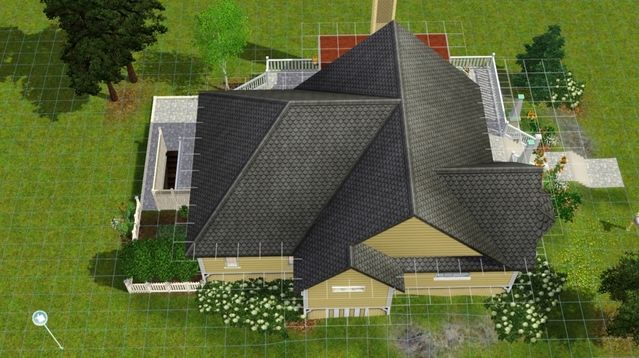
But what is this??? The angle of the back section doesnt match the first main section so there is a bit of a lip showing. Messy. :evil: But that is what porches are for!
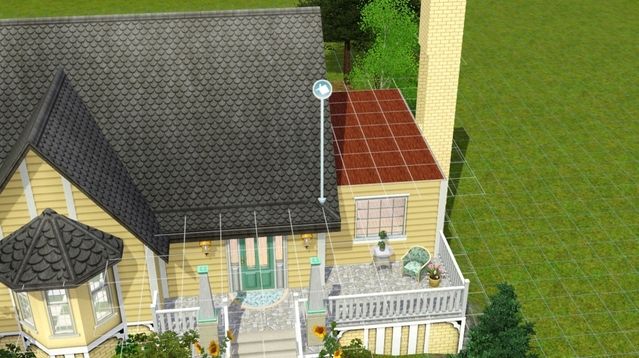
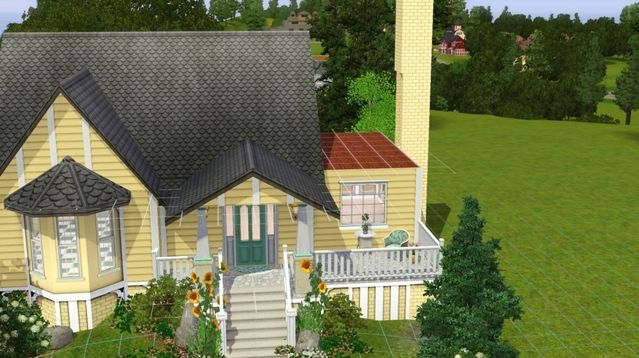
Now that is hidden! :-)
Lets move to that next section on the right:
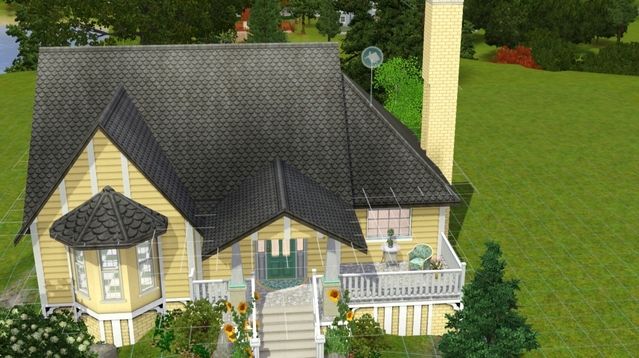
This roof seems like it might be a good choice, but looking at it in place, it doesnt seem to go well with the main ( first) roof section at all, does it? Let's try something else?
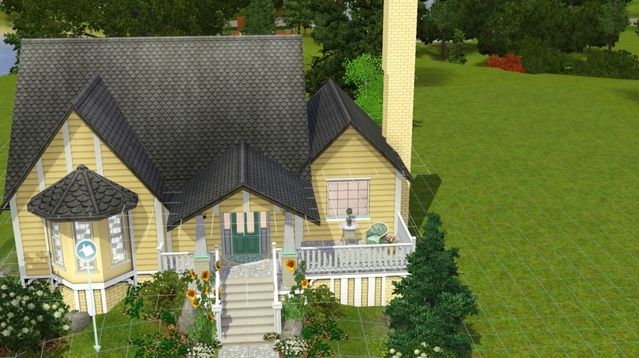
Yeah...that really doesnt work either does it? I show you this to demonstrate how sometimes you have to try several different things and just see how it feels and looks before you find one that works. When you find one that you think is right, you will know it. Let's try again:
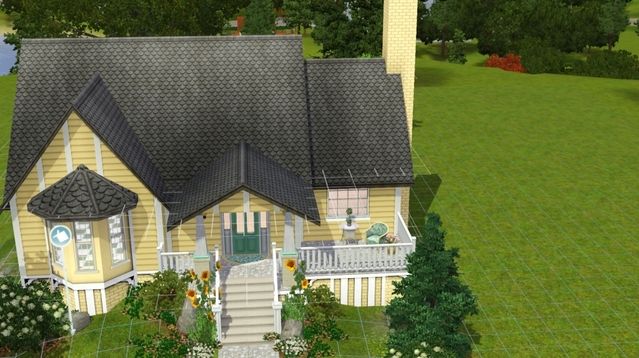
I like this one because it echos the shape of the main section, still joins that part to the house and is a smoother transition. Does that make sense?
Now we have the little sections done, we have to look at the house as a whole. Before, we were looking at each section...but now we want to look at it as a single thing and make sure our proportions are pleasing. Doing that, I thought a dormer over the front porch would add some interest and balance things out. But....looking at it again...I see way too many peaks in the front. It makes it sharp looking. We want to soften out one of those peaks
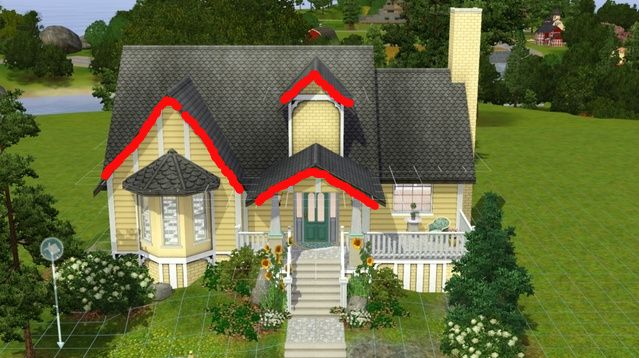
How about this instead?
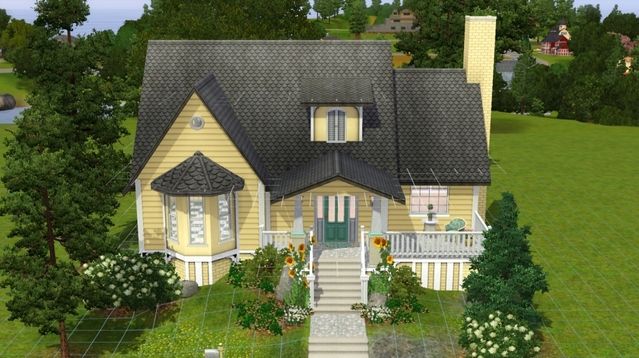
Now we have good variety and no one particular shape is overtaking everything else. It has balance.
Find this house in the practice lot:
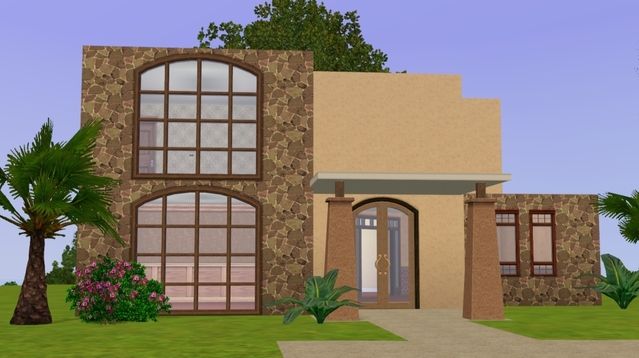
It is not as complicated as the example I just demonstrated but I want you to practice bringing a bunch of different shapes together. Follow the same steps and remember to look for unfinished edges and for the overall shape. I also want you to consider the style of the house. Sharply peaked gables worked on that yellow house because that was a cottage. Will that work on this house? It as a different feel entirely. How will you accomodate that? Work around the house and see whay you can do. Ask me if you hit a rough spot.
***I am going to stop here for today because I dont want to flood you with too much info. We still have wrap around porches to cover and that can take a while all by itself, so that is where we will start next saturday.
Also...if you have a personal project that is giving you a hard time, be sure to load it saturday so I can download it and help you work through it.
The Final lesson will be Victorians in all of their hair pulling frustrating glory! :D
Most of the houses we build are not just simple boxes, are they? In fact, we dont WANT them to be boxes because the more angles and variety on the shape, the more interesting the house looks. But that can present a problem all of its own. What do you do when you make a great floorplan and then you have to roof a very irregular shape?
How about something like this? Intimidating?

The very first thing to do is to put on the decking ( as I have done) so you can see what you are working with. Then find the biggest square/rectangle of roofing that touches all four sides if possible. It is not always possible. In the example...we can see a big hunk here:

but look at the left side there....we have a one square wide little strip that is not covered. That is not going to work well. Lets try another big hunk instead:

This works because even though there are bits on the sides, they are large enough to cover well and we have the main body of the house covered in one section.
So lets go ahead and cover that section.

Now we are going to slowly work our way around the house and deal with each section as it comes up. Remember that the leftover parts DONT have to be covered in a single section at all. We might have to use multiple parts. Lets start at the front. We have two different shapes here so we will need two different bits to cover it.

Lets do the straight part first like so:

And since the bit that is leftover is curvy...how about a curvy roof to match?

If you are asking yourself, does it have to be curvy? I show you this picture by way of saying..yes, it does! :D

Now...back to the curvy roof. We want to look at the proportions and make sure it looks nice. Right now, the curved part is a bit cramped looking in the gable, isnt it?

If we raise the angle of the roof behind it we can give it more room and it will look nicer:

Do you see the difference?
Now that we have that part taken care of, let's move around to the next part. Wait a minute! Whats this?

We have an unfinished line along the side, dont we? When we made that section we didnt bring it far enough back. This is why it is good to look at things from every angle. Let's fix that!

Much better! And then we can cover that little bit sticking out as well:

We can cover this back bit fairly easily in one big hunk as well:

But what is this??? The angle of the back section doesnt match the first main section so there is a bit of a lip showing. Messy. :evil: But that is what porches are for!


Now that is hidden! :-)
Lets move to that next section on the right:

This roof seems like it might be a good choice, but looking at it in place, it doesnt seem to go well with the main ( first) roof section at all, does it? Let's try something else?

Yeah...that really doesnt work either does it? I show you this to demonstrate how sometimes you have to try several different things and just see how it feels and looks before you find one that works. When you find one that you think is right, you will know it. Let's try again:

I like this one because it echos the shape of the main section, still joins that part to the house and is a smoother transition. Does that make sense?
Now we have the little sections done, we have to look at the house as a whole. Before, we were looking at each section...but now we want to look at it as a single thing and make sure our proportions are pleasing. Doing that, I thought a dormer over the front porch would add some interest and balance things out. But....looking at it again...I see way too many peaks in the front. It makes it sharp looking. We want to soften out one of those peaks

How about this instead?

Now we have good variety and no one particular shape is overtaking everything else. It has balance.
Find this house in the practice lot:

It is not as complicated as the example I just demonstrated but I want you to practice bringing a bunch of different shapes together. Follow the same steps and remember to look for unfinished edges and for the overall shape. I also want you to consider the style of the house. Sharply peaked gables worked on that yellow house because that was a cottage. Will that work on this house? It as a different feel entirely. How will you accomodate that? Work around the house and see whay you can do. Ask me if you hit a rough spot.
***I am going to stop here for today because I dont want to flood you with too much info. We still have wrap around porches to cover and that can take a while all by itself, so that is where we will start next saturday.
Also...if you have a personal project that is giving you a hard time, be sure to load it saturday so I can download it and help you work through it.
The Final lesson will be Victorians in all of their hair pulling frustrating glory! :D