GusWizard
7 years agoSeasoned Ace
Tutorial - Free Model to The Sims 4 Game - Step by Step
Hello guys,
This will be a tutorial to get a free model on the internet and make it into a CAS CC mod for the Sims 4.
Programs you will need:
Blender
Photoshop (or picture editing equivalent software)
Sims4Studio
Pepakura Designer 4
Step 1: Pick your Model
Most times i google image what i want with 'pepakura' at the end; pepakura models most times are low poly and very good for sims 4 convertion, they are also way easier to texture mapping.
For this tutorial i will be making a Megaman (rockman) Helmet, i pick the model here:
https://www.deviantart.com/gankutsu-o-taku/art/Rockman-Mega-Man-Helmet-Pepakura-621793106
(the model is locked but the password is over there on the post)
Step 2: Export your Model
Open the .pdo file on Pepakura Designer, do NOT open on viewer (u cant export models there), use the password and press OK, or get a unlocked file.
 1 by Gustavo Lacerda Homem Assumpcao, no Flickr
Export the File as a .obj (this will be our pre-model)
Also Export the Bitmap as a .png (this will be our texture)
 2 by Gustavo Lacerda Homem Assumpcao, no Flickr
Step 3: Import to Blender
Open Blender, click on import -> .obj
Then save as 'Name'.blender on desktop (i recoment name it FILENAME_addon, so you can organize it better later)
Step 4: Sim4Studio -> Pick your base model
Now you need to open Sim4Studio, go on CAS then create new mesh, now pick a CAS item that match the category and the general shape of the model you want to add, for example, in this case i will be picking a helmet that is open on the front (if you pick a base full closed helmet, it will come with a 'buffer' voice effect ingame, so you use close helmets for CC close helmets), i will be picking this helmet:
 3 by Gustavo Lacerda Homem Assumpcao, no Flickr
Pick a Name for your mod now (pick a name so you can find it easy later, i put Wiz on all my mods so this will be called WizMegaManHelmet.
You already have your pre-mod!
Now go on Meshes -> export mesh (save as MegaManHelmet -> this will be your final model)
Step 5: Blender Work
Open your exported mesh on Blender, click on append ->obj-> your model
you will have something like this now:
 4 by Gustavo Lacerda Homem Assumpcao, no Flickr
Most models, even low poly pepakuras, are way bigger than Sim 4 models, so now you need to re-scale, rotate, scale X and Z, until you got the shape of the sims head (use the base helmet as model)
When you get the shape you want, select the hole mesh, and map the texture, i wont get into detail on this but you need to think on parts, use the template texture for sims 4 locations (each color is a location), you map the texture on places that will affect the head only (for its shape this helmet will 'delete' earring, hair, and will go on hat slot, so i mapped like the picture below
Now change the Viewport Shading to 'Solid', select the base mesh then select the megaman helmet, then click on Weight Paint, then click on Transfer Weights (this will make the megaman model 'stick' to the Sim head.
also you got to rename the uvmap to uv_0 and add a new layer , uv_1
AFTER you done with mapping
 5 by Gustavo Lacerda Homem Assumpcao, no Flickr
After that you can select the hole base mesh model and delete it, but dont delete the mesh itself, then select the megaman helmet mesh, select the empty base mesh, and Crtl+J join them.
finally, export your UV layout (the texture map)
Save the File.
Step 6: Import to Sims4Studio
Go back to your mod file, click import mesh and import your new model.
import the mesh for the other LODS (unless you want to decimate for each smaller LOD - there are tutorials for that, but if your model is not HD than you dont need it at all, wont make difference in-game)
If the base model had more than 1 mesh and your final model have only 1 mesh, you will have to go to warehouse and manual delete each extra mesh for the 4 LODS, be sure to not delete your own meshes thou.
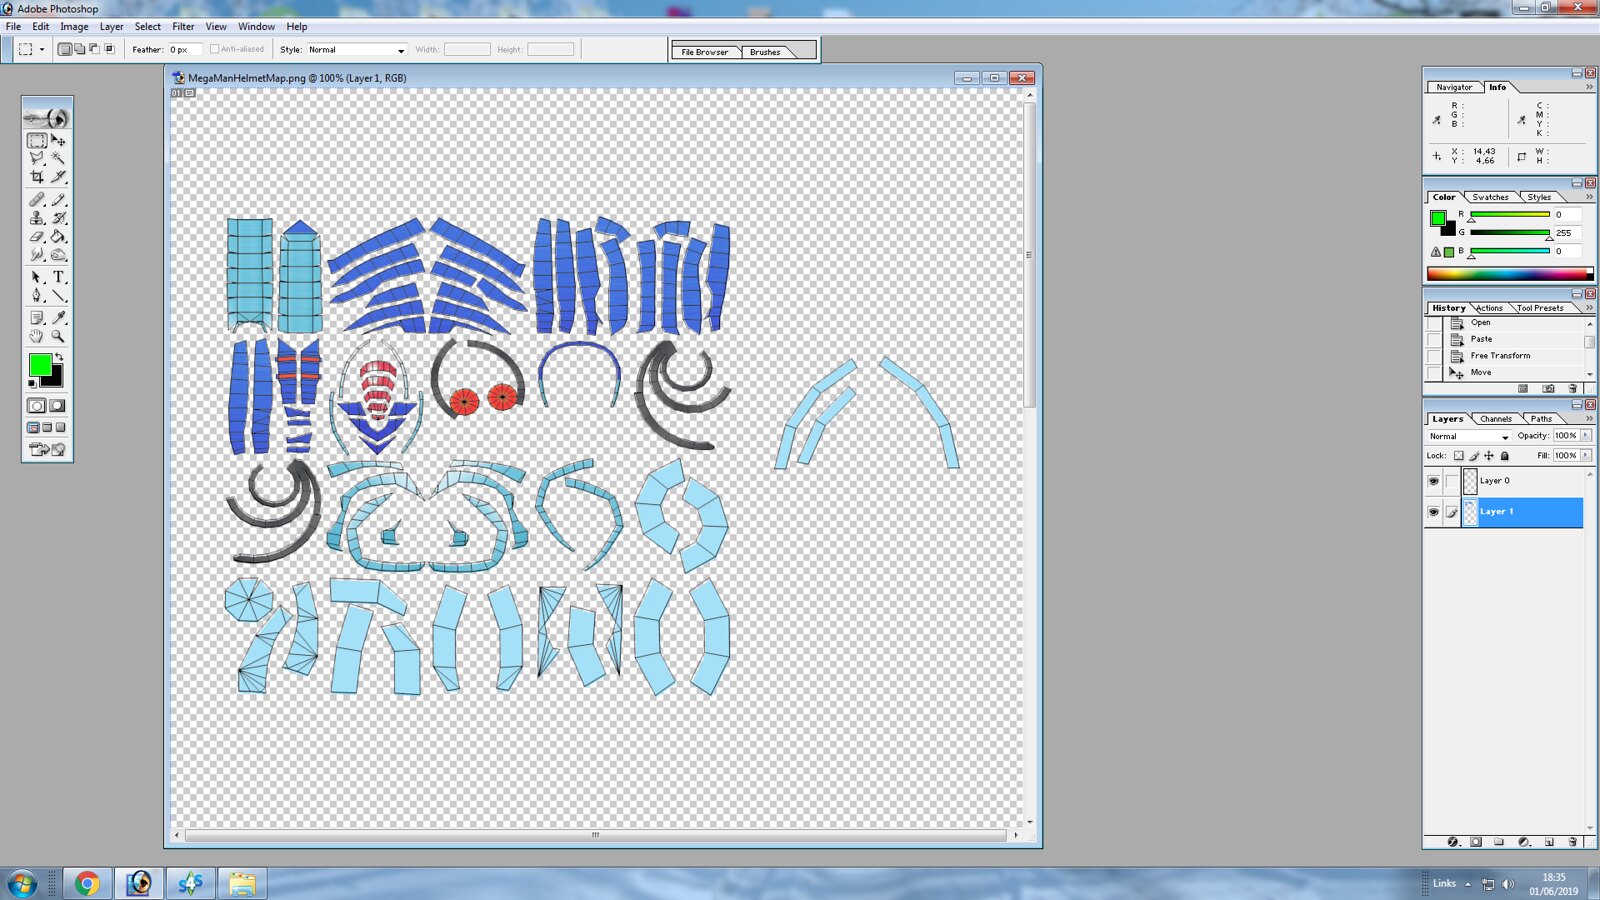
Step 7: Make your Texture
Open your megamanhelmetmap (texture map) on photoshop and paint it (you can use the texture you export on step 1 and fit it on the map, this will be much faster than paint it manually)
 6 by Gustavo Lacerda Homem Assumpcao, no Flickr
 7 by Gustavo Lacerda Homem Assumpcao, no Flickr
Sometimes, on pepakura models, the borders are meant to be cut on real life to make paper models, so the model will look like this now:
 8 by Gustavo Lacerda Homem Assumpcao, no Flickr
A solution is to manually paint the borders as solid colors, like so:
 9 by Gustavo Lacerda Homem Assumpcao, no Flickr
So the model is pretty much ready now:
 10 by Gustavo Lacerda Homem Assumpcao, no Flickr
After that import your texture back, remove shadow, specular and normal textures, make your own specular channel (i recomend medium gray at 50% transparency and a light gray mask)
Save it,
put the mod in the mod folder, and test it!
 06-01-19_6-59-55 PM by Gustavo Lacerda Homem Assumpcao, no Flickr
 06-01-19_7-00-00 PM by Gustavo Lacerda Homem Assumpcao, no Flickr
PRESTO! as you guys can see it works perfect in-game. and got a nice shinny too! specular makes a difference!
here is the helmet for download if someone want:
http://www.mediafire.com/file/4l51syb3781lad7/WizMegaManHelmet.package/file
Any questions ask here!
ENJOY!
This will be a tutorial to get a free model on the internet and make it into a CAS CC mod for the Sims 4.
Programs you will need:
Blender
Photoshop (or picture editing equivalent software)
Sims4Studio
Pepakura Designer 4
Step 1: Pick your Model
Most times i google image what i want with 'pepakura' at the end; pepakura models most times are low poly and very good for sims 4 convertion, they are also way easier to texture mapping.
For this tutorial i will be making a Megaman (rockman) Helmet, i pick the model here:
https://www.deviantart.com/gankutsu-o-taku/art/Rockman-Mega-Man-Helmet-Pepakura-621793106
(the model is locked but the password is over there on the post)
Step 2: Export your Model
Open the .pdo file on Pepakura Designer, do NOT open on viewer (u cant export models there), use the password and press OK, or get a unlocked file.
1 by Gustavo Lacerda Homem Assumpcao, no FlickrExport the File as a .obj (this will be our pre-model)
Also Export the Bitmap as a .png (this will be our texture)
2 by Gustavo Lacerda Homem Assumpcao, no FlickrStep 3: Import to Blender
Open Blender, click on import -> .obj
Then save as 'Name'.blender on desktop (i recoment name it FILENAME_addon, so you can organize it better later)
Step 4: Sim4Studio -> Pick your base model
Now you need to open Sim4Studio, go on CAS then create new mesh, now pick a CAS item that match the category and the general shape of the model you want to add, for example, in this case i will be picking a helmet that is open on the front (if you pick a base full closed helmet, it will come with a 'buffer' voice effect ingame, so you use close helmets for CC close helmets), i will be picking this helmet:
3 by Gustavo Lacerda Homem Assumpcao, no FlickrPick a Name for your mod now (pick a name so you can find it easy later, i put Wiz on all my mods so this will be called WizMegaManHelmet.
You already have your pre-mod!
Now go on Meshes -> export mesh (save as MegaManHelmet -> this will be your final model)
Step 5: Blender Work
Open your exported mesh on Blender, click on append ->obj-> your model
you will have something like this now:
4 by Gustavo Lacerda Homem Assumpcao, no FlickrMost models, even low poly pepakuras, are way bigger than Sim 4 models, so now you need to re-scale, rotate, scale X and Z, until you got the shape of the sims head (use the base helmet as model)
When you get the shape you want, select the hole mesh, and map the texture, i wont get into detail on this but you need to think on parts, use the template texture for sims 4 locations (each color is a location), you map the texture on places that will affect the head only (for its shape this helmet will 'delete' earring, hair, and will go on hat slot, so i mapped like the picture below
Now change the Viewport Shading to 'Solid', select the base mesh then select the megaman helmet, then click on Weight Paint, then click on Transfer Weights (this will make the megaman model 'stick' to the Sim head.
also you got to rename the uvmap to uv_0 and add a new layer , uv_1
AFTER you done with mapping
5 by Gustavo Lacerda Homem Assumpcao, no FlickrAfter that you can select the hole base mesh model and delete it, but dont delete the mesh itself, then select the megaman helmet mesh, select the empty base mesh, and Crtl+J join them.
finally, export your UV layout (the texture map)
Save the File.
Step 6: Import to Sims4Studio
Go back to your mod file, click import mesh and import your new model.
import the mesh for the other LODS (unless you want to decimate for each smaller LOD - there are tutorials for that, but if your model is not HD than you dont need it at all, wont make difference in-game)
If the base model had more than 1 mesh and your final model have only 1 mesh, you will have to go to warehouse and manual delete each extra mesh for the 4 LODS, be sure to not delete your own meshes thou.
Step 7: Make your Texture
Open your megamanhelmetmap (texture map) on photoshop and paint it (you can use the texture you export on step 1 and fit it on the map, this will be much faster than paint it manually)
6 by Gustavo Lacerda Homem Assumpcao, no Flickr7 by Gustavo Lacerda Homem Assumpcao, no FlickrSometimes, on pepakura models, the borders are meant to be cut on real life to make paper models, so the model will look like this now:
8 by Gustavo Lacerda Homem Assumpcao, no FlickrA solution is to manually paint the borders as solid colors, like so:
9 by Gustavo Lacerda Homem Assumpcao, no FlickrSo the model is pretty much ready now:
10 by Gustavo Lacerda Homem Assumpcao, no FlickrAfter that import your texture back, remove shadow, specular and normal textures, make your own specular channel (i recomend medium gray at 50% transparency and a light gray mask)
Save it,
put the mod in the mod folder, and test it!
06-01-19_6-59-55 PM by Gustavo Lacerda Homem Assumpcao, no Flickr06-01-19_7-00-00 PM by Gustavo Lacerda Homem Assumpcao, no FlickrPRESTO! as you guys can see it works perfect in-game. and got a nice shinny too! specular makes a difference!
here is the helmet for download if someone want:
http://www.mediafire.com/file/4l51syb3781lad7/WizMegaManHelmet.package/file
Any questions ask here!
ENJOY!